You don’t have to use a table saw for long to realize the importance of having nice outfeed support when ripping longer material. Roller stands can help some, but they can be annoying to setup for different length boards and lighter weight ones have a tendency to tip over at exactly the wrong time. So to solve this problem and to replace a small workbench that has seen better days, I decided to build a large workbench which would provide outfeed support for boards up to 8’ long.
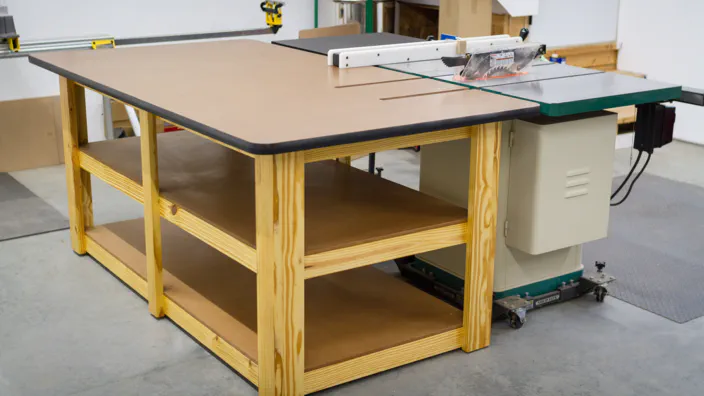
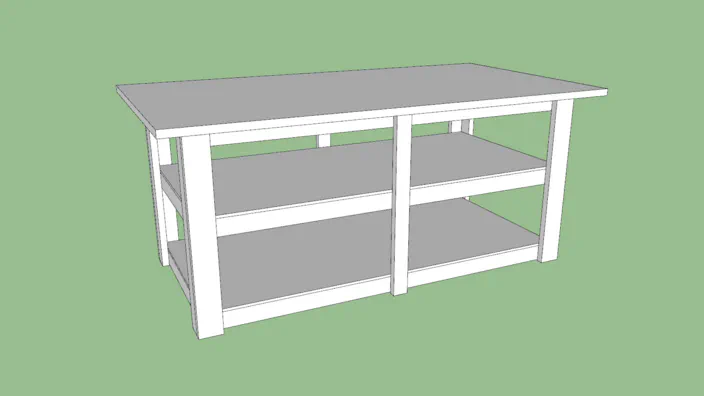
Since I’ll be building a second Roubo-style workbench for hand-tool work, I wanted this one to work well for assembling and finishing projects. This meant having a large, flat top that wouldn’t immediately soak up paint and glue. And in order to meet the outfeed support requirements, I wanted it to have adjustable feet so that the top could be leveled with my table saw. I also couldn’t pass up the opportunity for more storage, so I decided to include two large shelves. After a little design work in SketchUp, it was time to start building!
Milling the Lumber
The legs and frames for the shelves and top were built using six 2"x8"x8’ boards and one 2"x10"x8’ board. They certainly could have been built using 2"x4" lumber, but finding that many nice boards would be challenging and around here they don’t come in southern yellow pine.

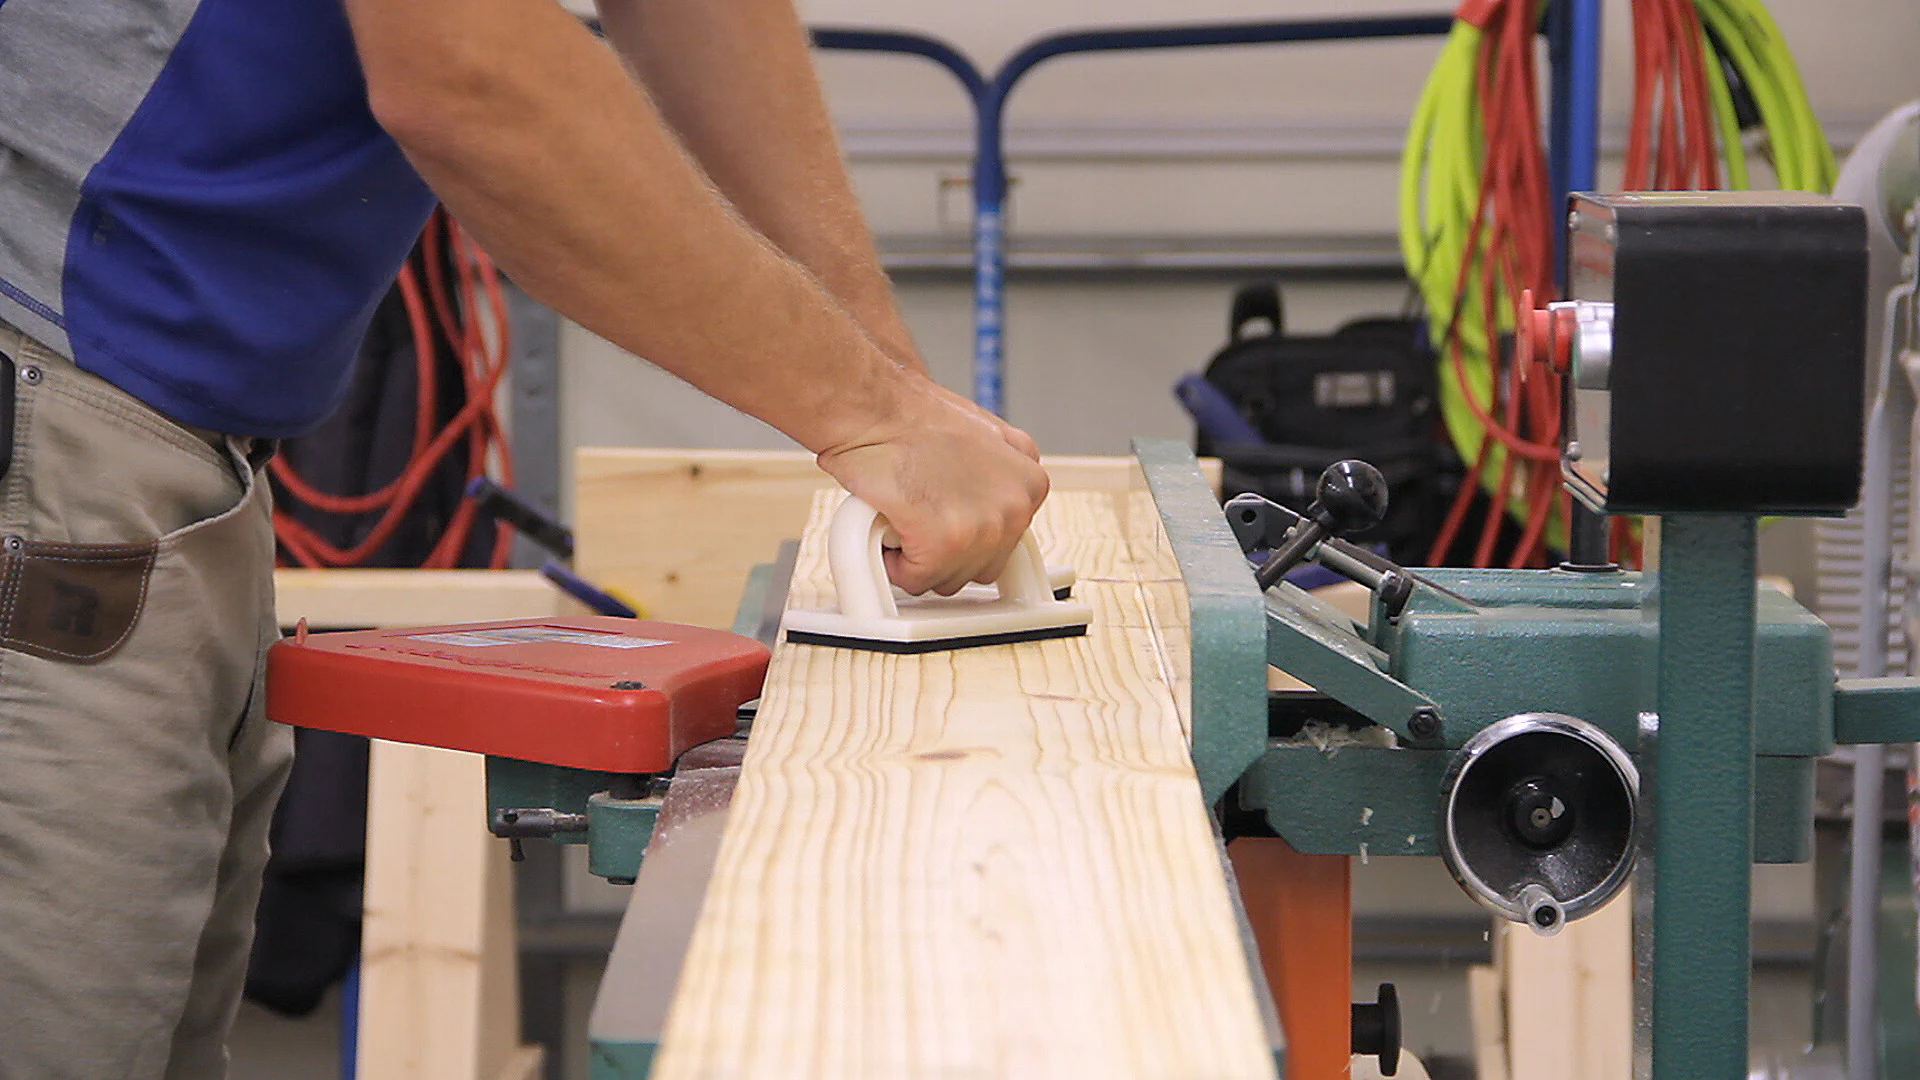
After cutting the boards to rough length, I headed over to the jointer and joined one face and edge on the 2"x8" boards. Since the 2"x10" board was wider than my jointer, I joined an edge on it and ripped it in half first at the table saw.
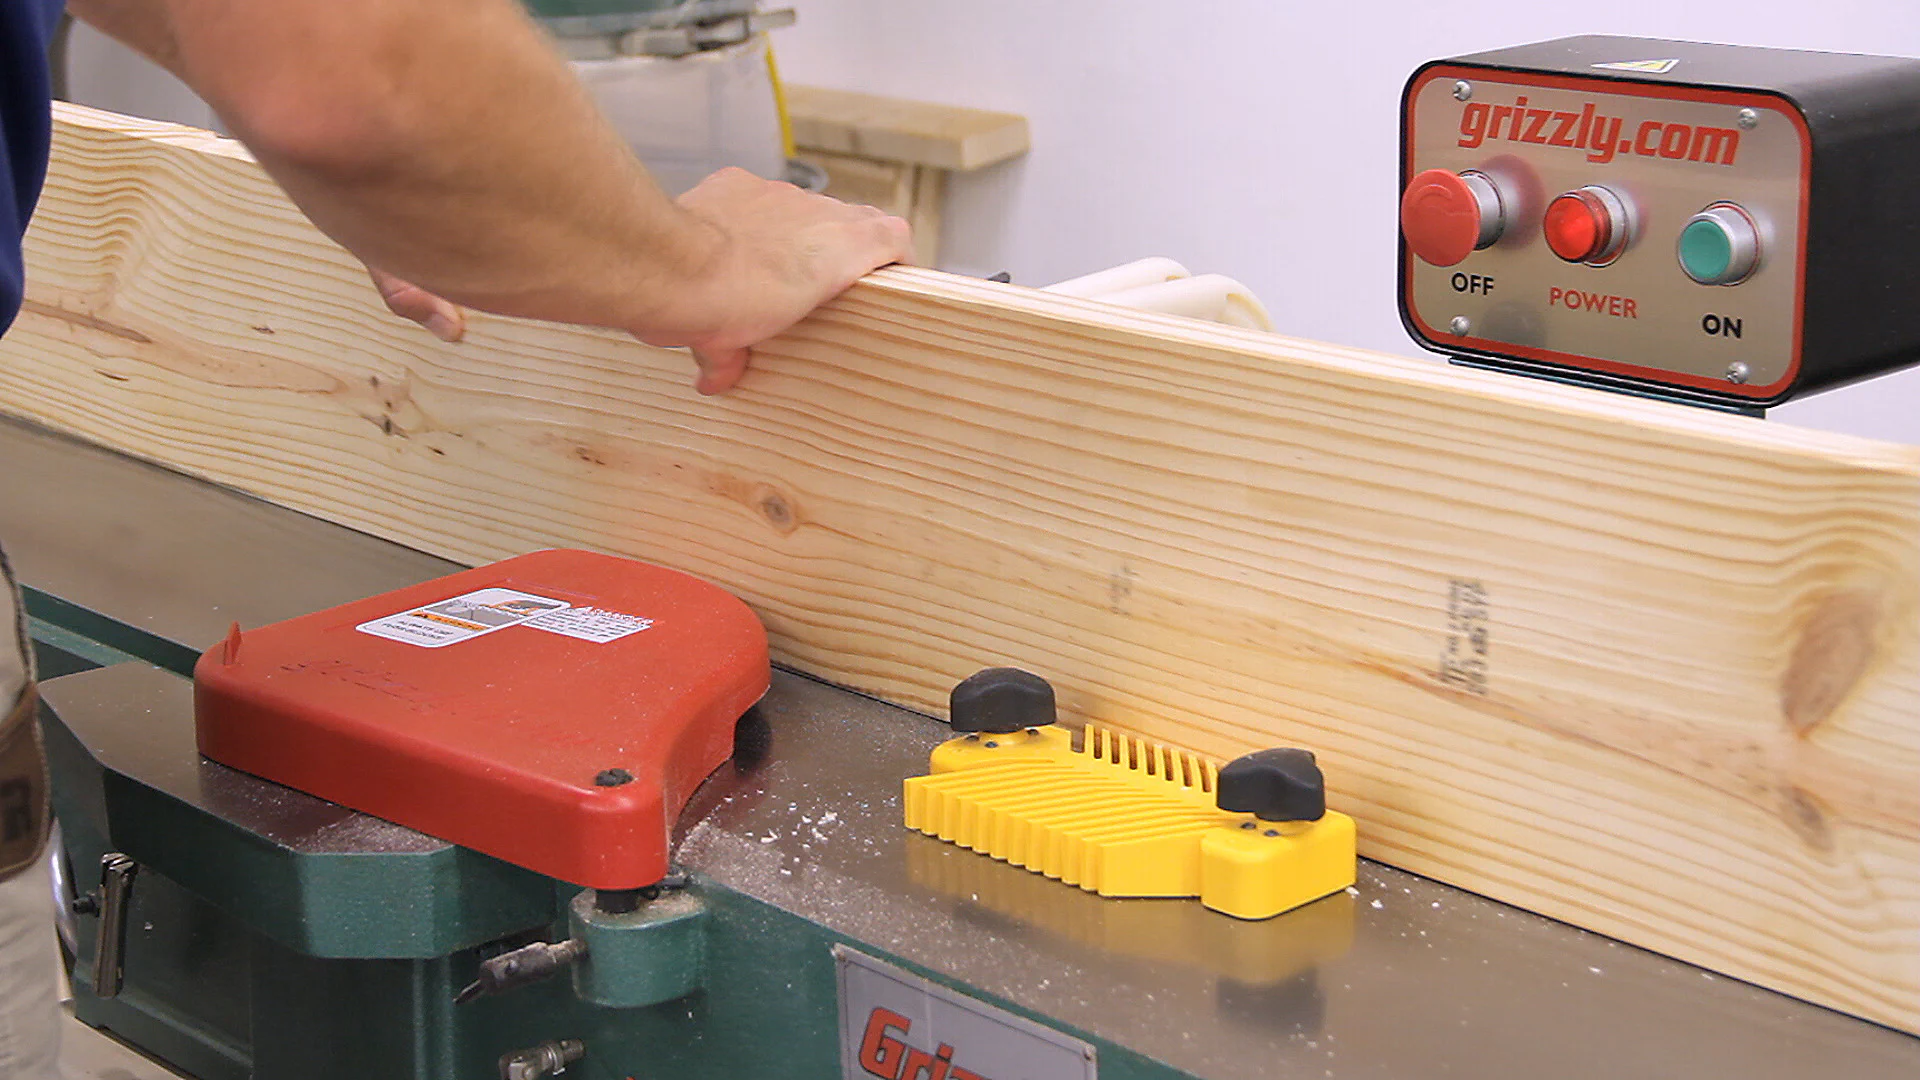
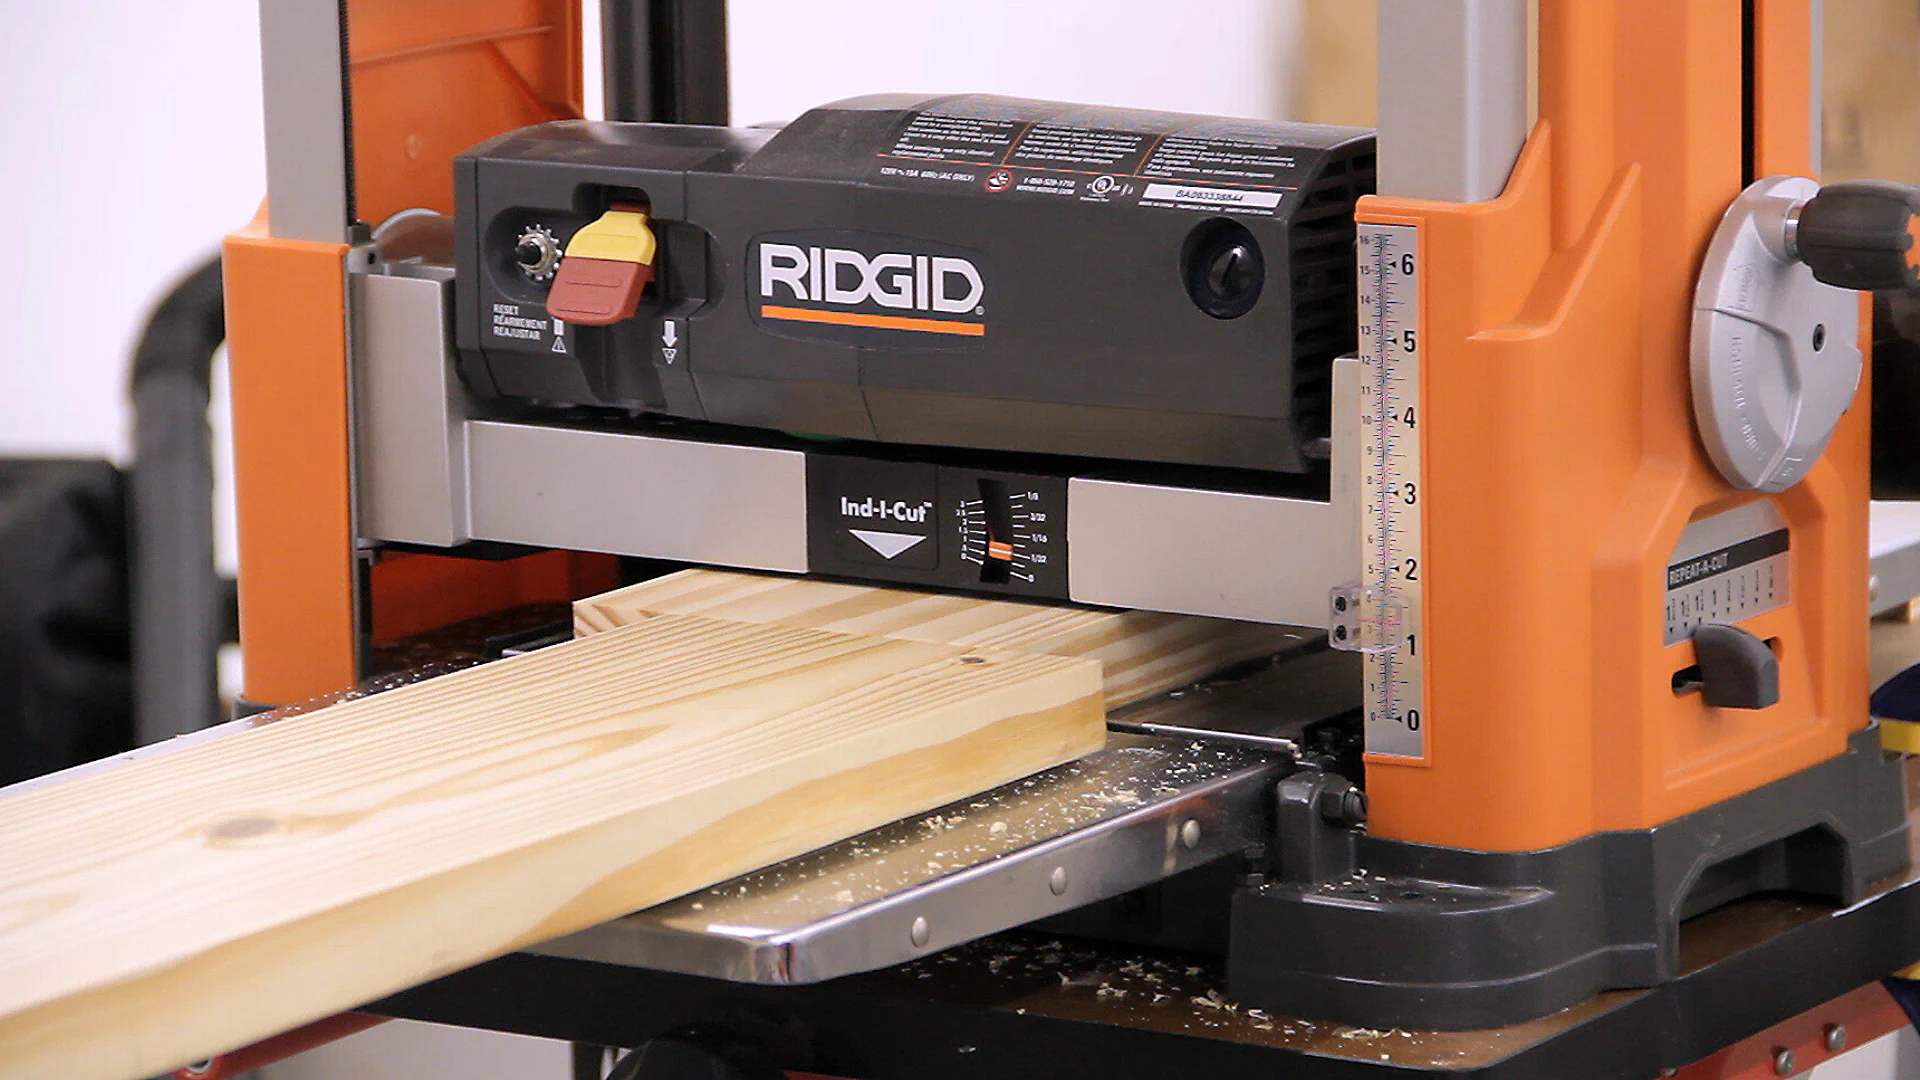
Once I had joined a face and an edge on all the boards, I ran them through the thickness planer until they were approximately 1.25" thick.
I then ripped the boards to their final width at the table saw and headed back to the miter saw to cut all the parts to final length.

Assembling the Legs and Frames
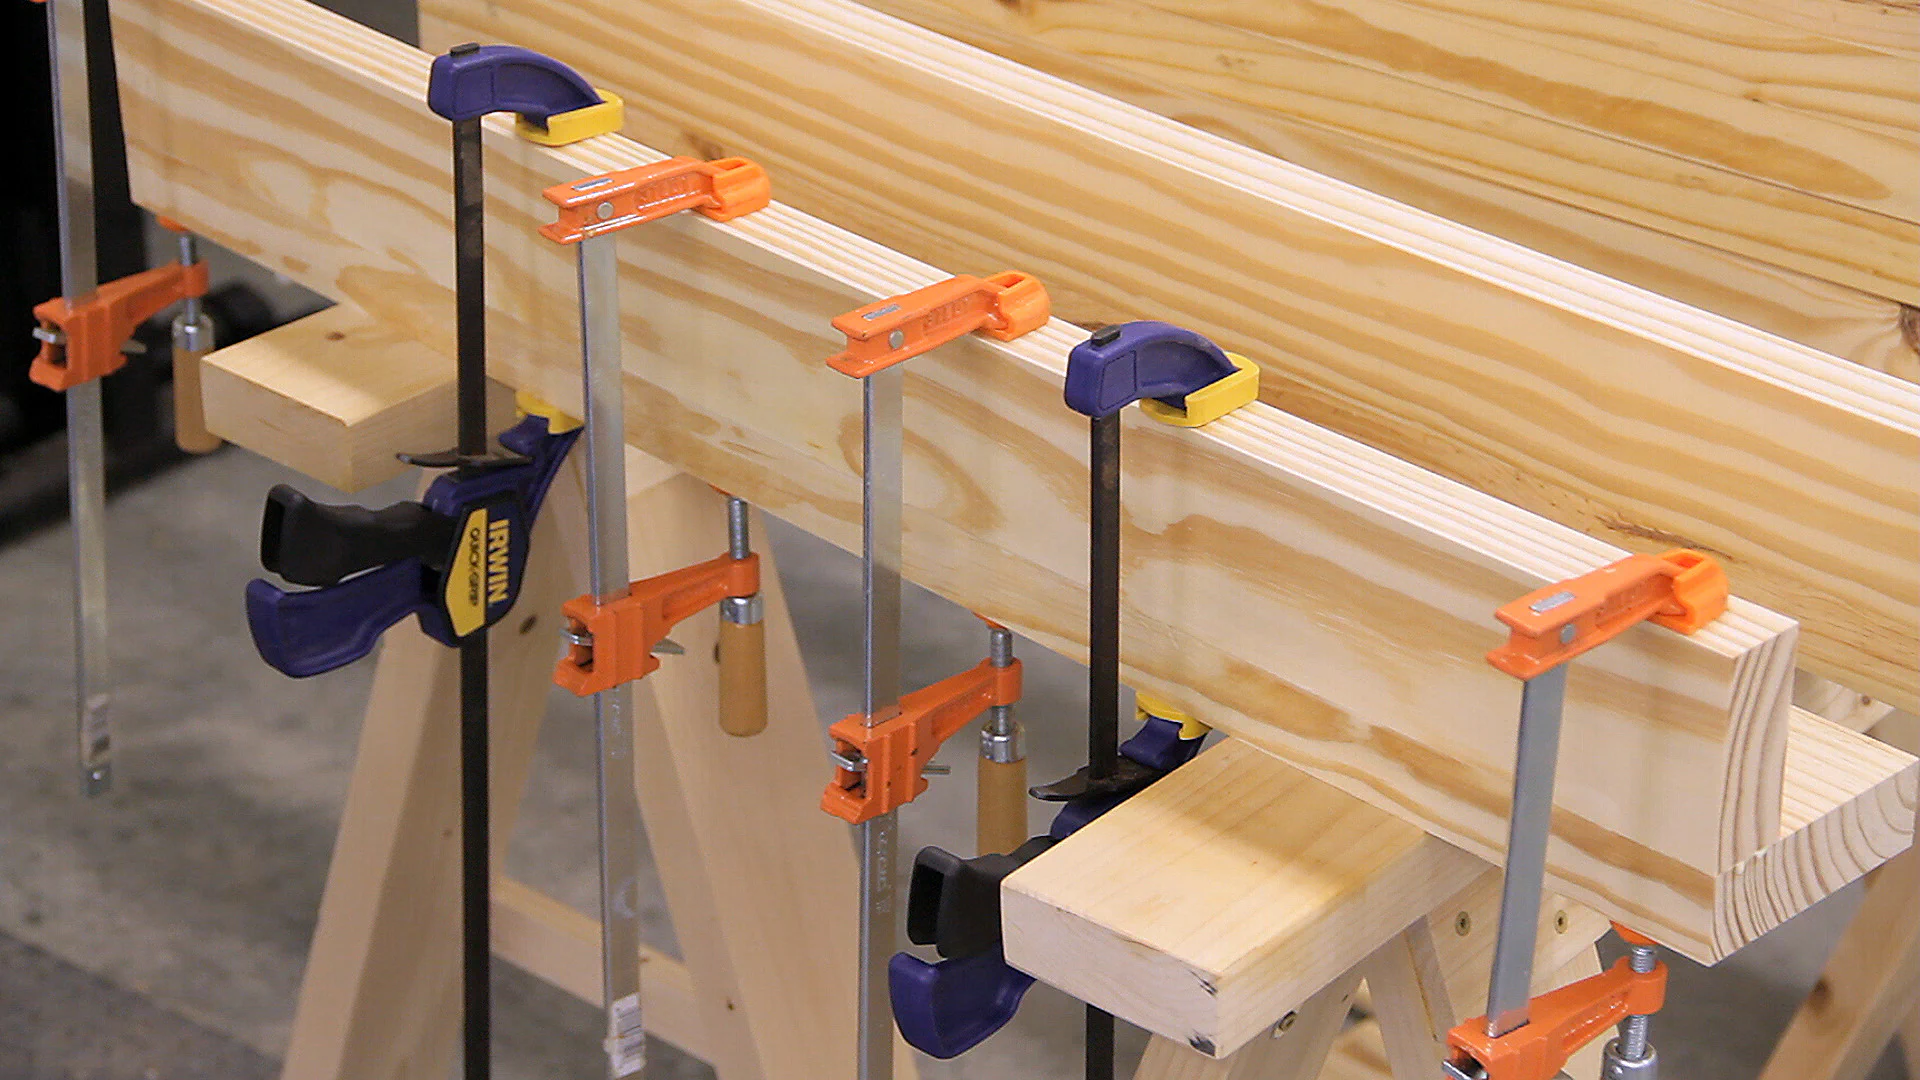
I started assembling the legs first. This was just a matter of applying a little glue to one edge and then clamping the two pieces together.
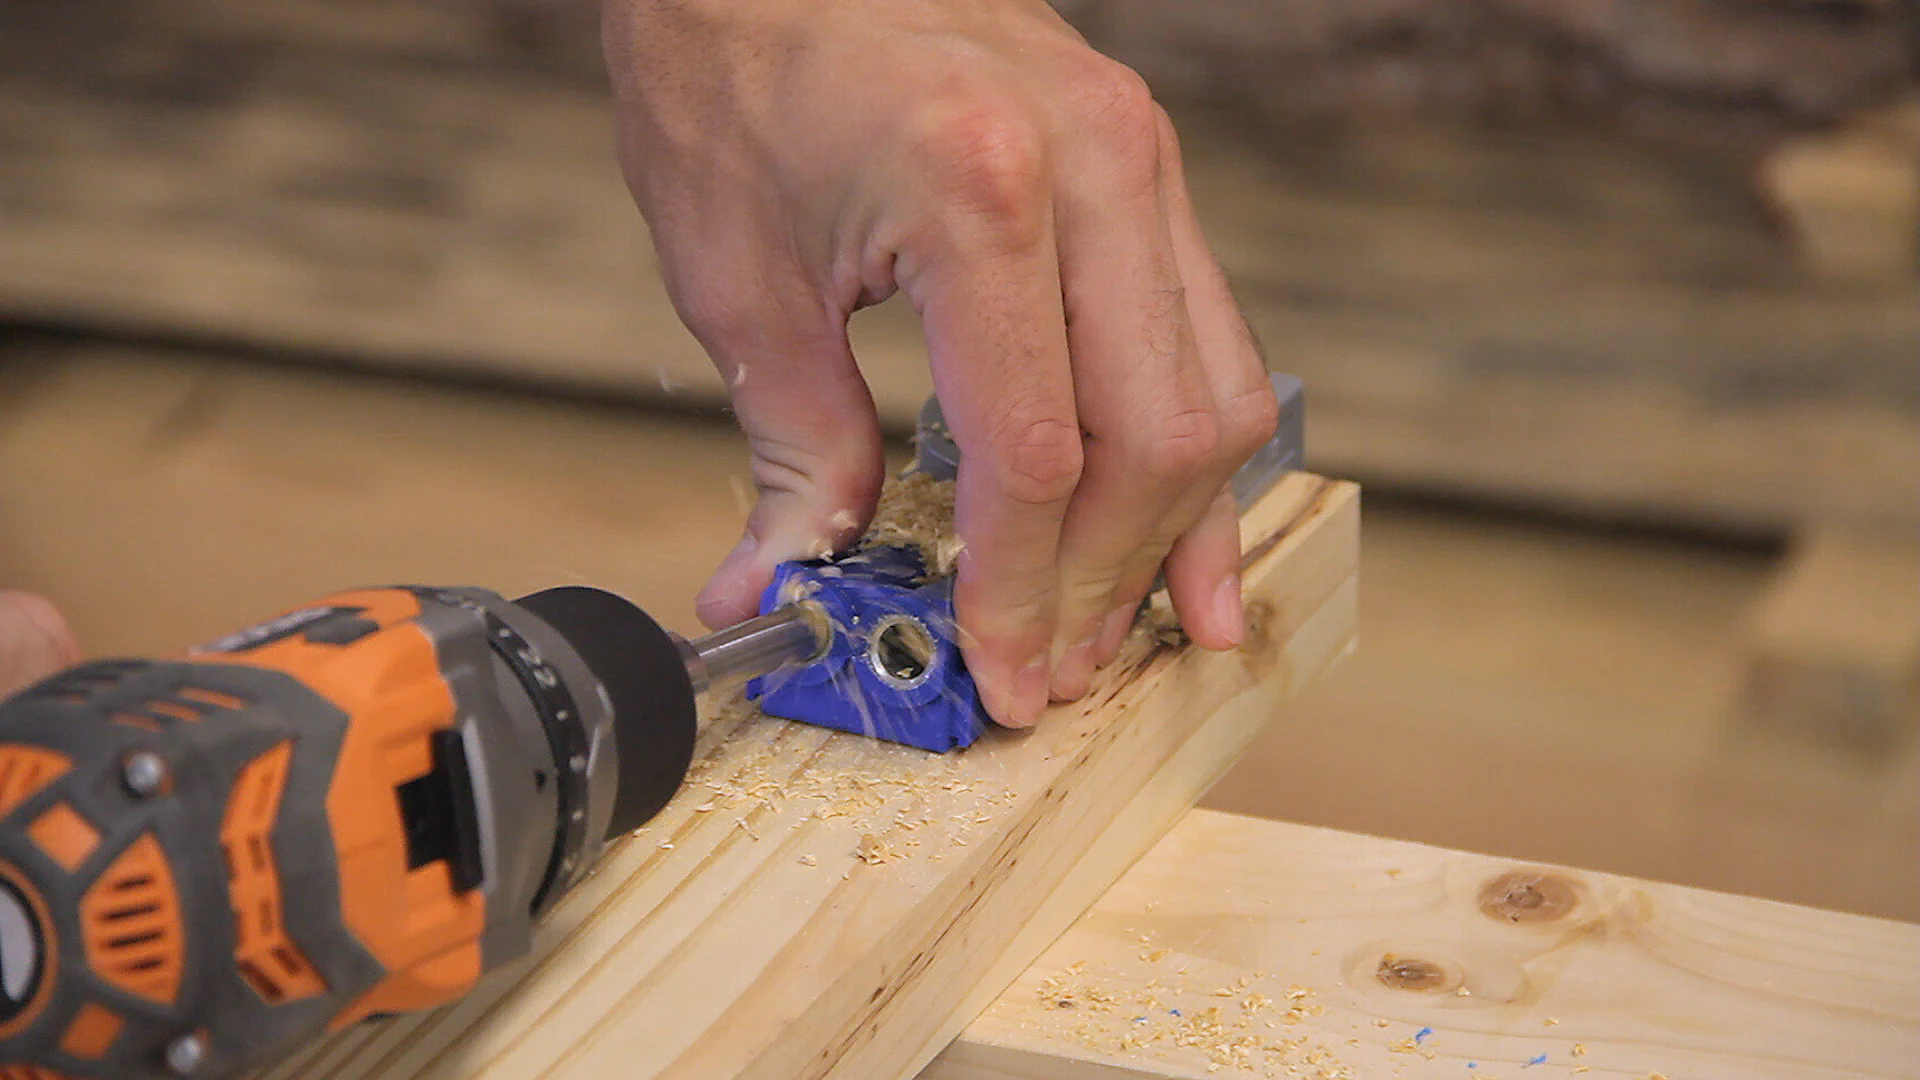
While the glue on the legs dried, I used a small pocket-hole guide to drill holes in the parts for the shelves and top.
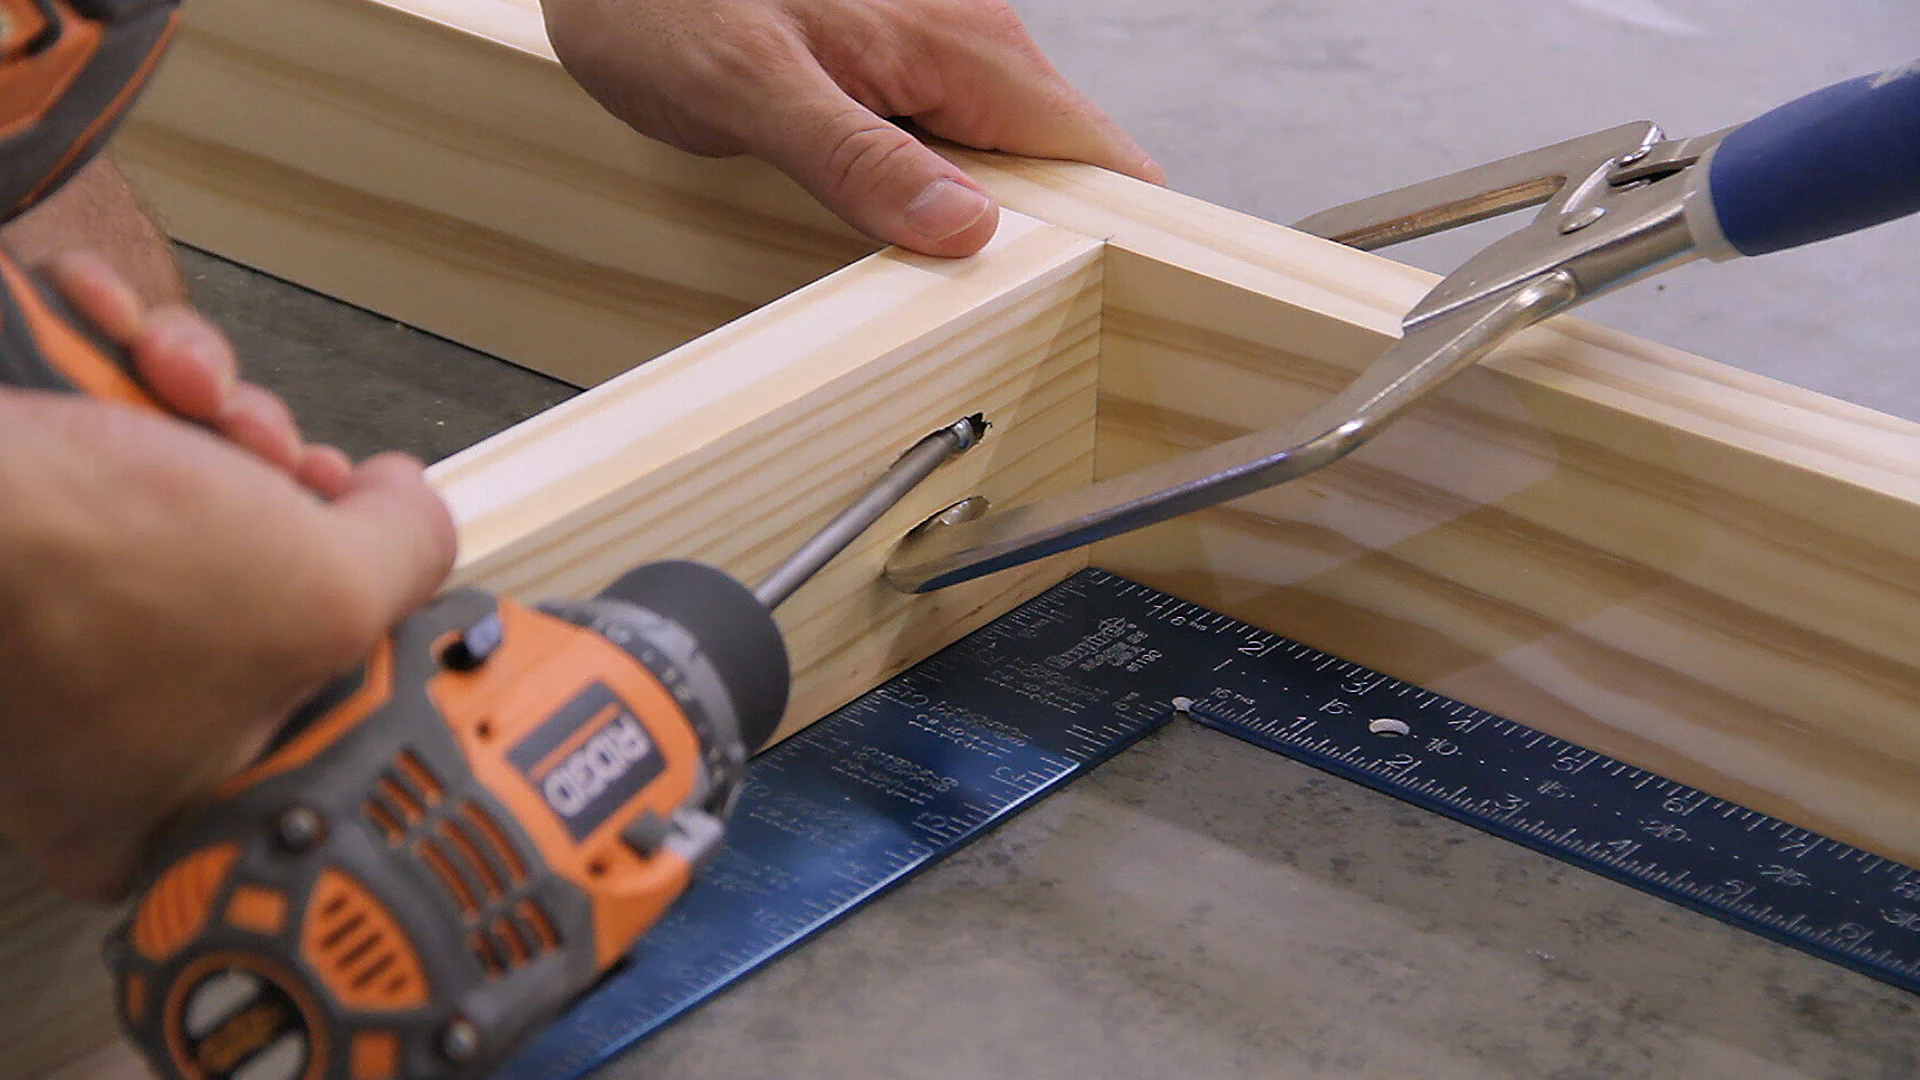
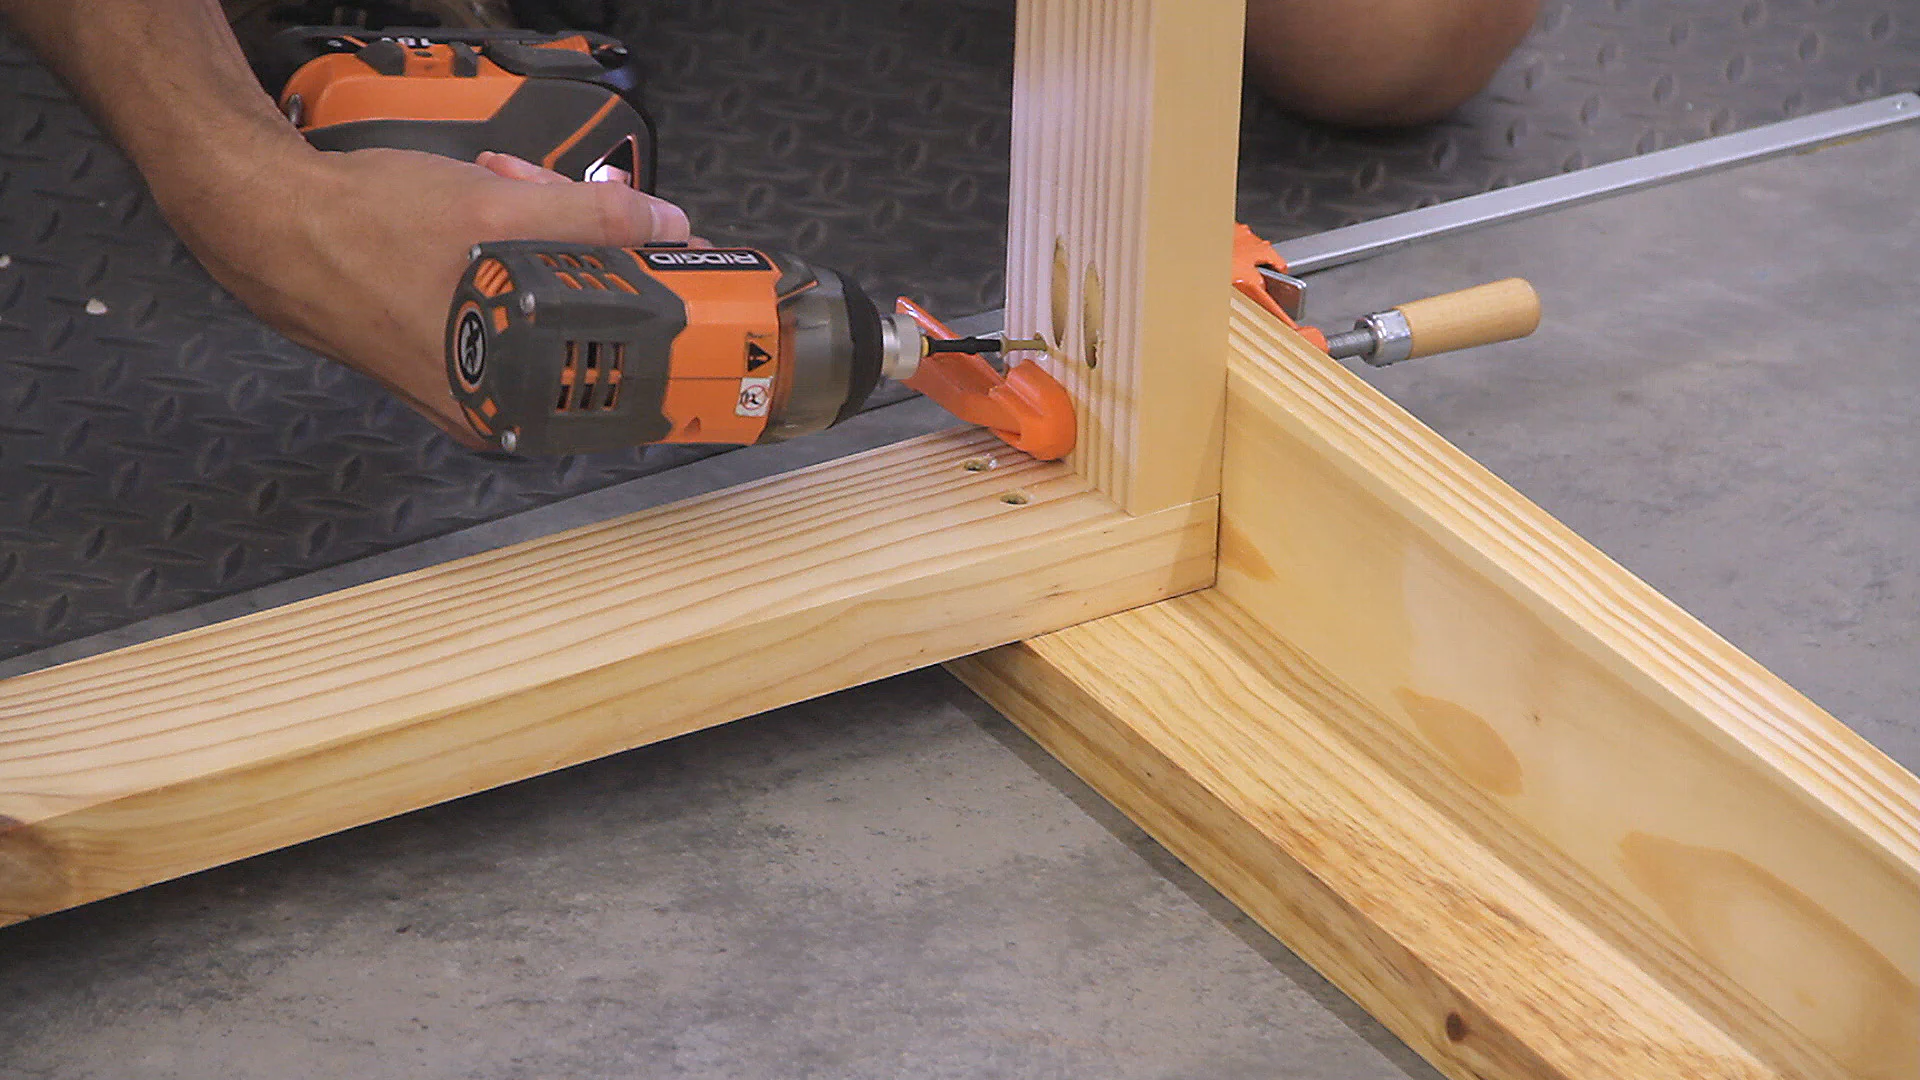
I then used a pocket-hole clamp to hold the parts square to each other while I screwed them together.

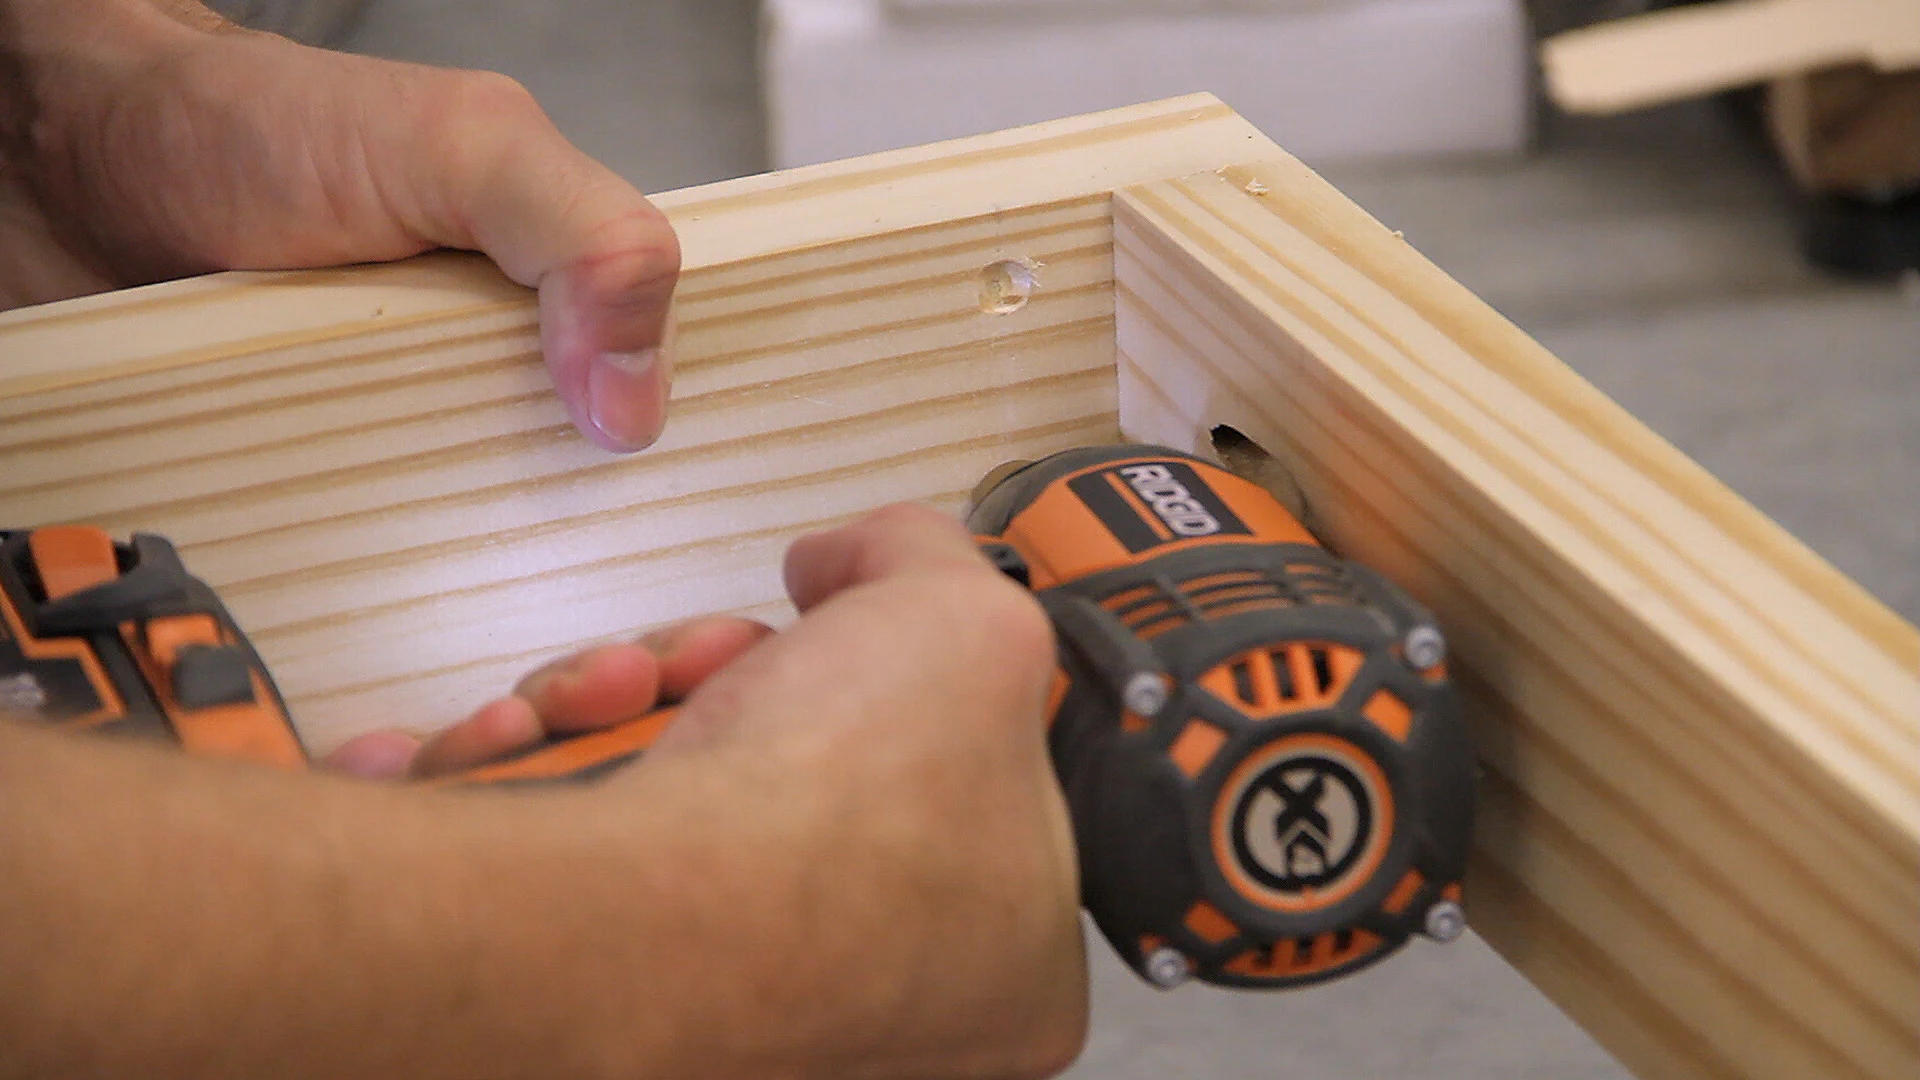
To finish up with the frames, I predrilled countersunk holes where they would later attach to the legs.

Adding the Shelf Tops
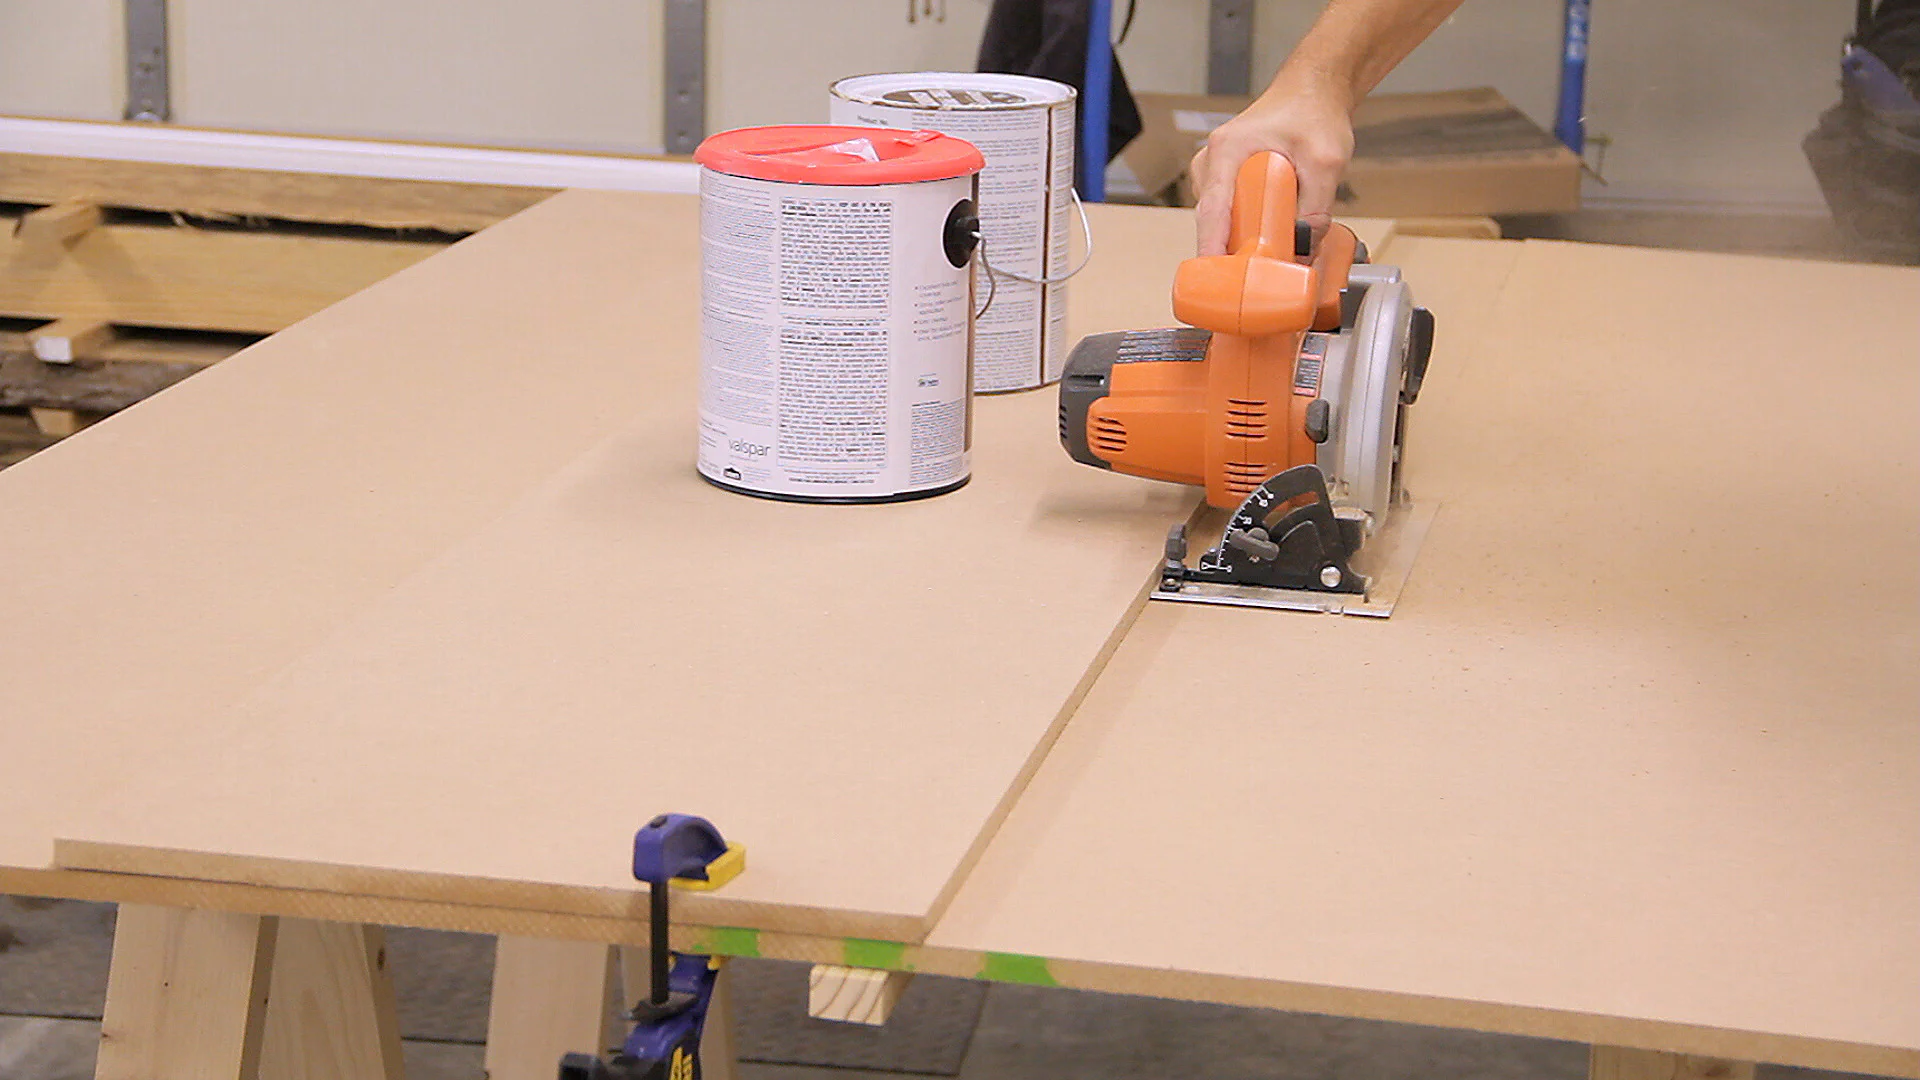
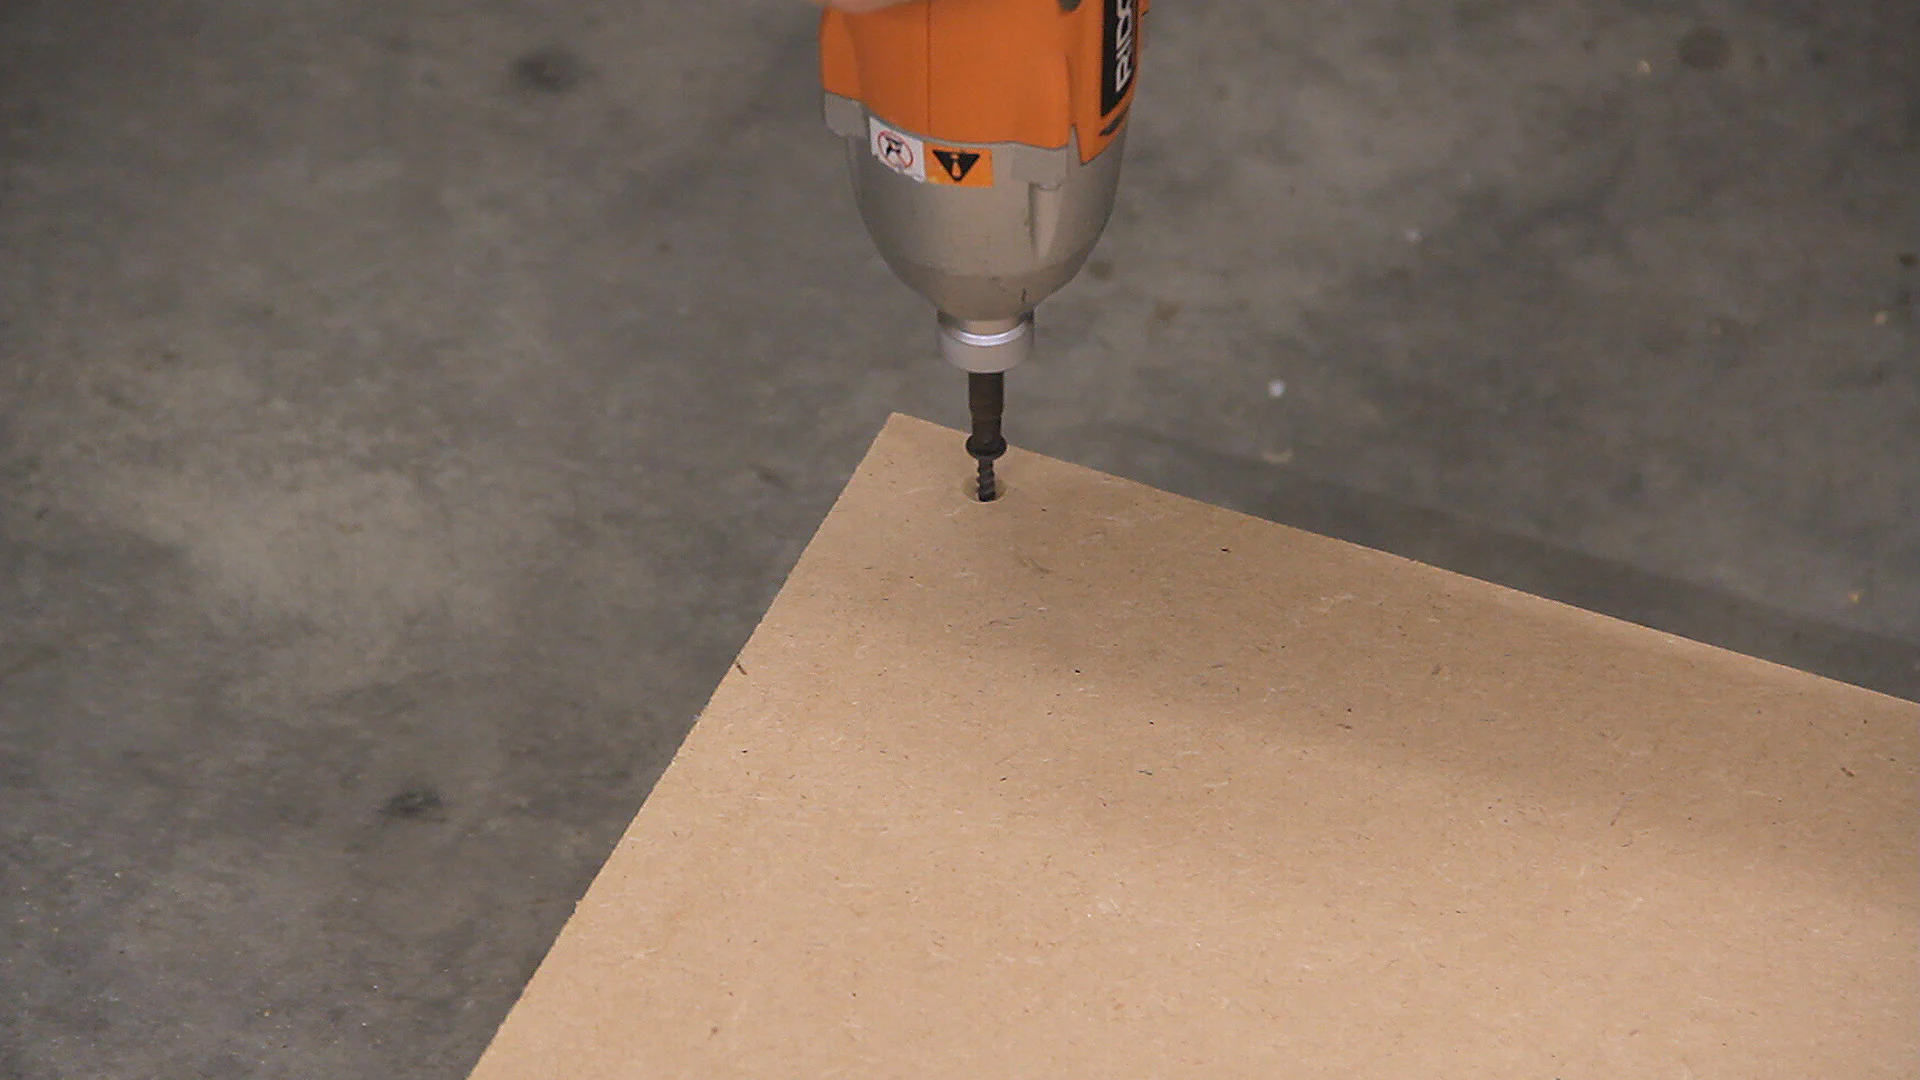
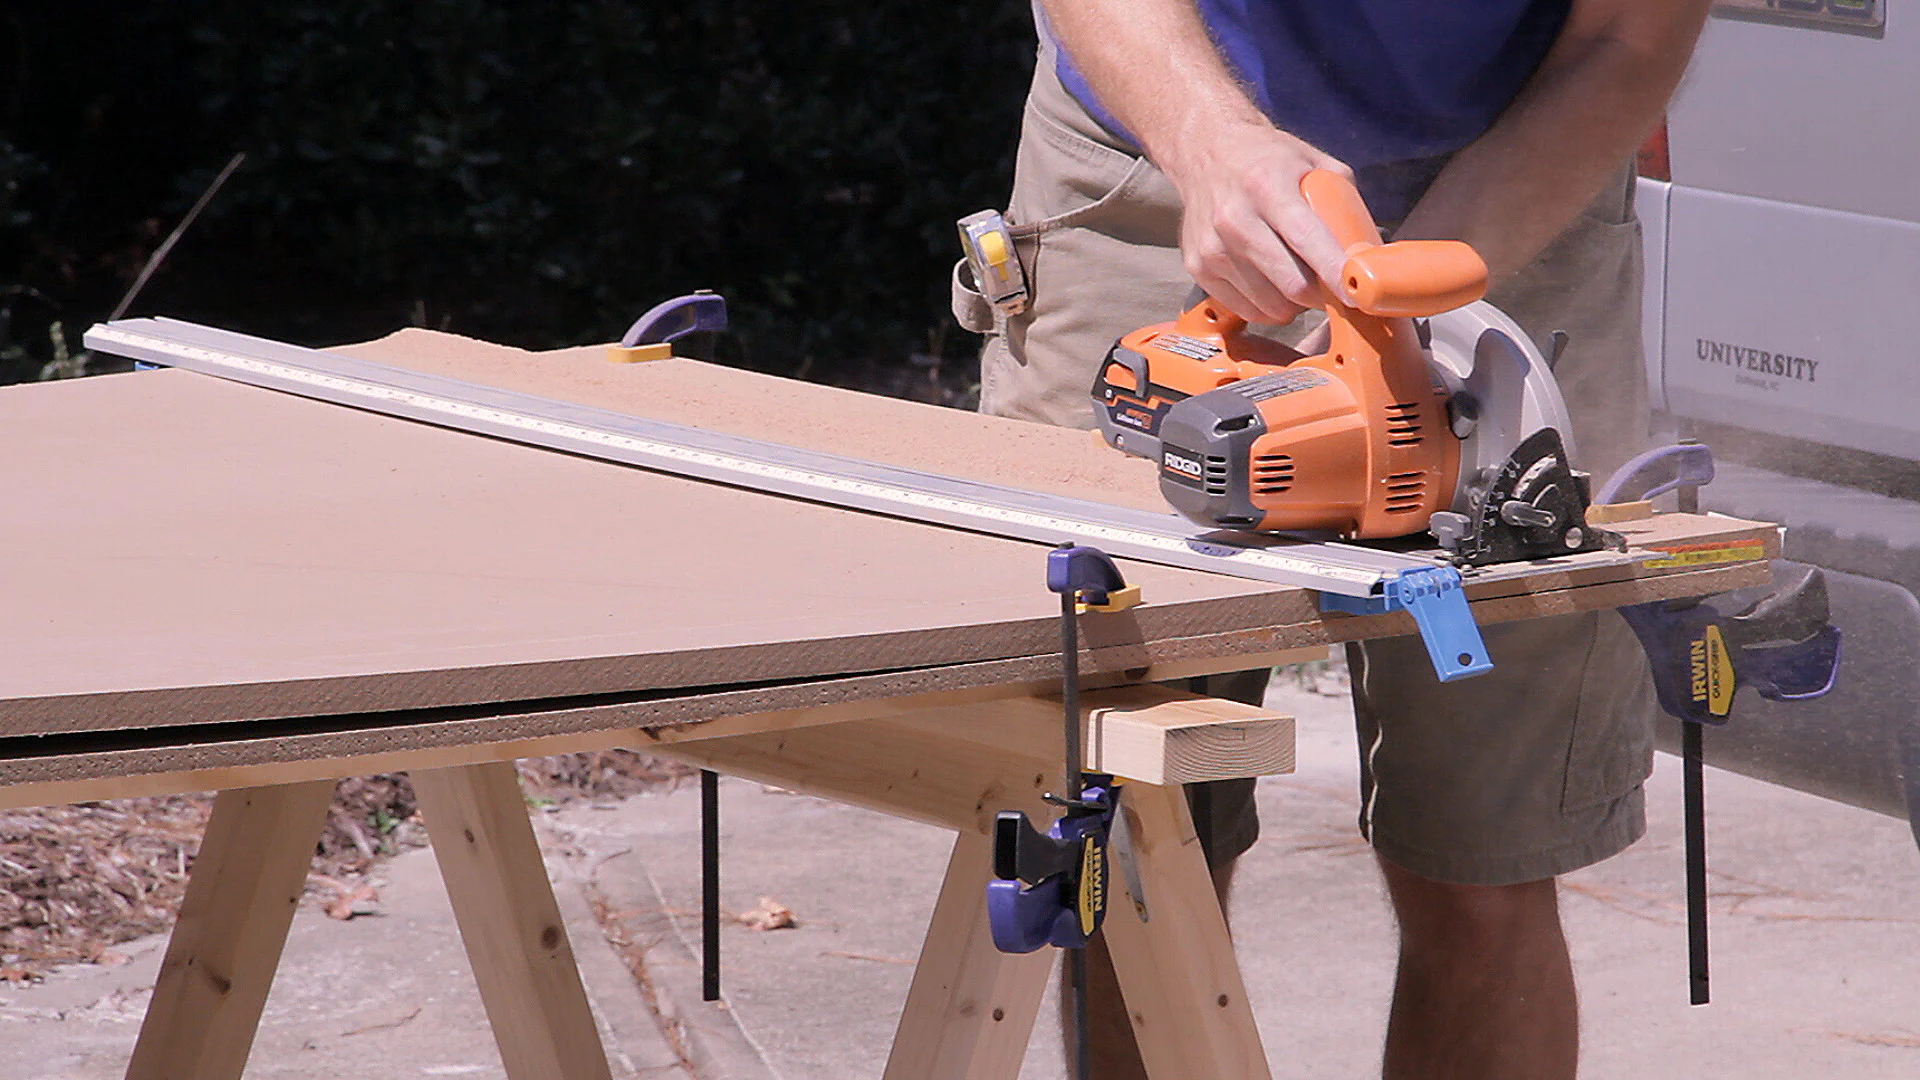
For the two shelf tops, I used 1/2" thick MDF. After cutting the pieces to size with my circular saw, I predrilled holes and attached them to the frame using 1-1/4" screws in the corners and middle. This was done so that the screws would be hidden once the legs were attached.
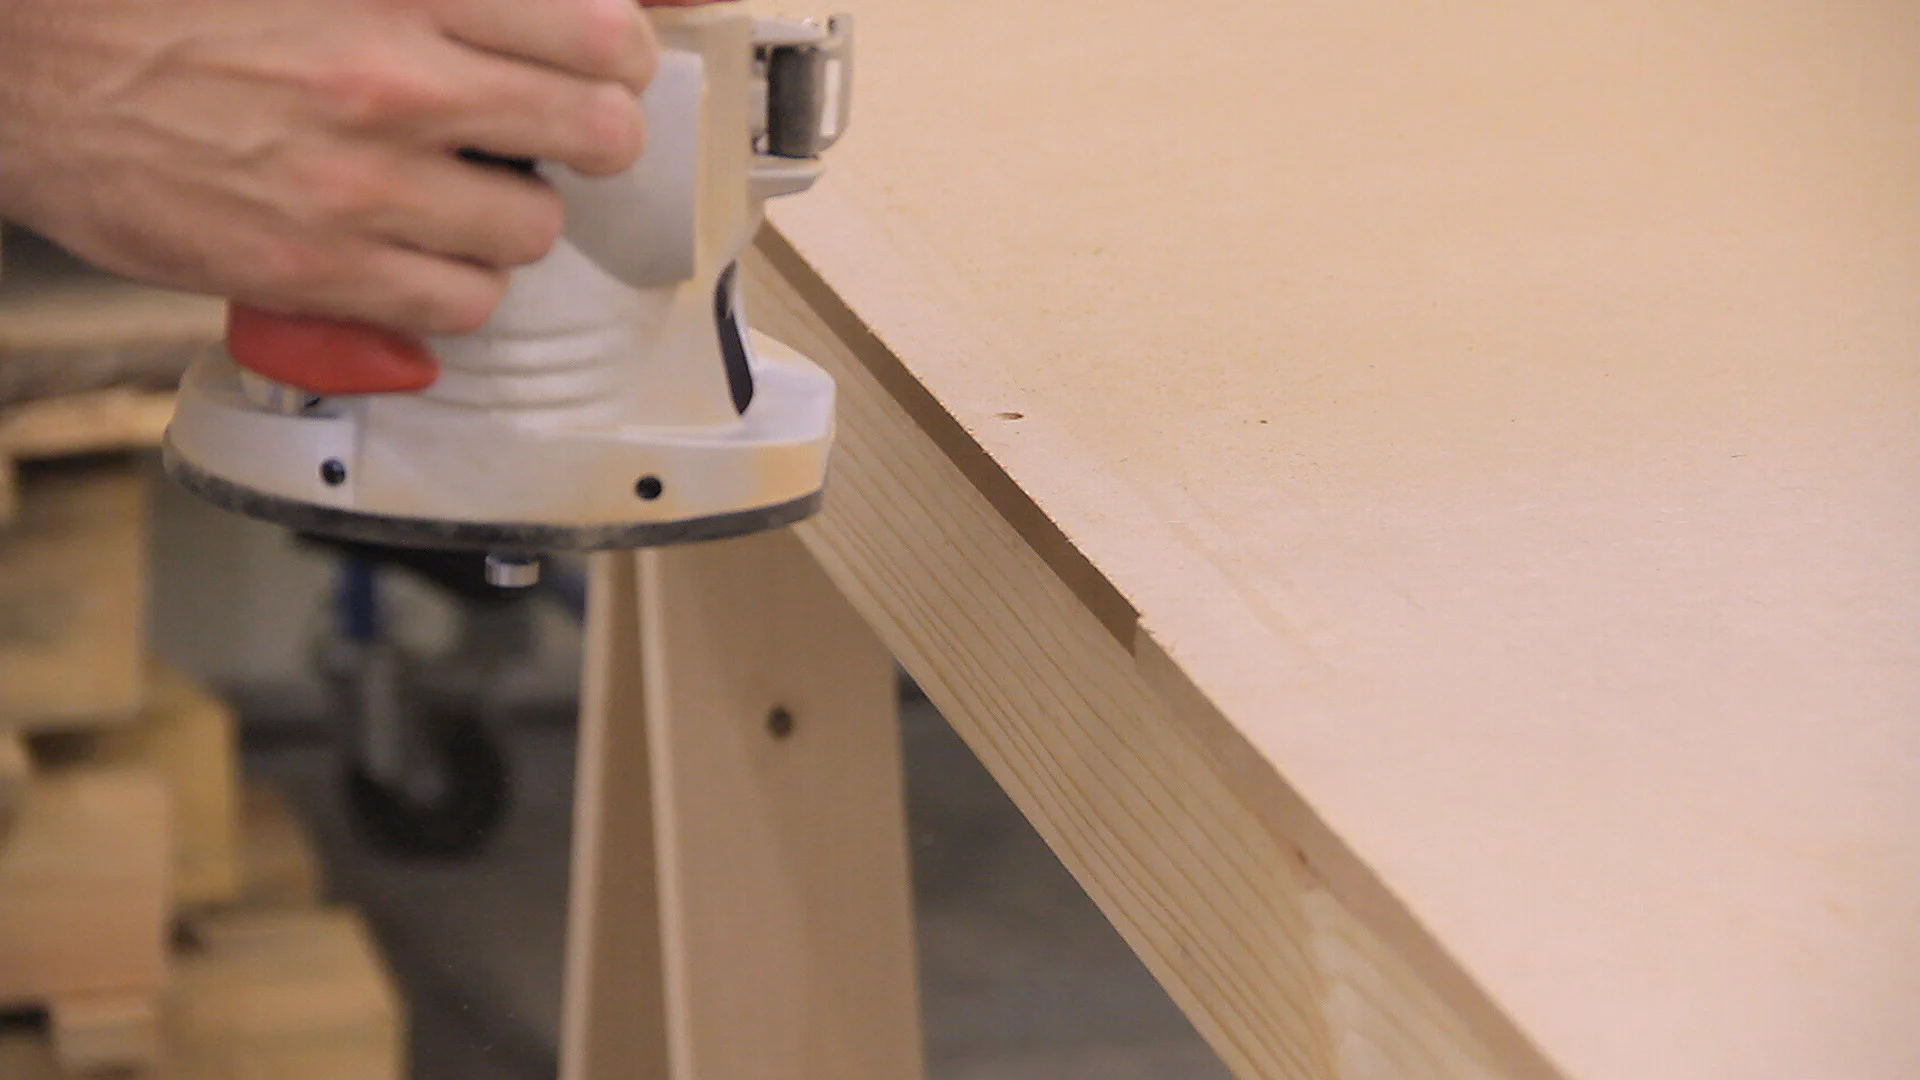
On one shelf I was able to simply use my random orbit sander to sand the MDF flush, but on the other one I had to use a flush-trim bit in my router. Once that was done, I rounded over the top edges a bit with my sander just to help prevent it from chipping out.

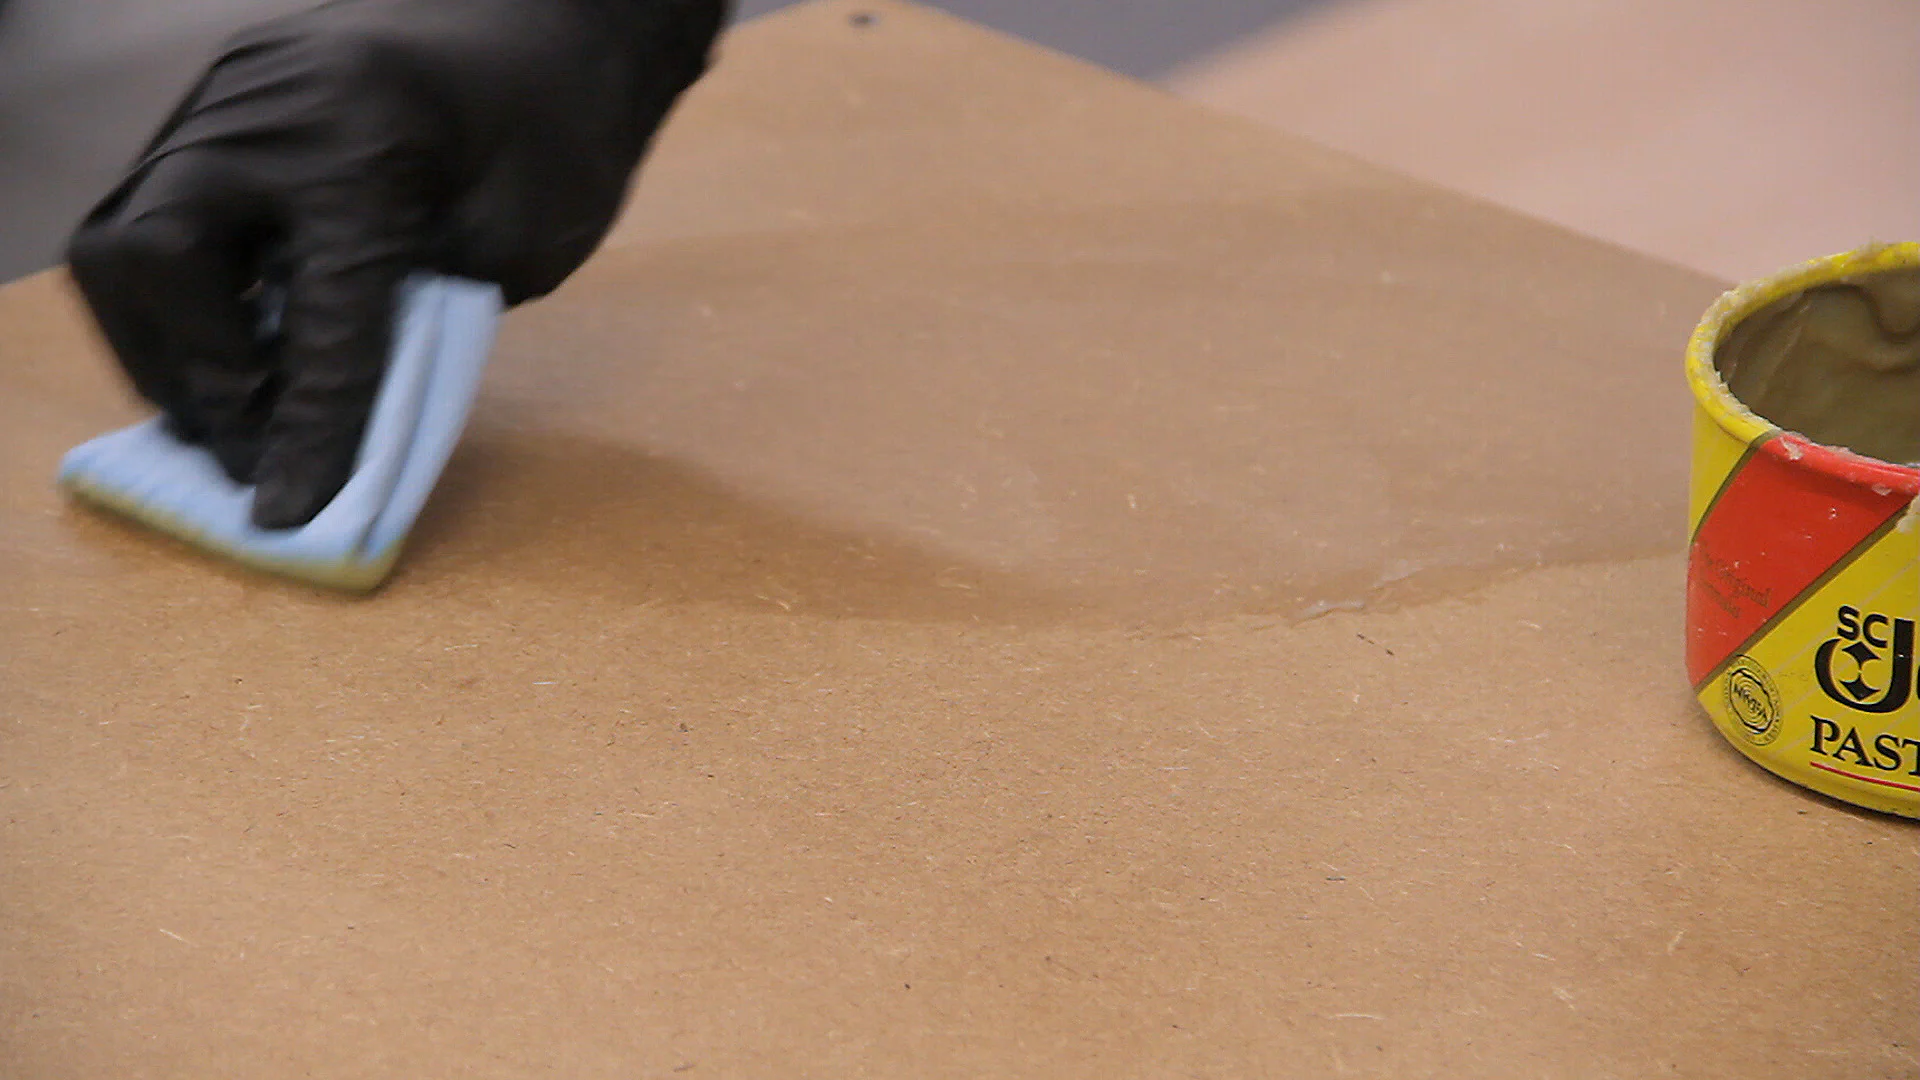
To finish the shelf tops I used two coats of boiled linseed oil since I liked the darker look that it gave (and I was trying to get rid of an old bottle). Unfortunately, it didn’t seem to help prevent drips from soaking in, so I added a thin coat of paste wax and then buffed it as much as I could.
Assembling the Table
Now that the shelves were finished, it was time to finally assemble the table. I started by marking on one leg where the top and each shelf would attach. I then transferred those marks to all the other legs.


Next, I spaced the rear two legs apart on the floor and, after clamping the frame in place, I screwed them together using 2" decking screws. I also went ahead and attached the middle leg and then repeated the process for each shelf. Note that I wanted to maximize the storage space, so I moved the bottom shelf down as far as possible and since the top will have roughly a 5" overhang, a toe-kick isn’t necessary.
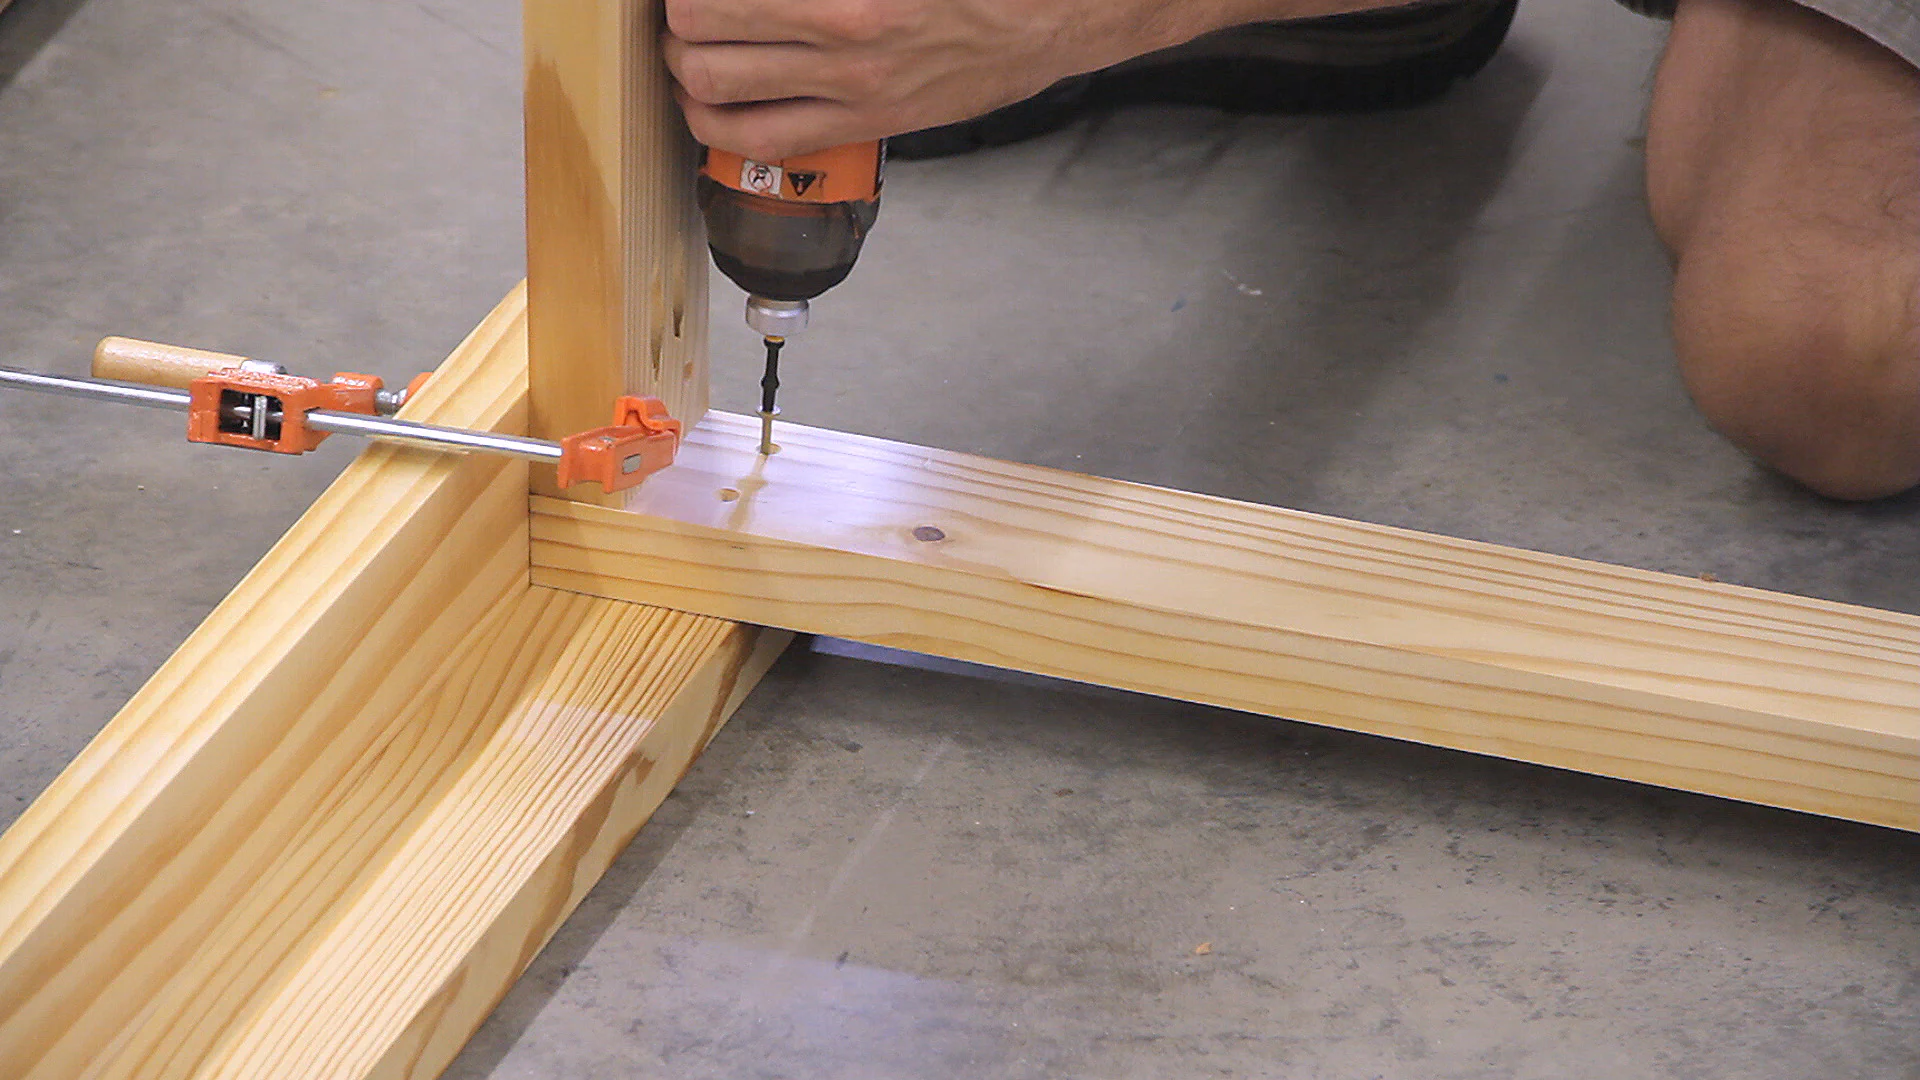
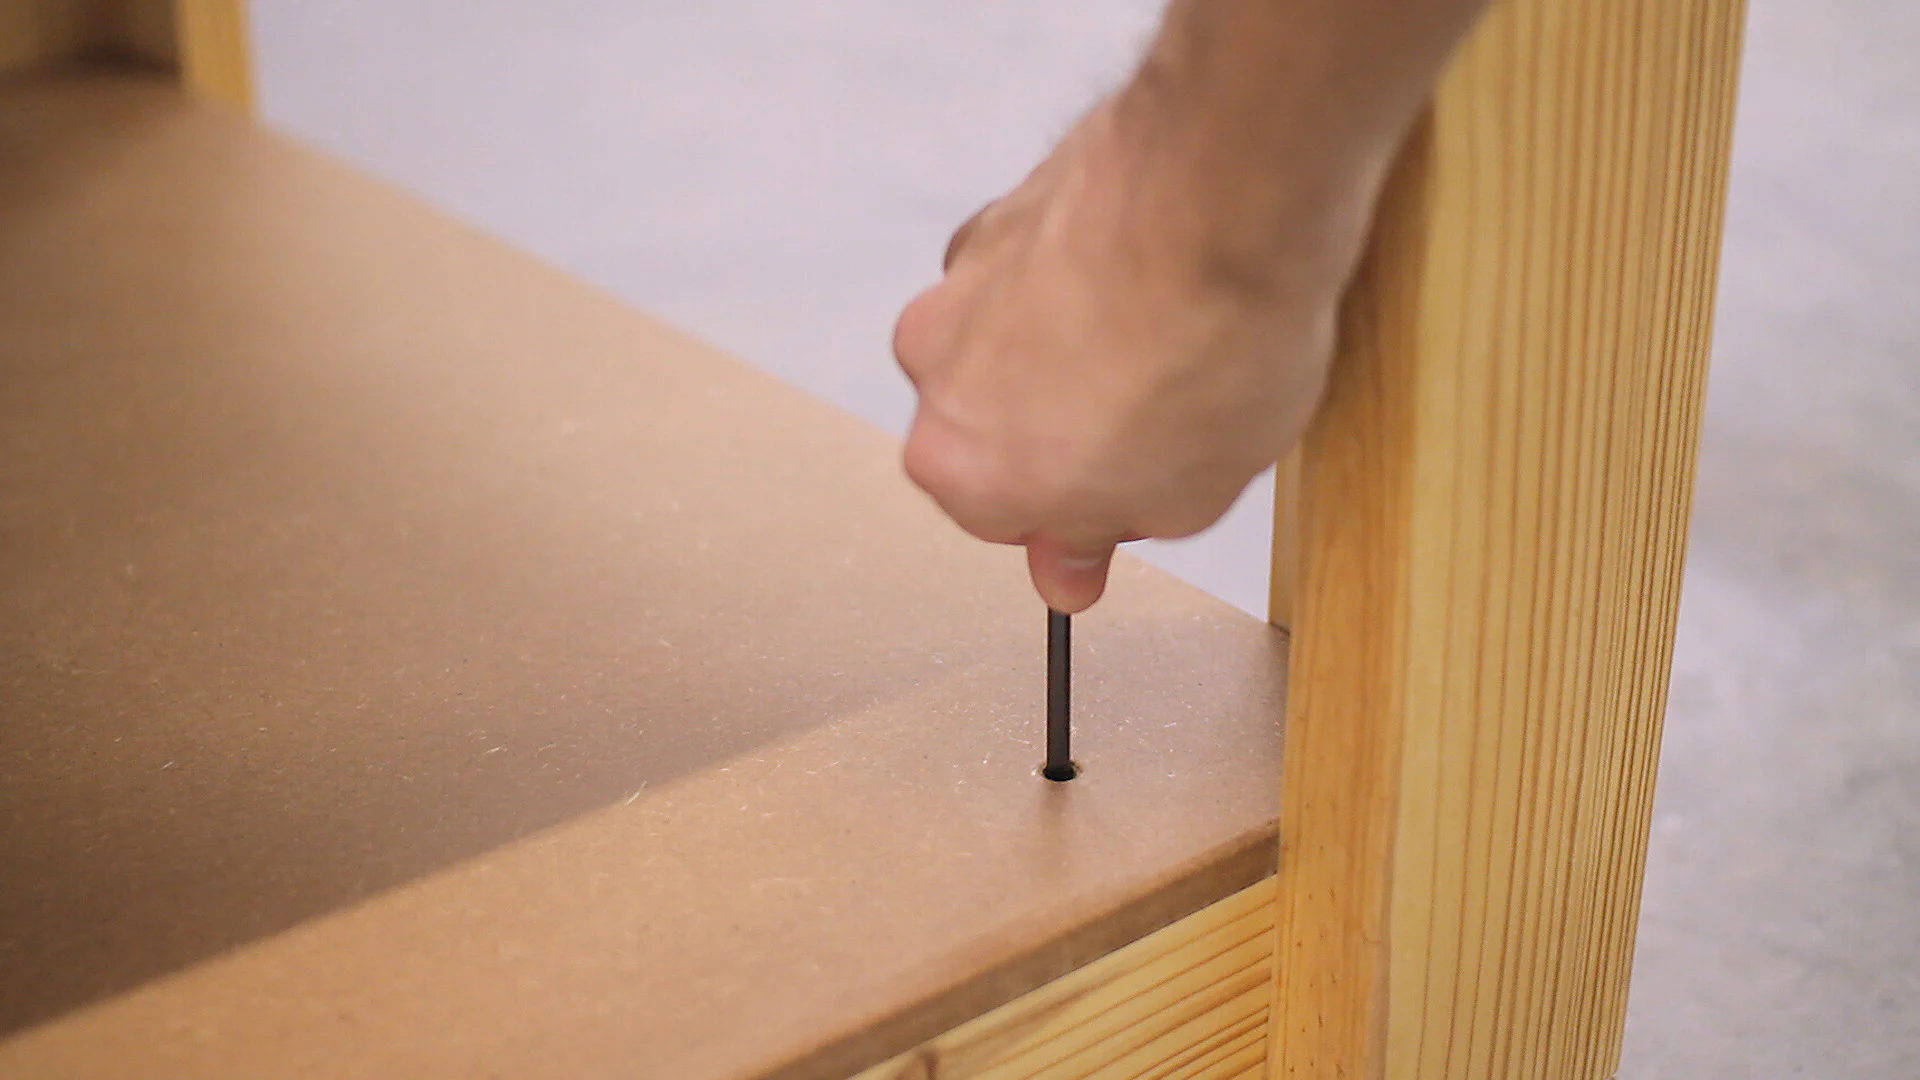
In order to hide the adjustable feet, I drilled an access hole for each in the bottom shelf. This makes it possible to adjust the height with an Allen wrench once the workbench is complete. I then marked and predrilled where each foot would go and screwed them in place.

I attached the front legs the same way, making sure the marks lined up properly with the top and shelves. Then I attached the remaining three feet to the bottom shelf.


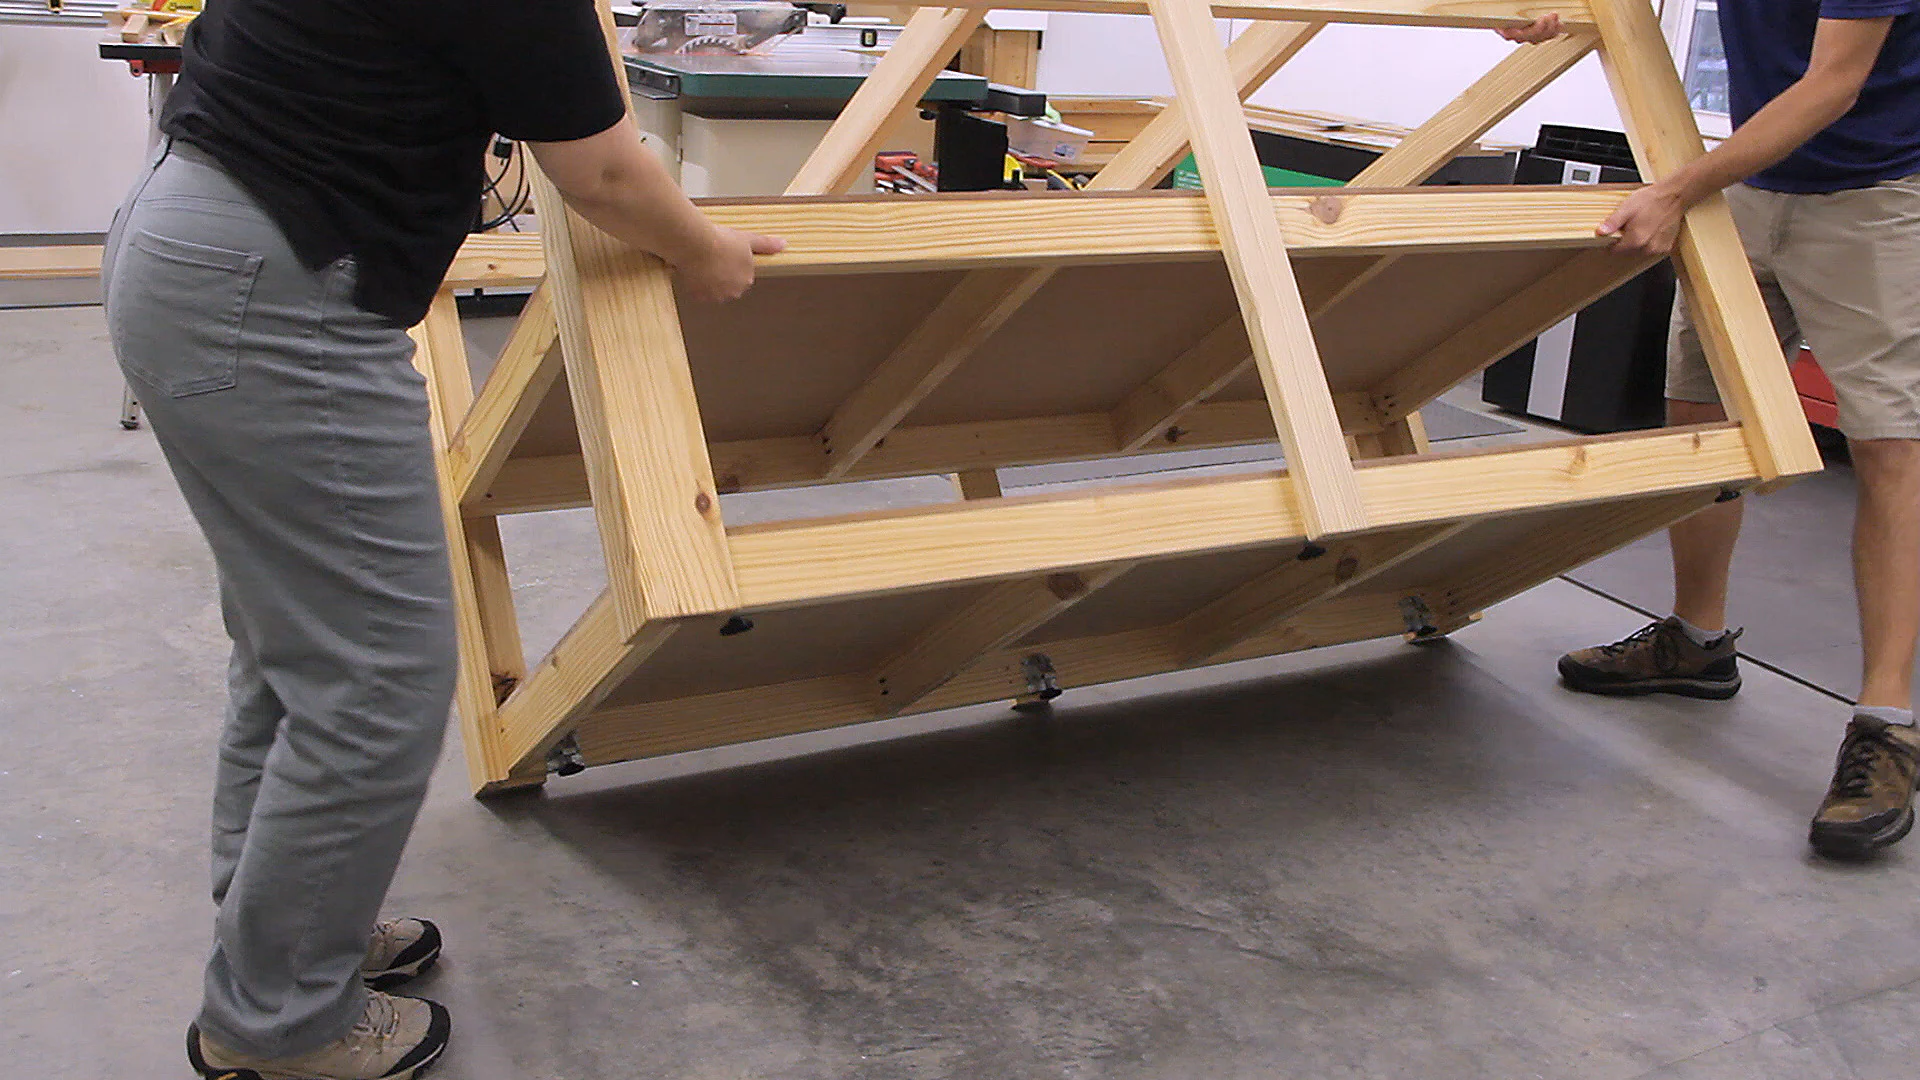
And with a little help from Carrie, it was finally time to flip it upright!
Building the Table Top
I wanted the top to be pretty thick, but I also wanted to use T-molding to protect the edges and that meant a maximum thickness of 1.25" as that was the limit of my router bit. I also wanted to keep the top as smooth as possible and hide any screw holes to avoid snags when using it as an outfeed table.
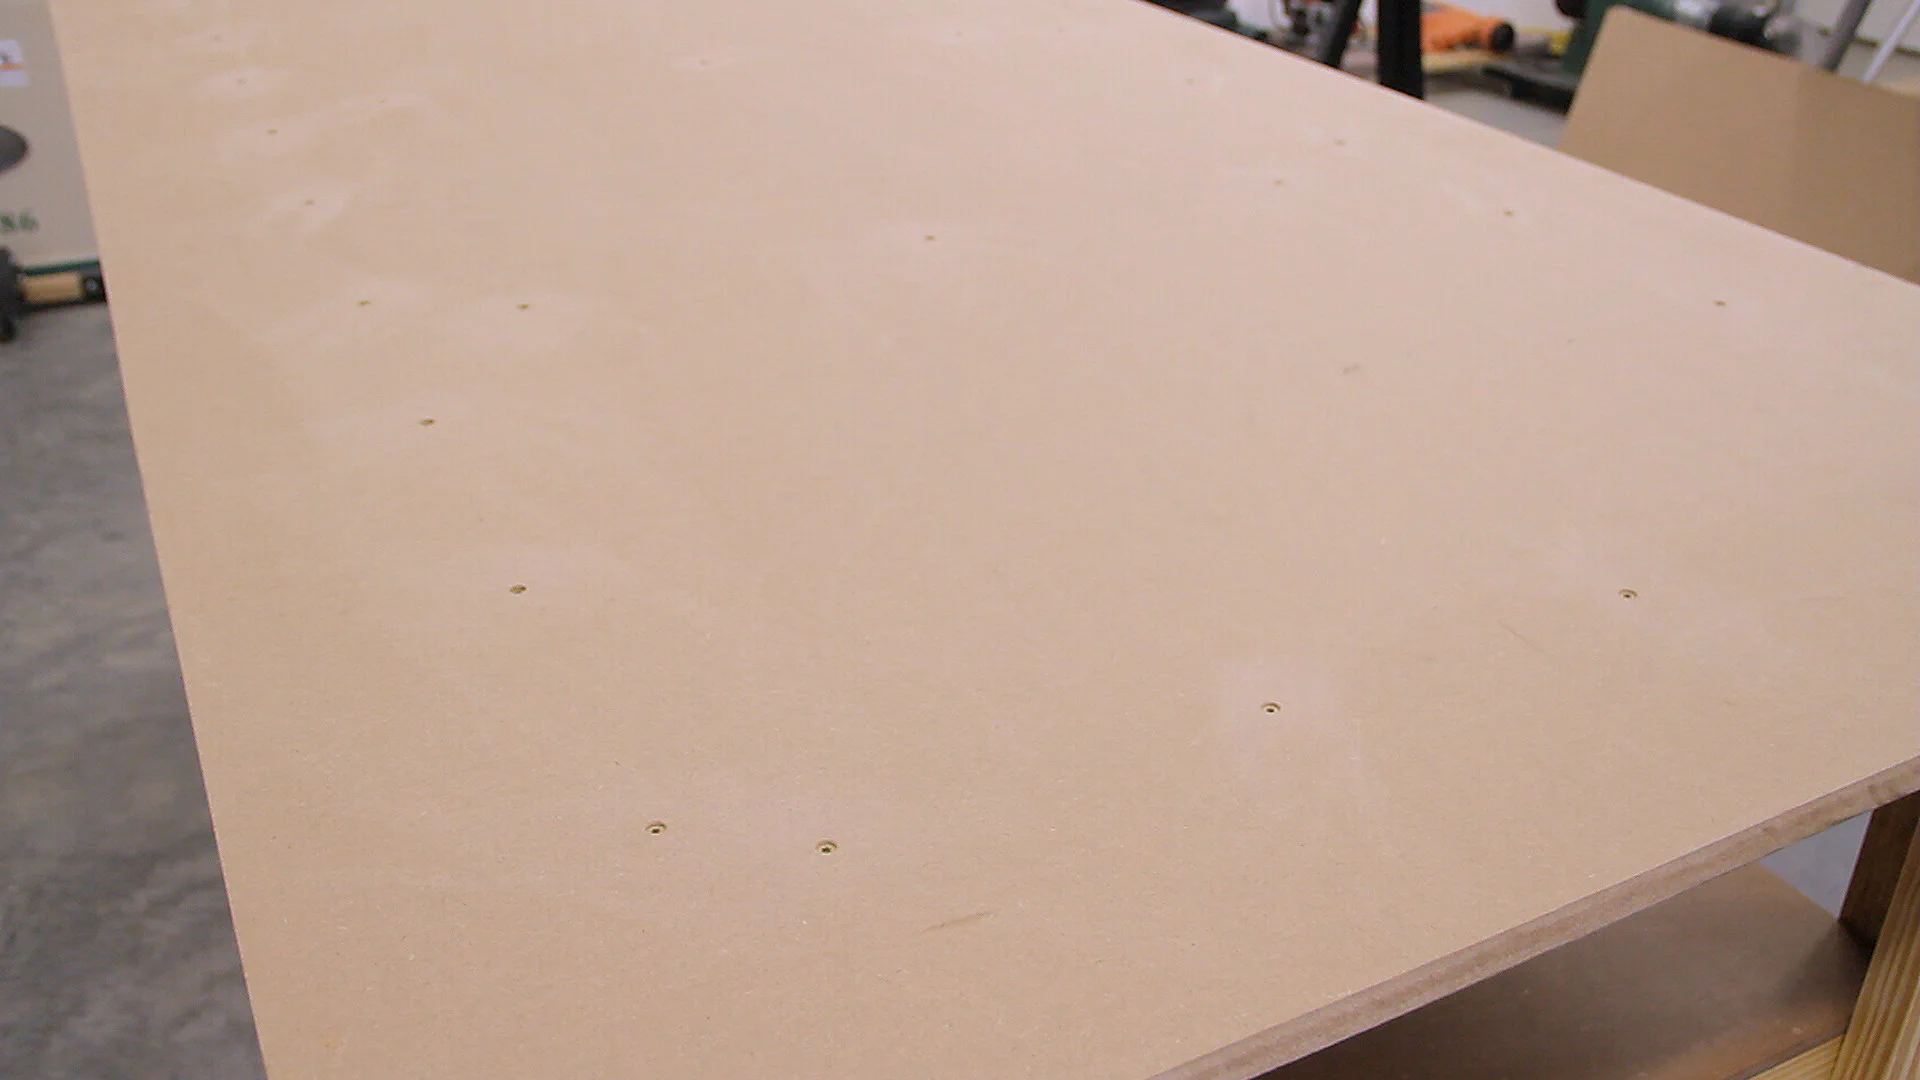
To do this I started by clamping a 3/4" and 1/2" piece of MDF together so that I could cut both pieces at once. After positioning the 3/4" piece on the workbench frame, I then countersunk screws into it roughly every 10" and sanded all the holes flush with a sanding block.
With help from Carrie, we quickly spread glue on the top of the 3/4" piece of MDF. For this we used Titebond-III wood glue since it has a bit longer open time.
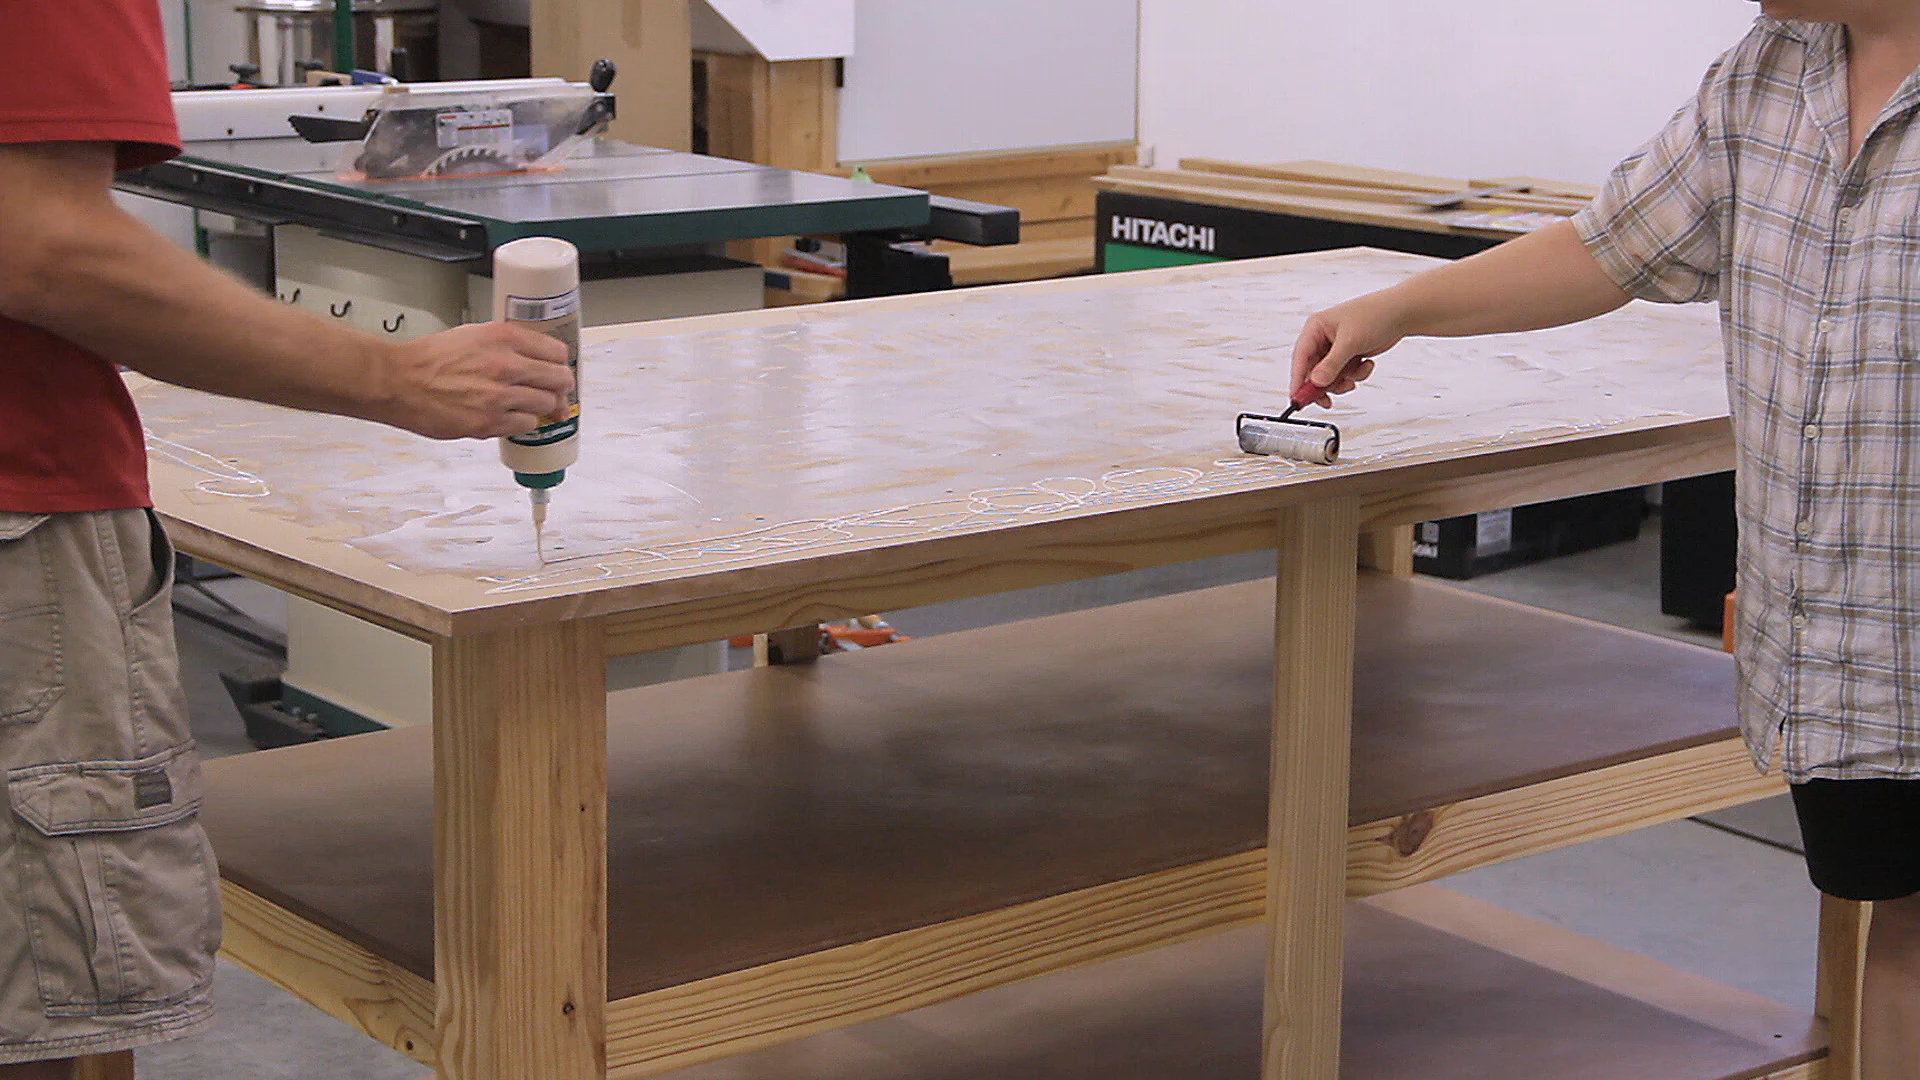
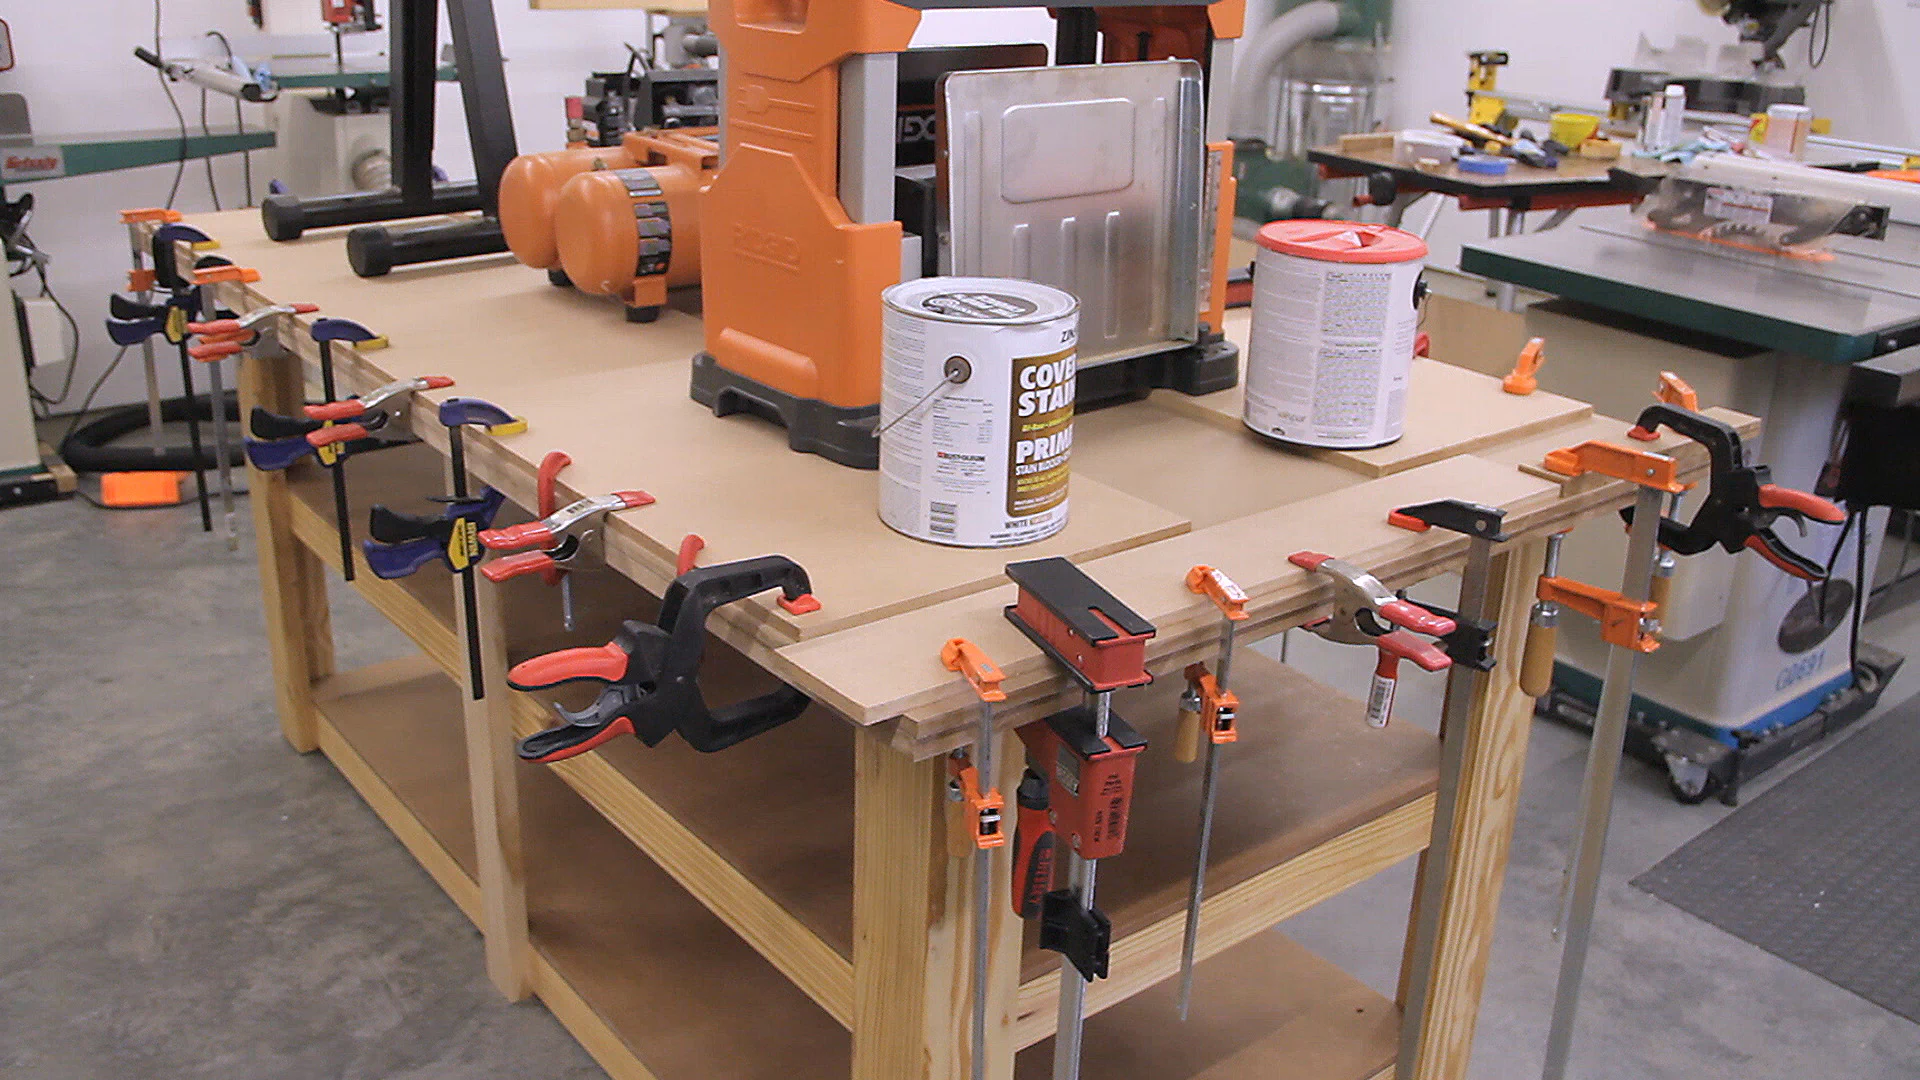
We then laid the 1/2" piece of MDF on top and once it was lined up nicely, I added some weights to the top and every clamp that I could find.
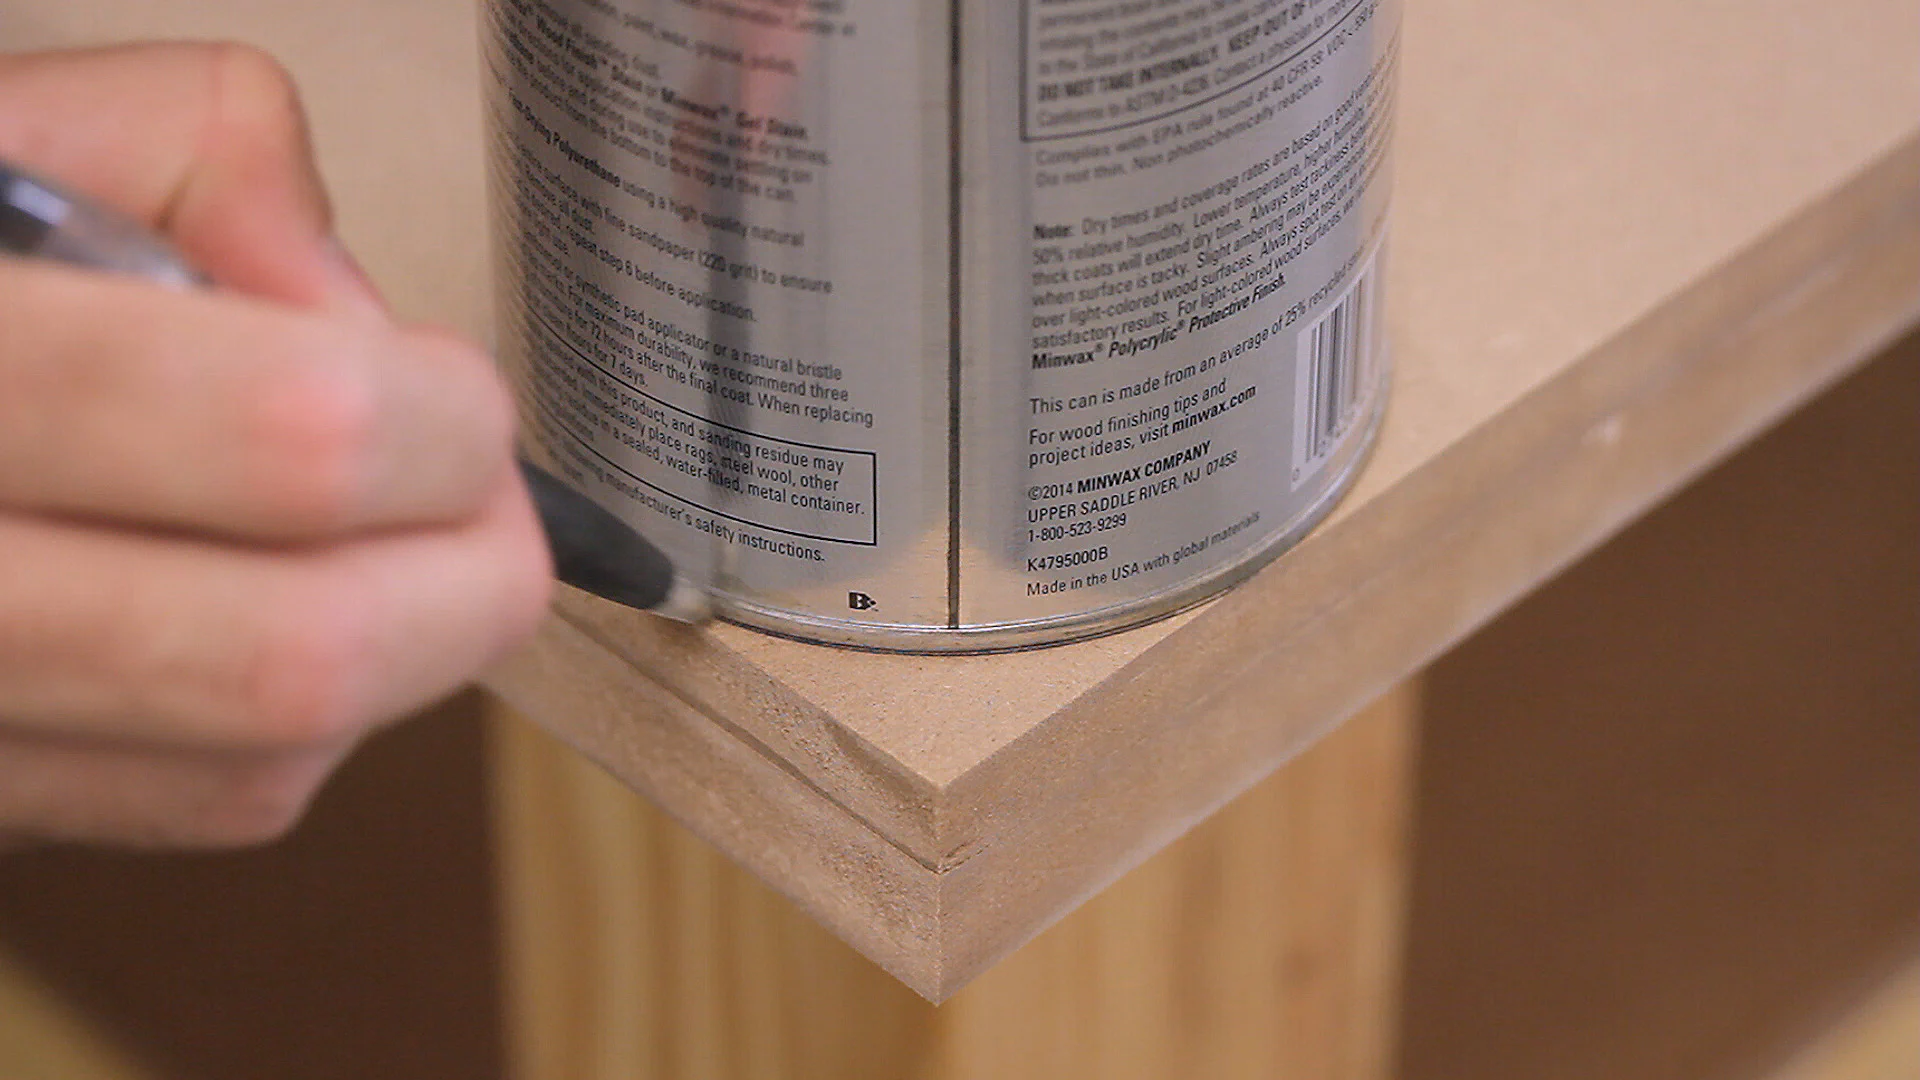
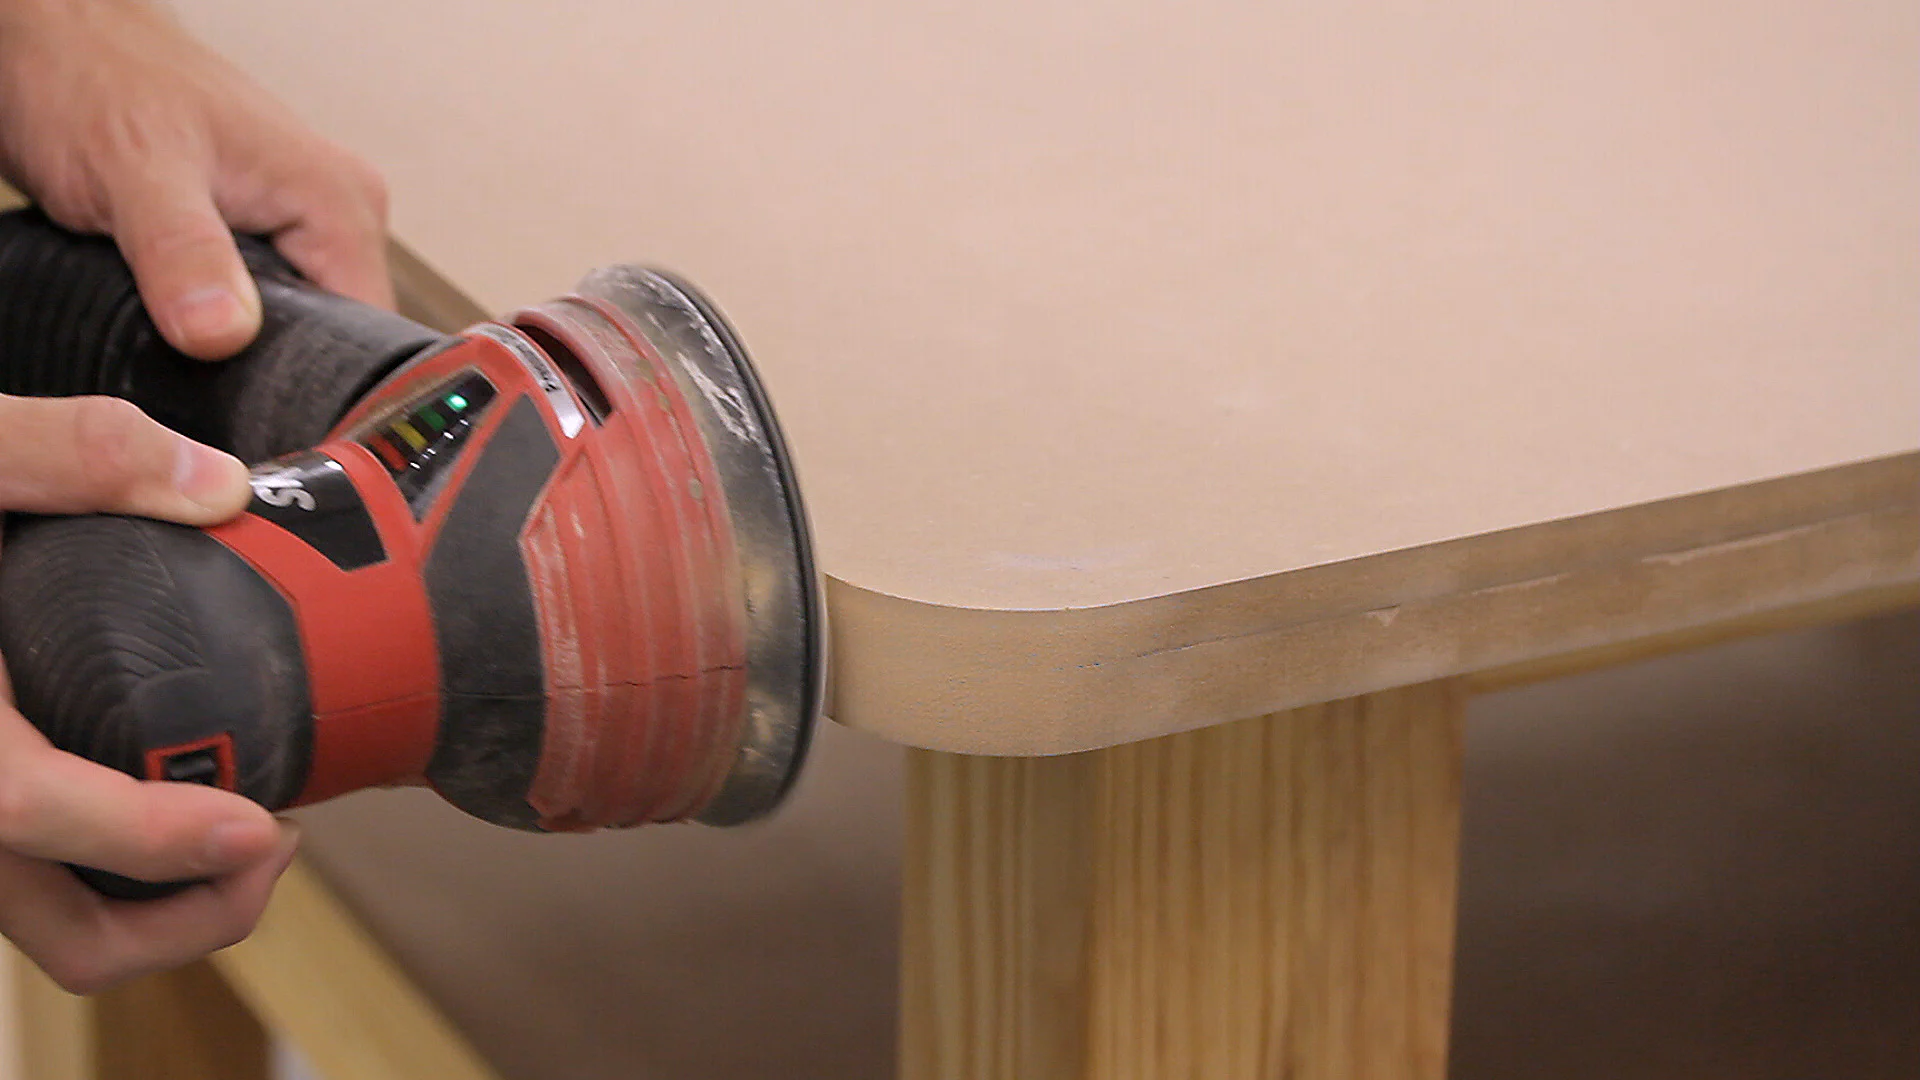
After letting the glue dry for a day or two, I came back and rounded the corners using a quart paint can as a guide. I then cut the corners using my jigsaw and sanded them smooth.
Finishing the Top
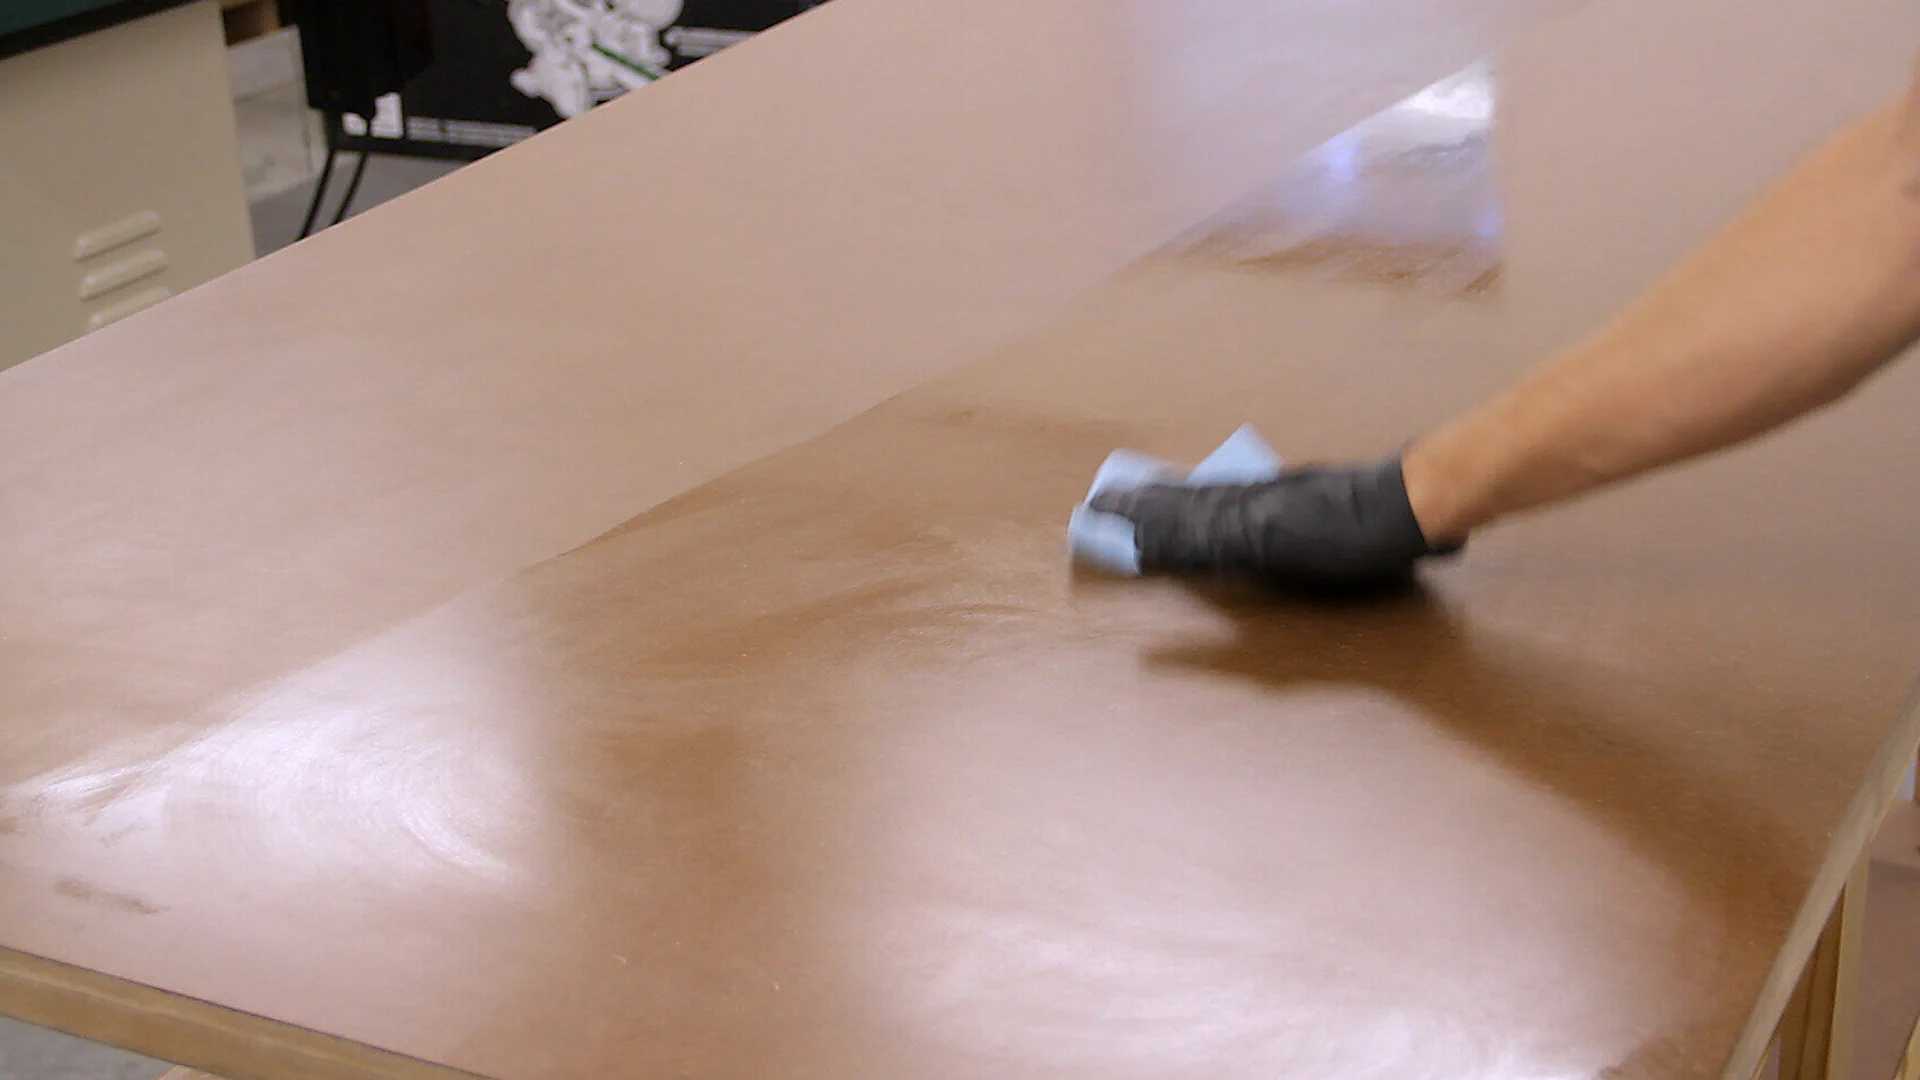
Since I was waiting on a part for my router, I went ahead and started to finish the top. I first used two coats of boiled linseed oil and then applied three coats of wipe-on polyurethane. I debated using paste wax again, but I thought the polyurethane might last a little longer.
To knock down the sheen a bit and smooth it even further, I sanded it well with #0000 steel wool and then applied one final coat of boiled linseed oil.
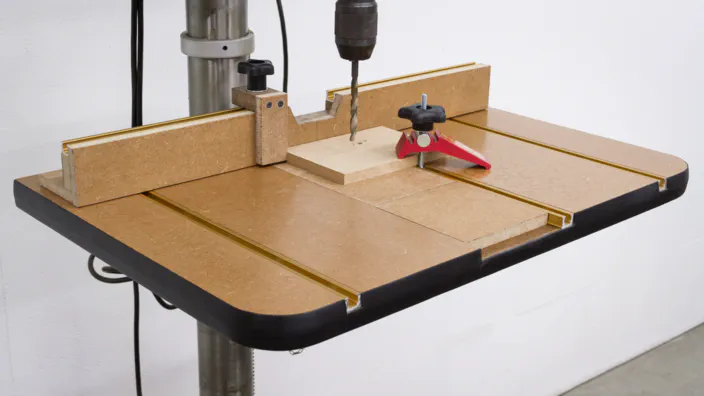
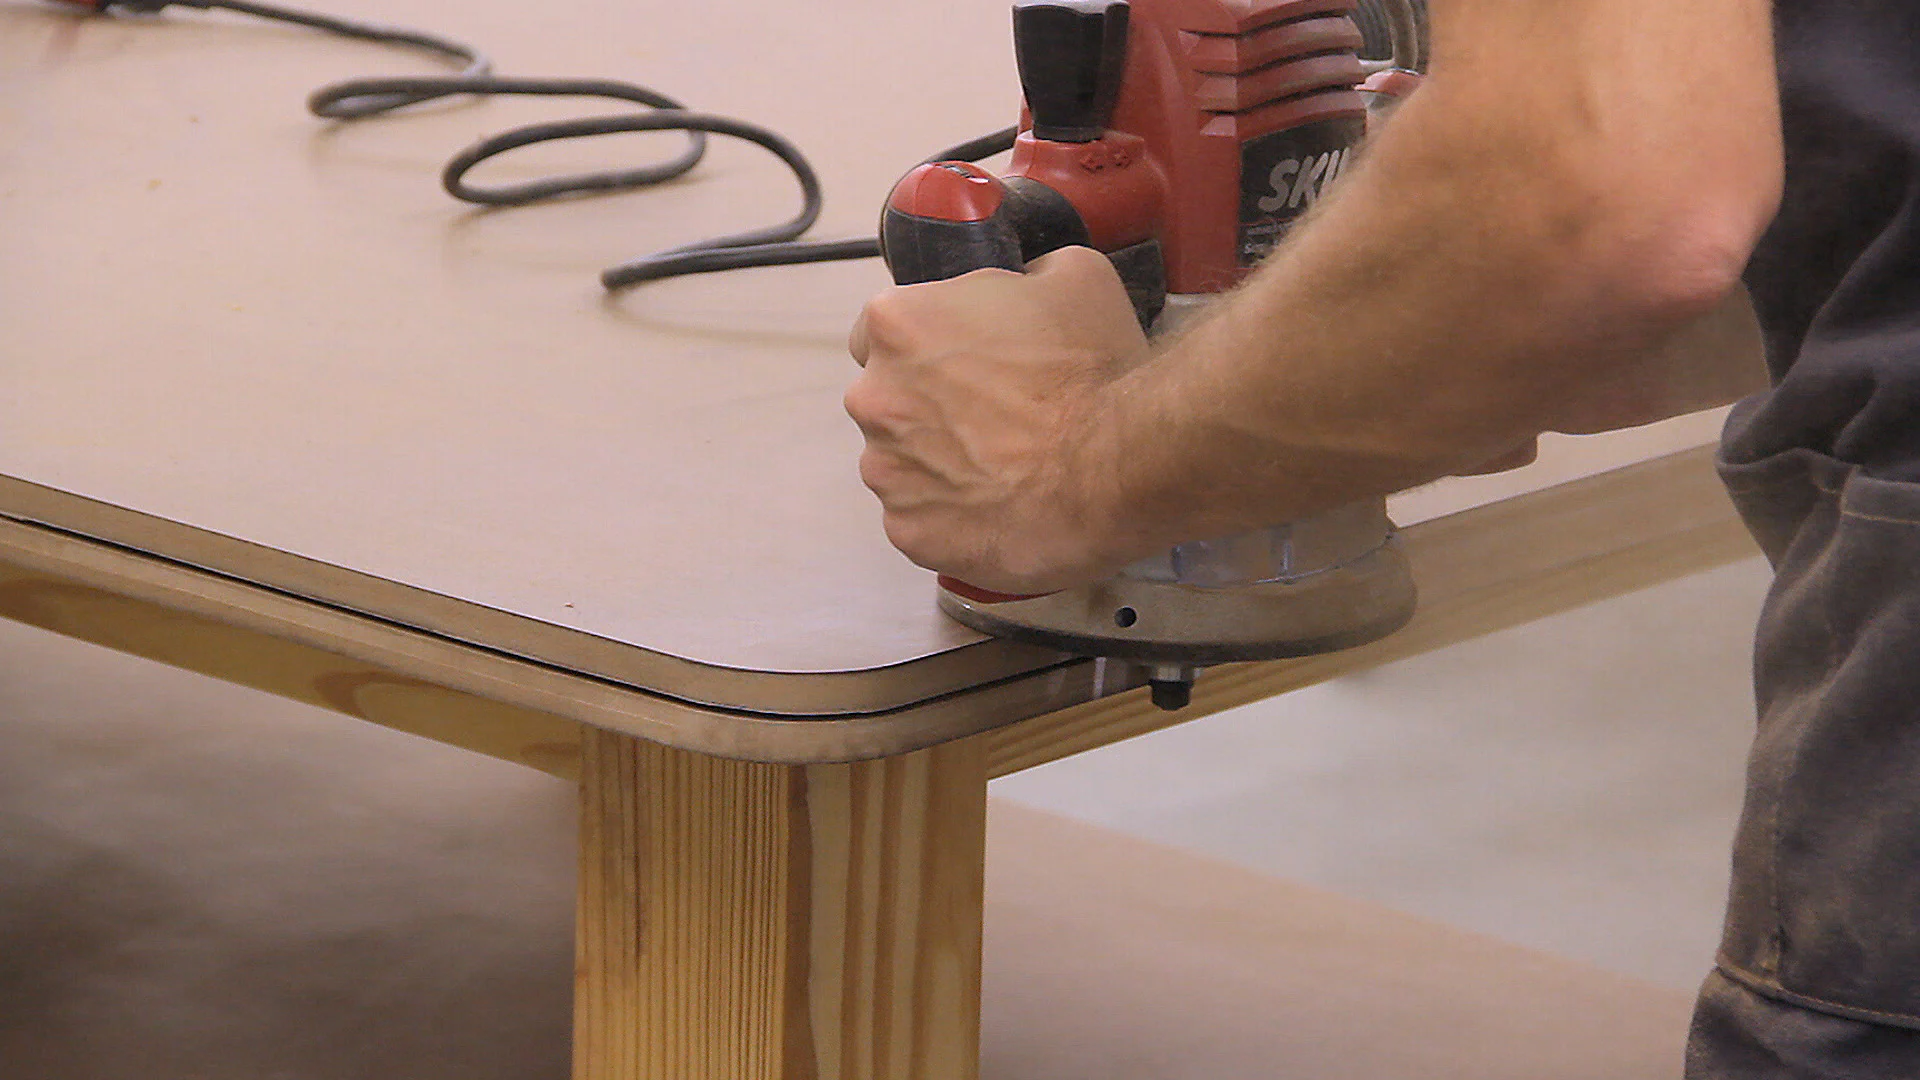
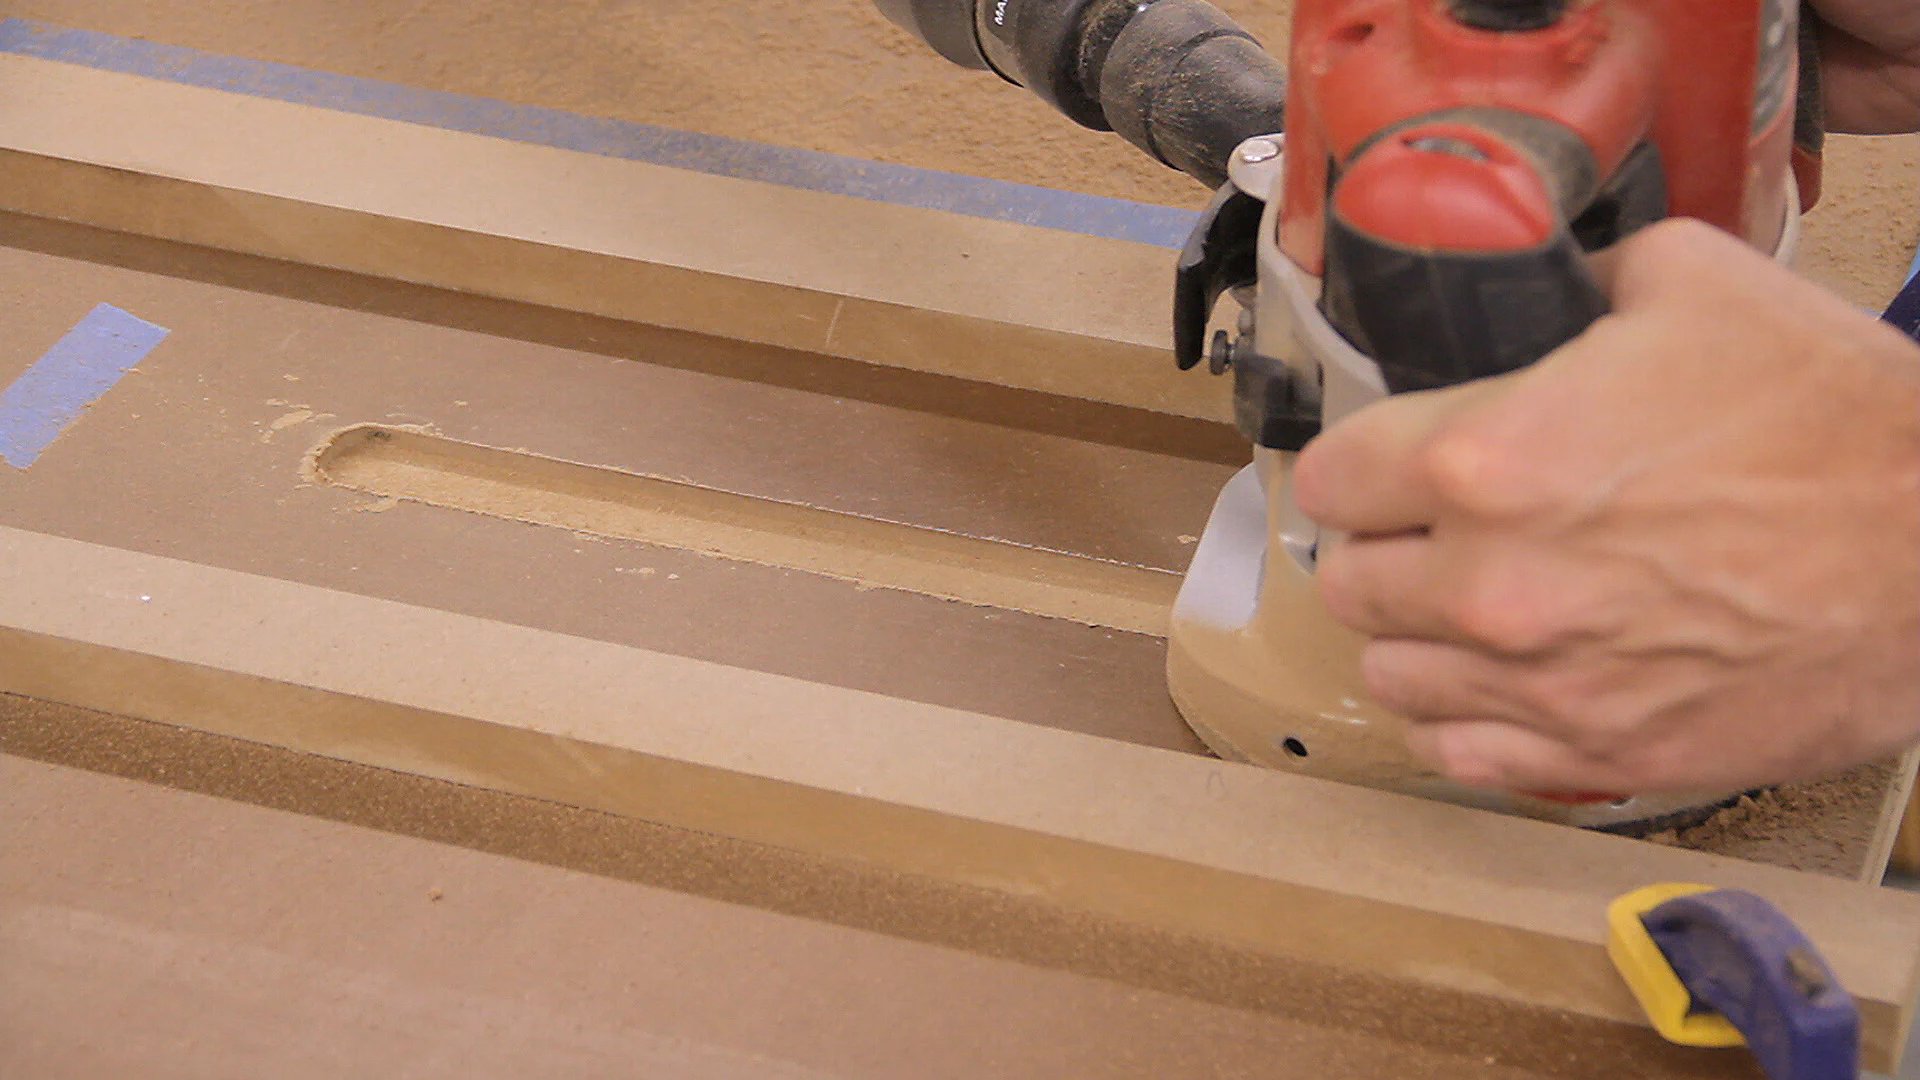
Routing the T-Molding Slot and Miter Gauge Grooves
The next step was to route a slot using a slot-cutting bit for the T-molding. This can be pretty dusty, so I definitely recommend a nice respirator and good eye protection. To get the bit height correct, I clamped a scrap piece of 1/2" and 3/4" MDF together and did a few test passes until the slot was perfectly centered.
I spent a while debating cutting the miter gauge grooves in my nice new table top. After convincing myself that it was the right thing to do, I transferred the locations to the top and widened them by 1/4". This extra width makes it easier to align the bench top grooves to the grooves on the table saw and prevents any issues if either gets bumped out of alignment a little.
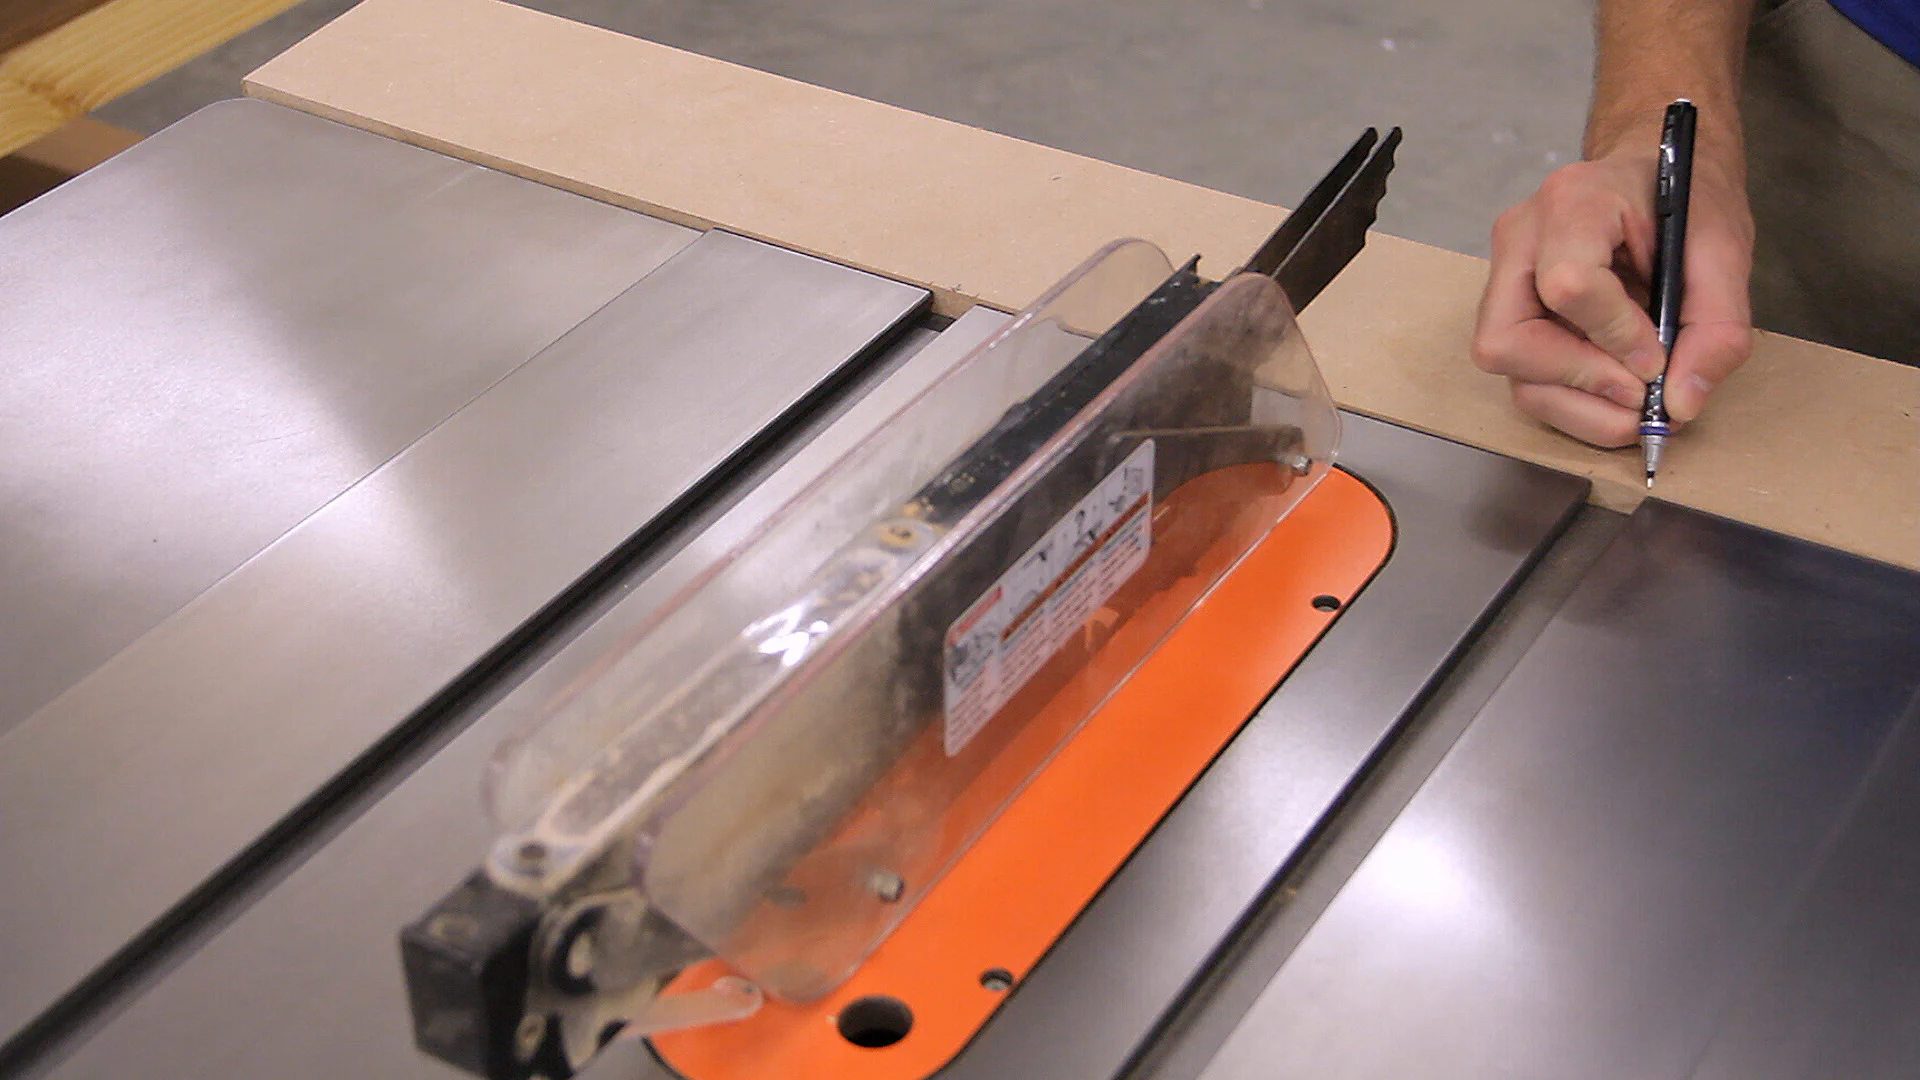
I then clamped down two straight scrap pieces as guides making sure that they were square to the back edge and parallel to each other. Next, I routed the grooves in two passes to get the desired depth. I cut them roughly 18" long to be able to accommodate a wide table saw sled in a future project. Once those were finished, I added some more boiled linseed oil and polyurethane to the grooves.
Installing the T-Molding
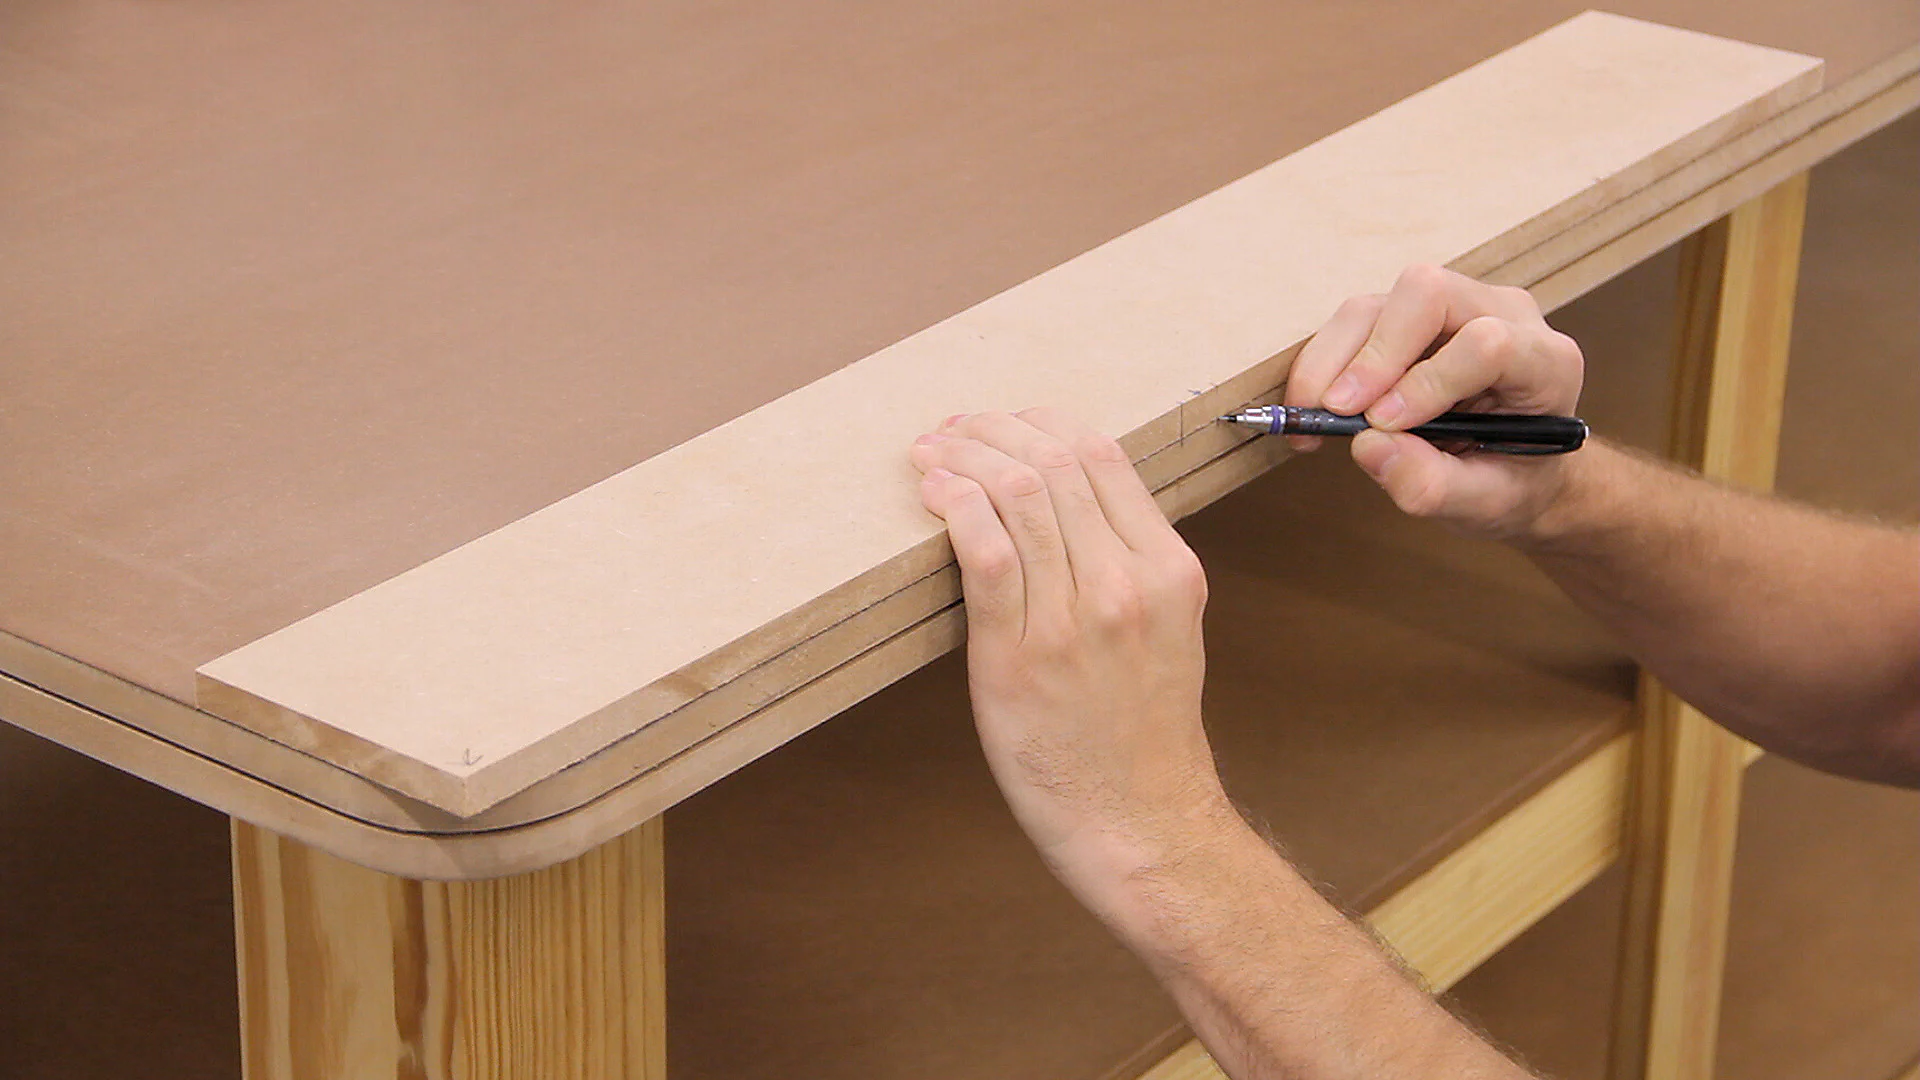
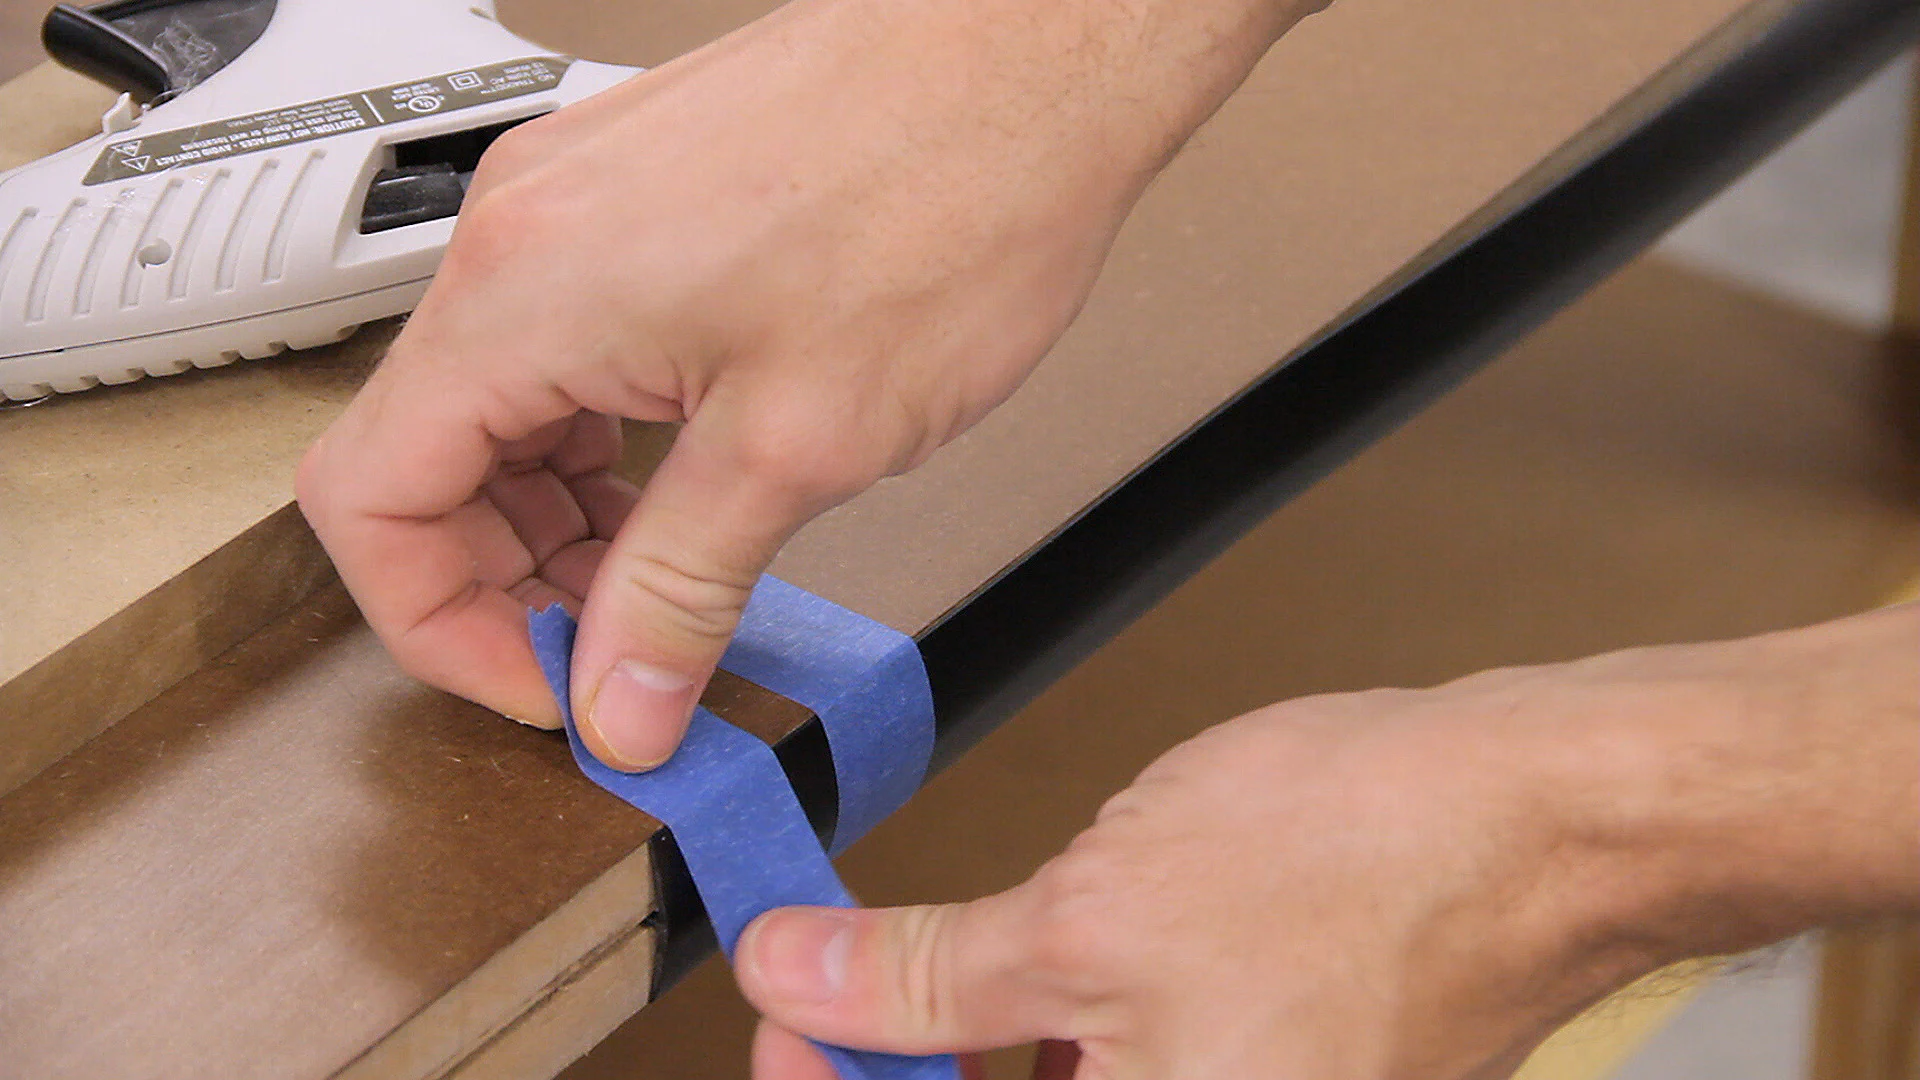
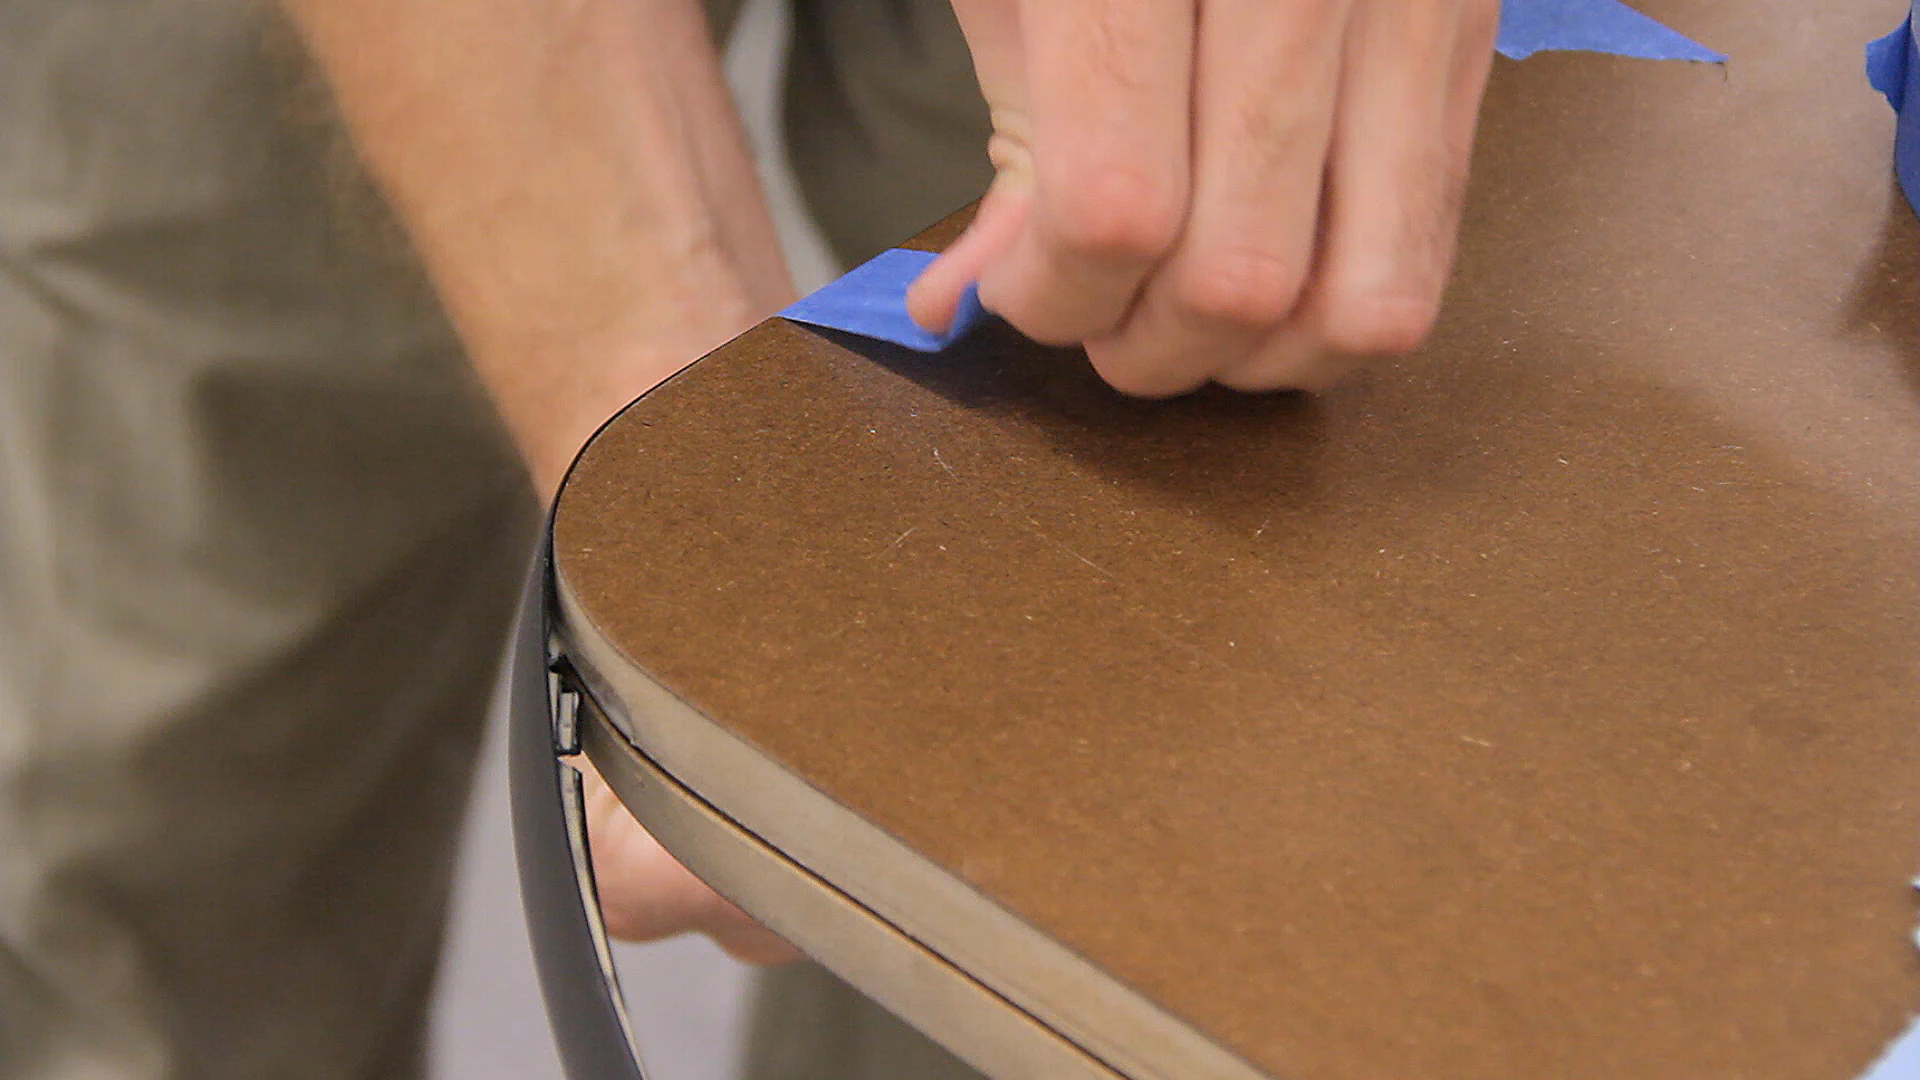
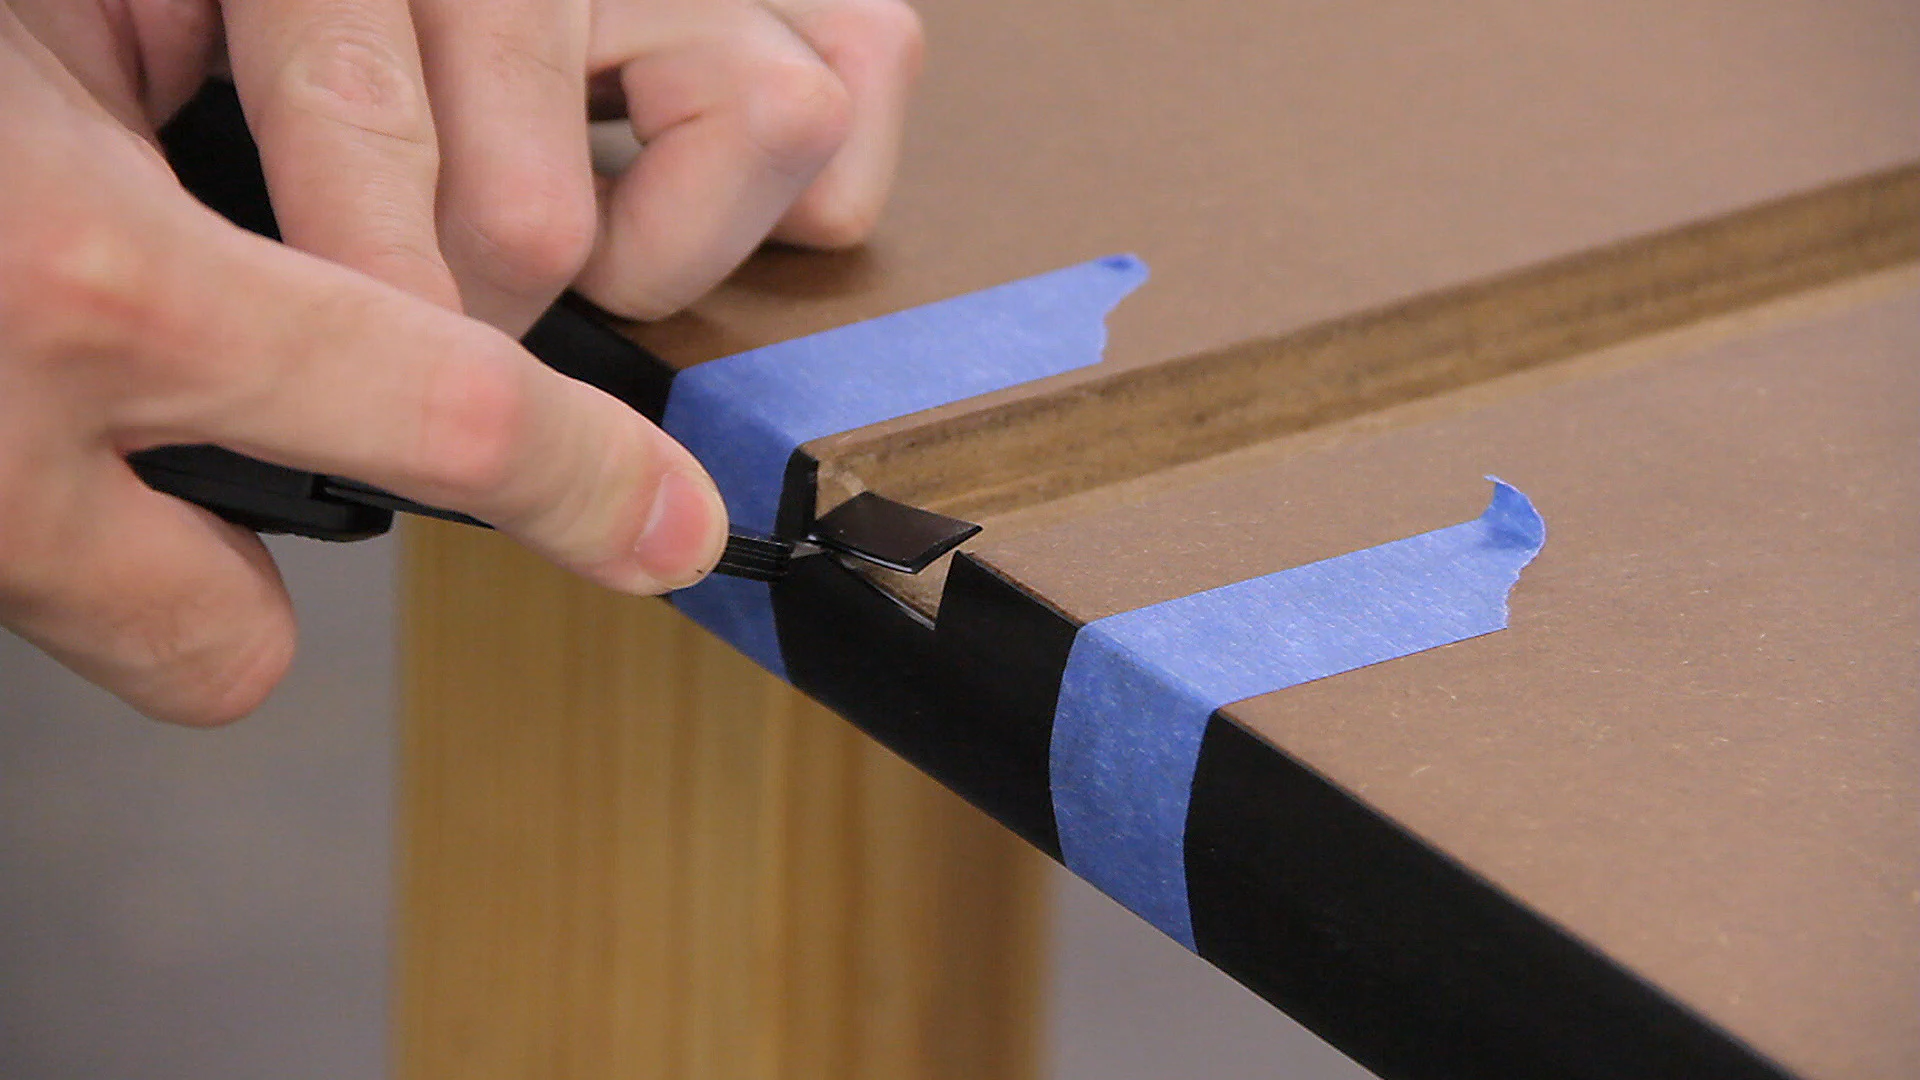
The last step to completing the top was to install the T-molding. After doing some tests, I decided to use a little Titebond wood glue to secure the molding as it seemed to work the best. I used several small strips of painters tape to hold it in place while the glue dried.
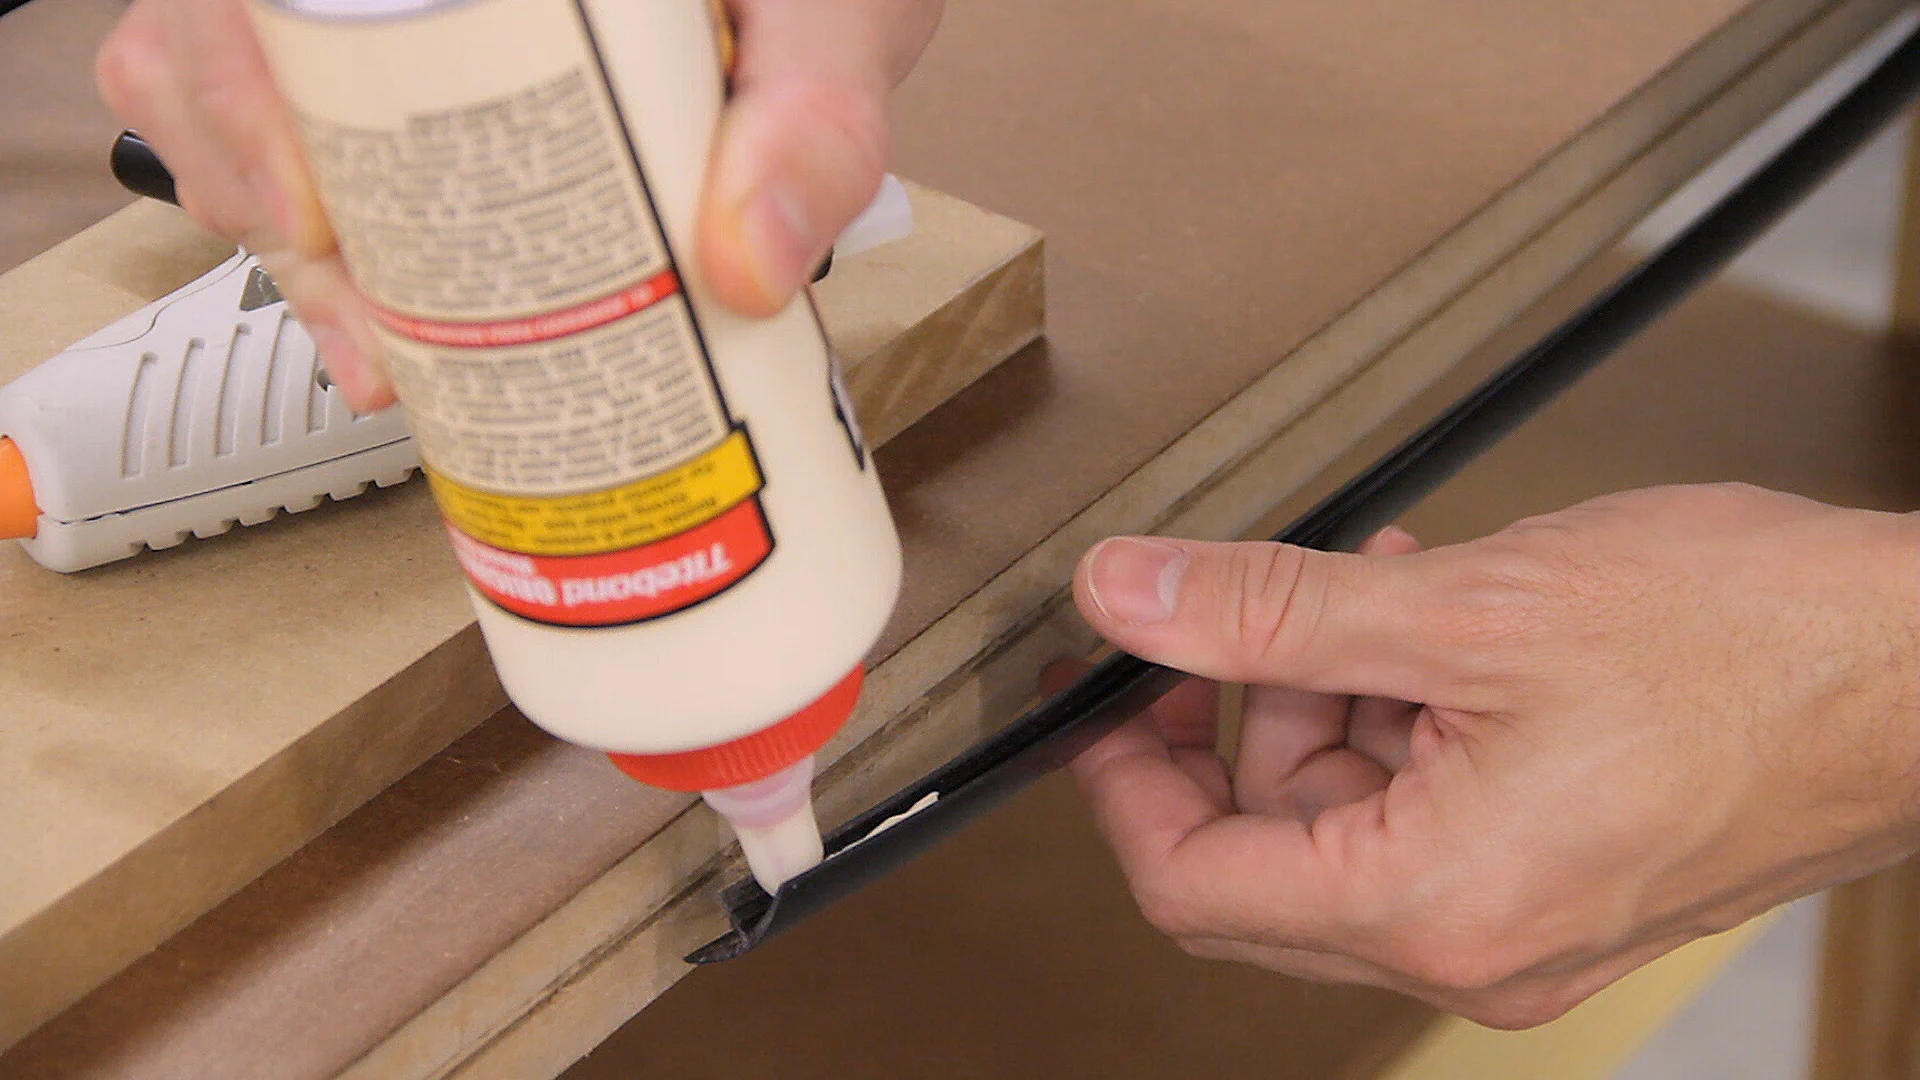
To go around the corners, I cut 4-5 small notches in the molding which allowed it to bend nicely. Then it was just a matter of working around the entire edge a few feet at a time applying glue and then tape. When I reached the end, I used a pair of sharp scissors to cut the molding to its final length.

Once the glue dried, I came back with a sharp knife and finished up by cutting out notches in the T-molding for the miter gauge.
Final Adjustments
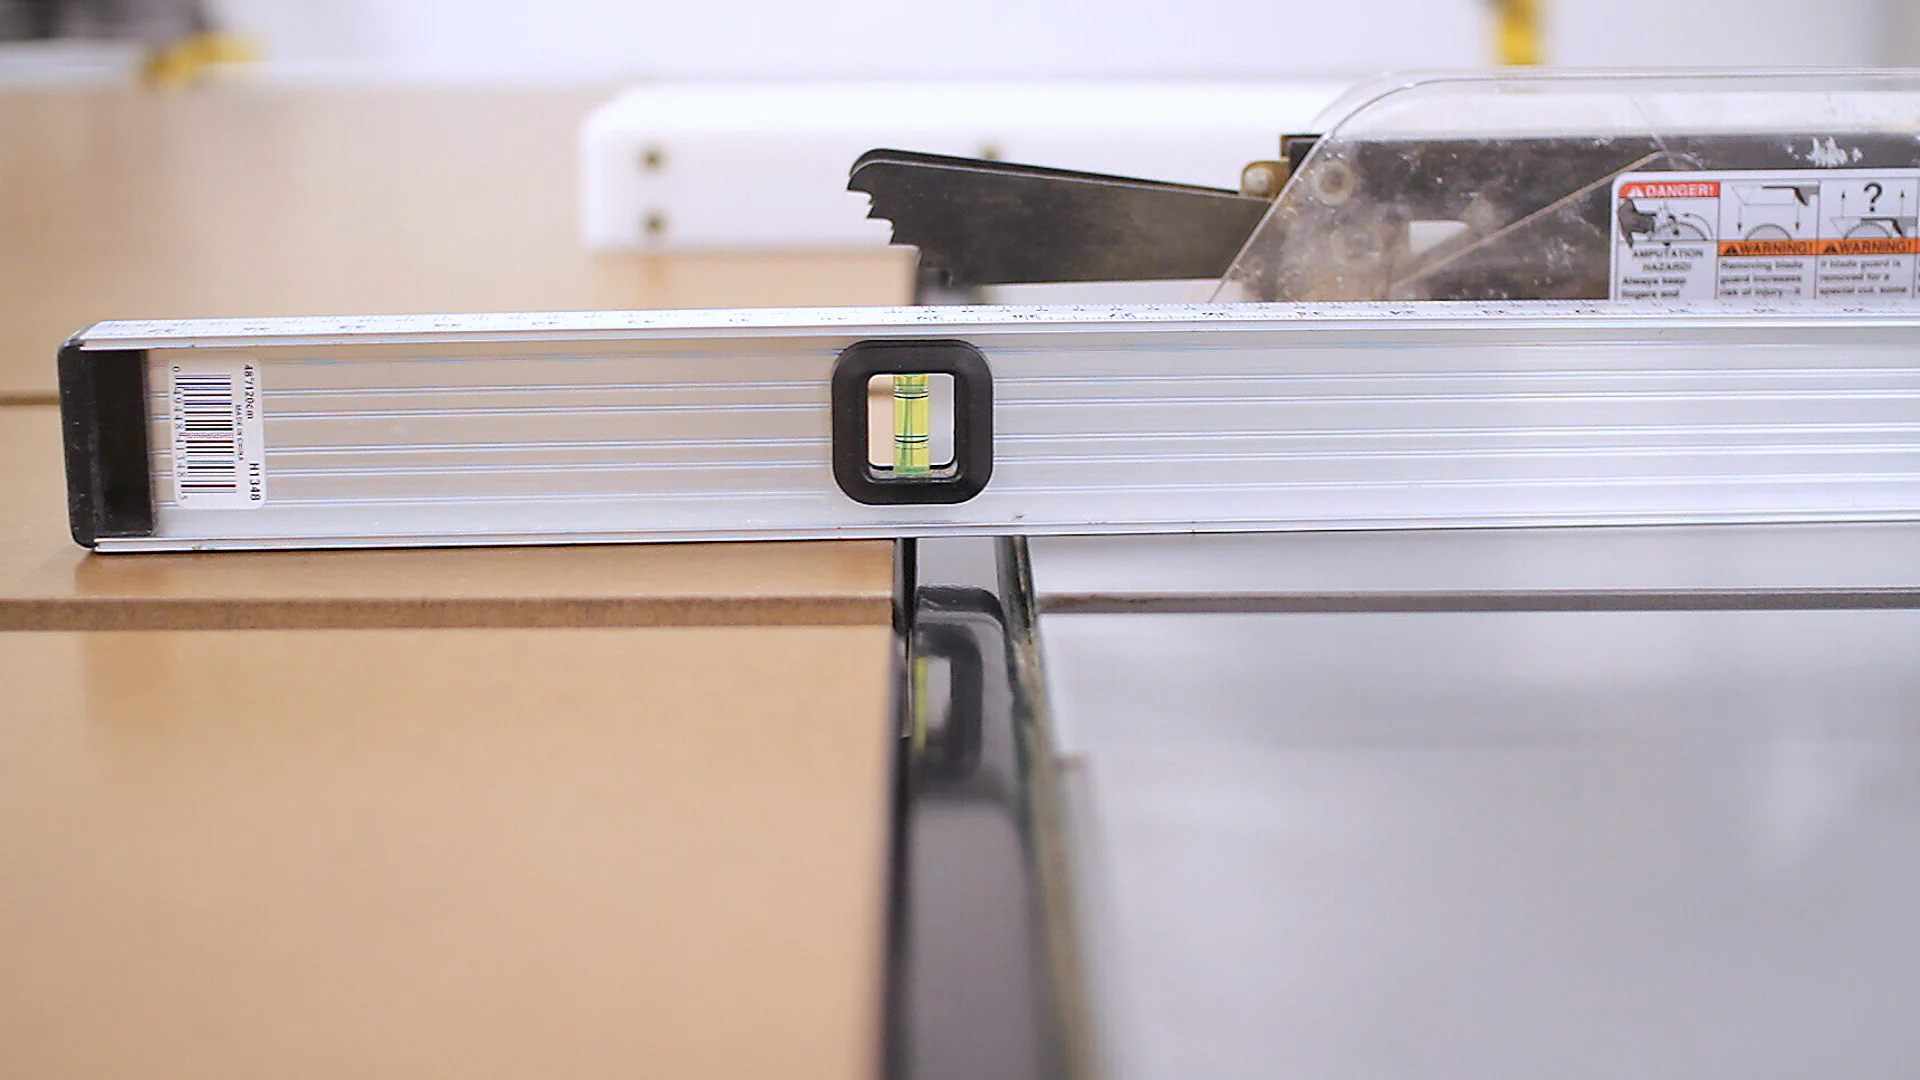
Finally, all that was left to do was to move the table into position and adjust the leveling feet so that it was just a fraction under the height of the table saw’s top. I then double checked it in several places along the table to verify that there would be no problems when using the saw.
After all the work, I think it turned out pretty nice, and I’m definitely looking forward to using it. The extra storage should help considerably as well!
One quick thing to note is that if you have a mobile base on your table saw, be sure to check for it interfering with the outfeed table’s legs. I (luckily) had about 1/4" of clearance between the outfeed table’s back left leg and the table saw’s mobile base which can partially be seen in the back of the photo below.

I already have several small upgrades in mind for this bench, and I’ll be building a more traditional, Roubo-style workbench very soon.
Parts and Materials
- 6 - 2" x 8" x 8’ Southern Yellow Pine Boards
- 1 - 2" x 10" x 8’ Southern Yellow Pine Board
- 3 - 1/2" x 4’ x 8’ MDF
- 1 - 3/4" x 4’ x 8’ MDF
- 6 - Heavy Duty Leg Levelers
- 22’ - 1-1/4" Black T-Molding
- Titebond-III Wood Glue
- 1-1/4" and 2" Decking Screws
Tools Used
Be sure to check out Our Workshop page for more details.
Freud 3/32" Slot Cutter Bit - 1/4" Shank or 1/2" Shank
Grizzly G0586 Jointer
Ridgid R4330 13" Planer
Ridgid 18V Cordless Circular Saw & Drill
Skil Random Orbit Sander, Jigsaw, Router
Plans
Plans for this project are available as a PDF or SketchUp file. Keep in mind that adjustments will likely need to be made to match the height of other table saws or mobile bases.