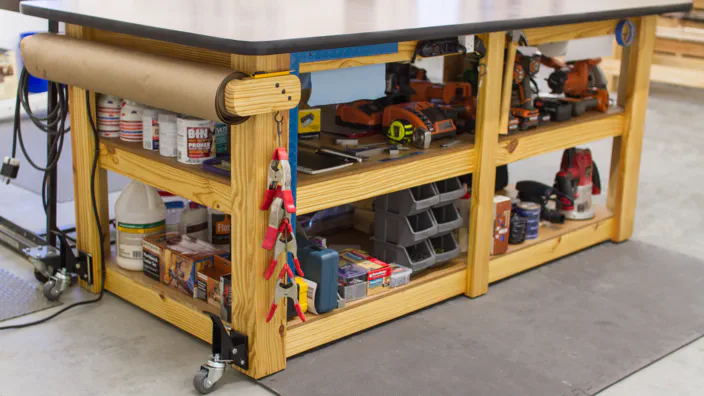
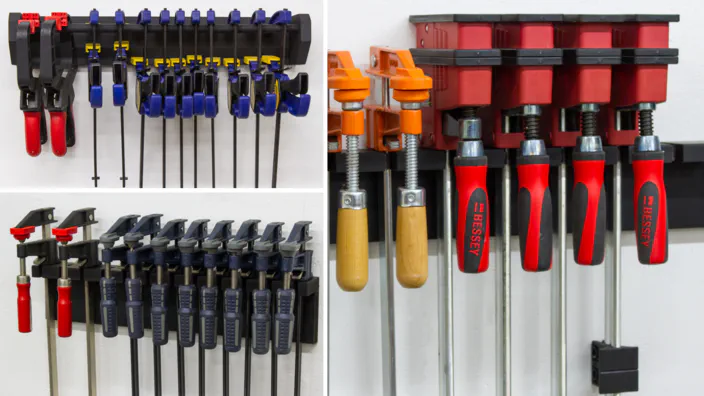
These clamp racks were another project that I put off for far too long considering how simple they are to make. So while cleaning up the shop before our next workbench build, I decided that it was time to build homes for all the clamps I had scattered around the shop.
![Three clamp racks filled with clamps.](/build-three-clamp-racks-from-scraps/images/build-three-clamp-racks-from-scraps-01_hu367ce97cc1d77d6af1ccbf2dab11fb4c_1825248_704x704_fit_q80_h2_mitchellnetravali.webp)
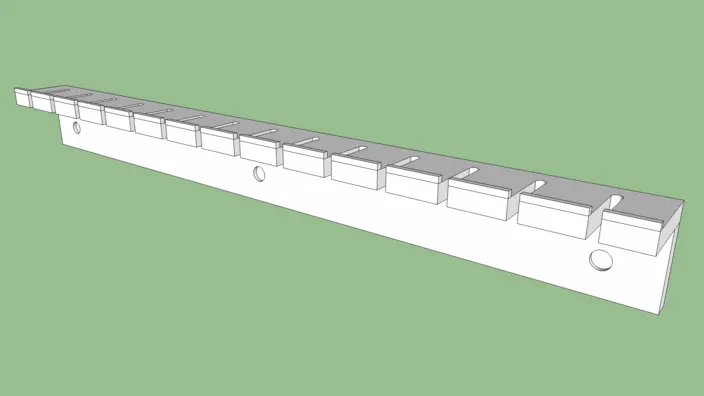
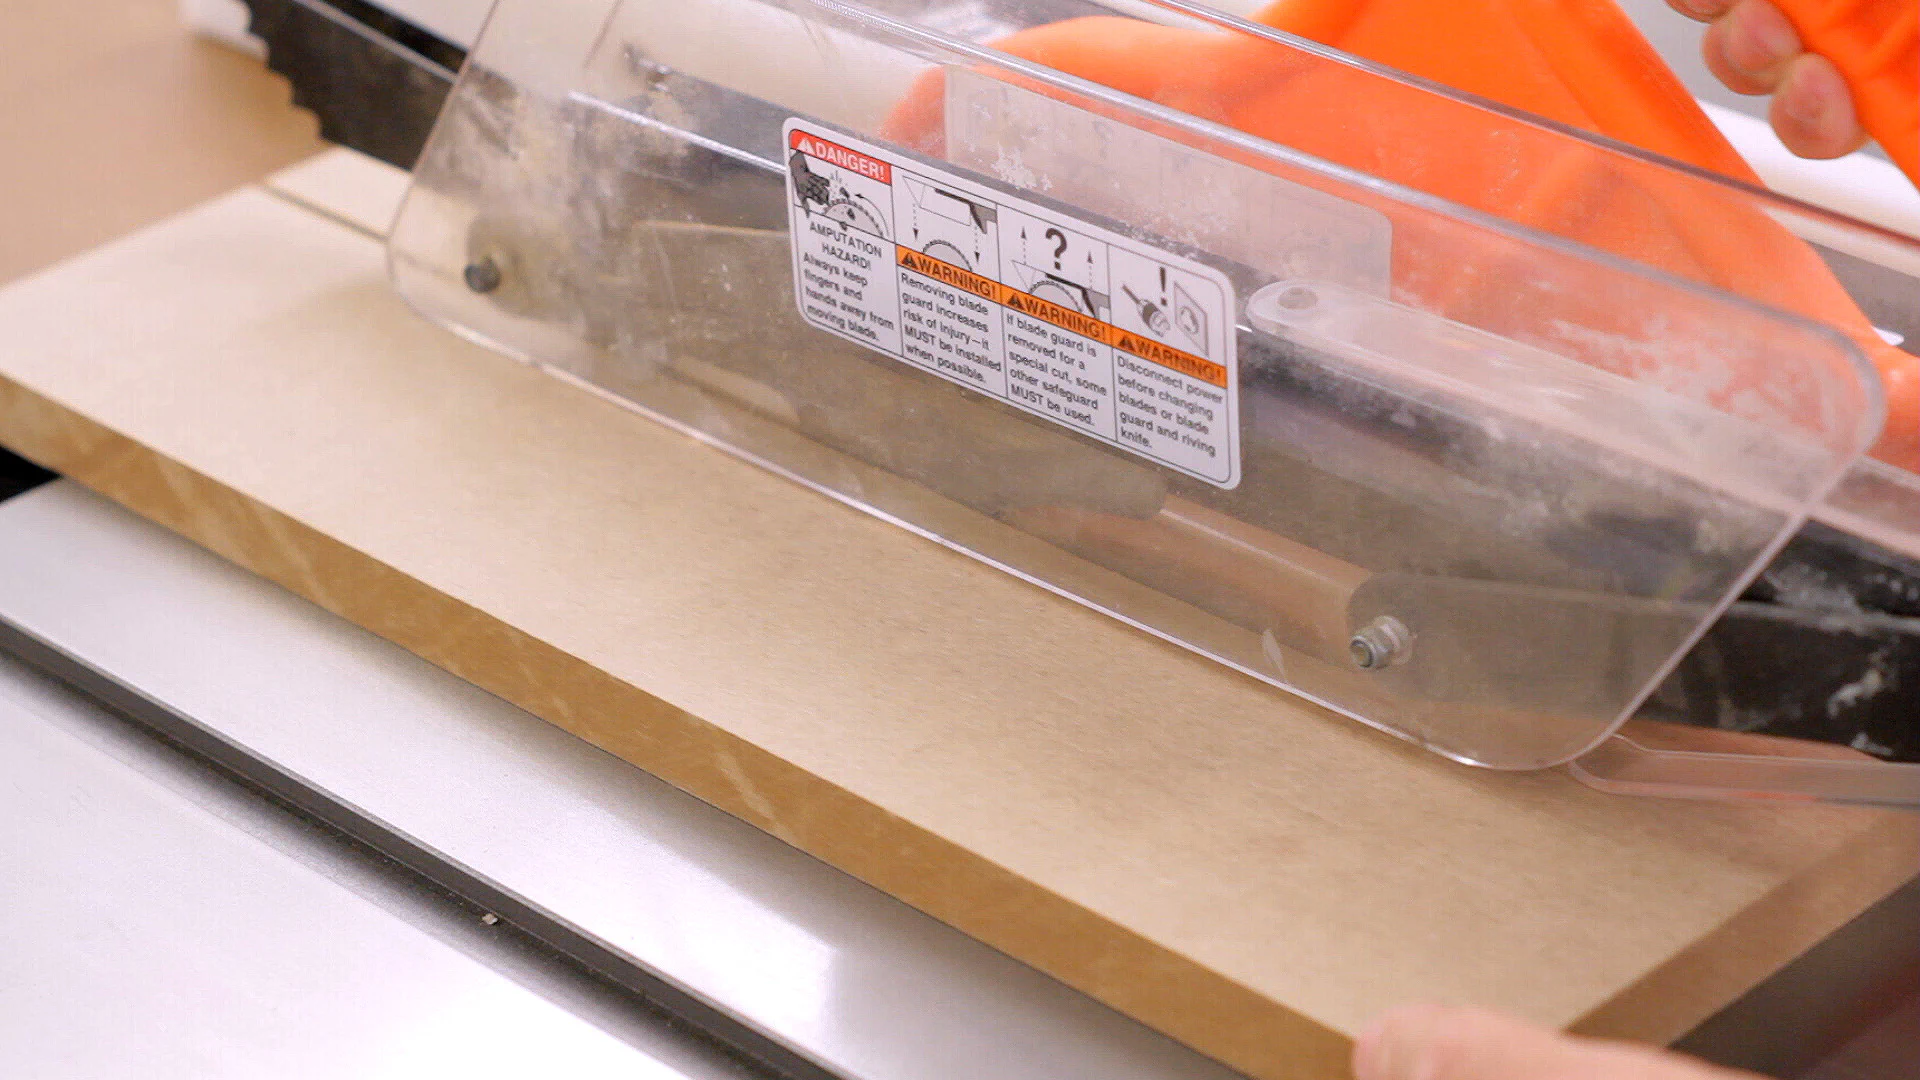
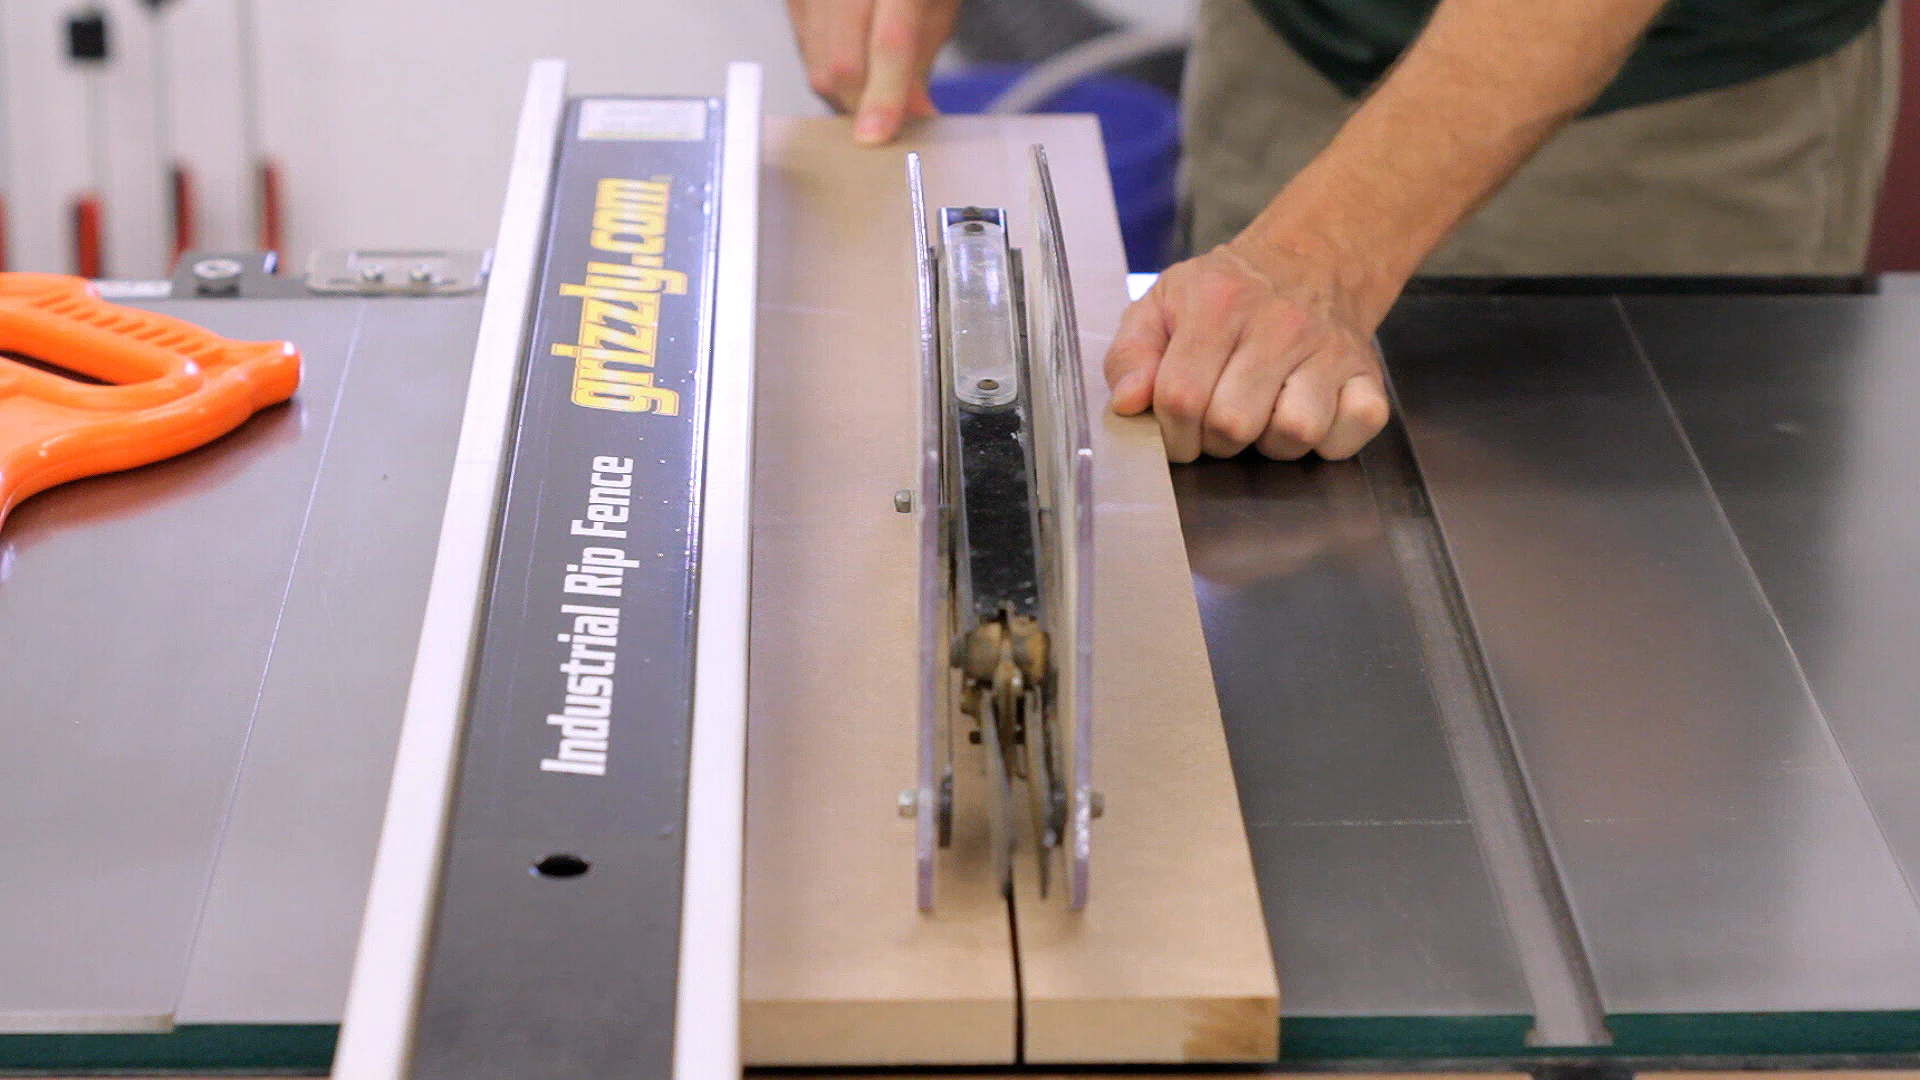
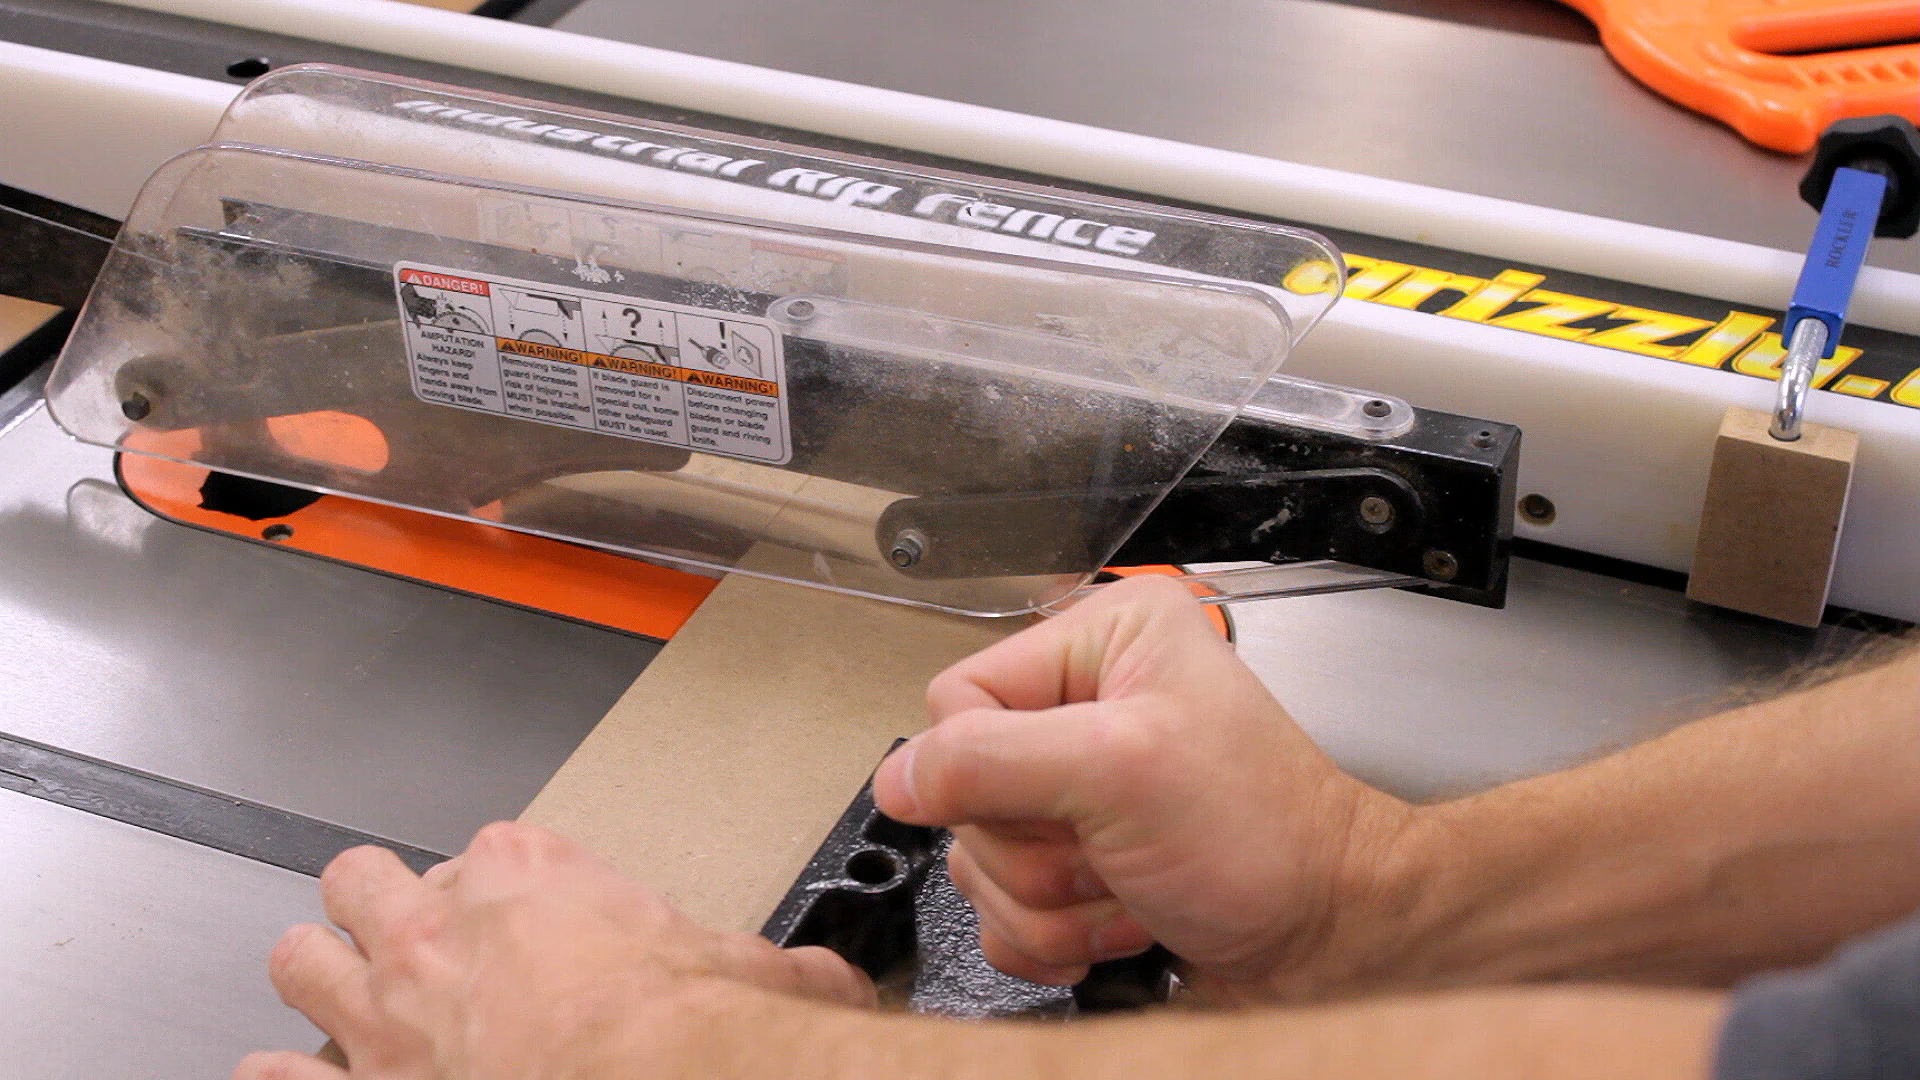
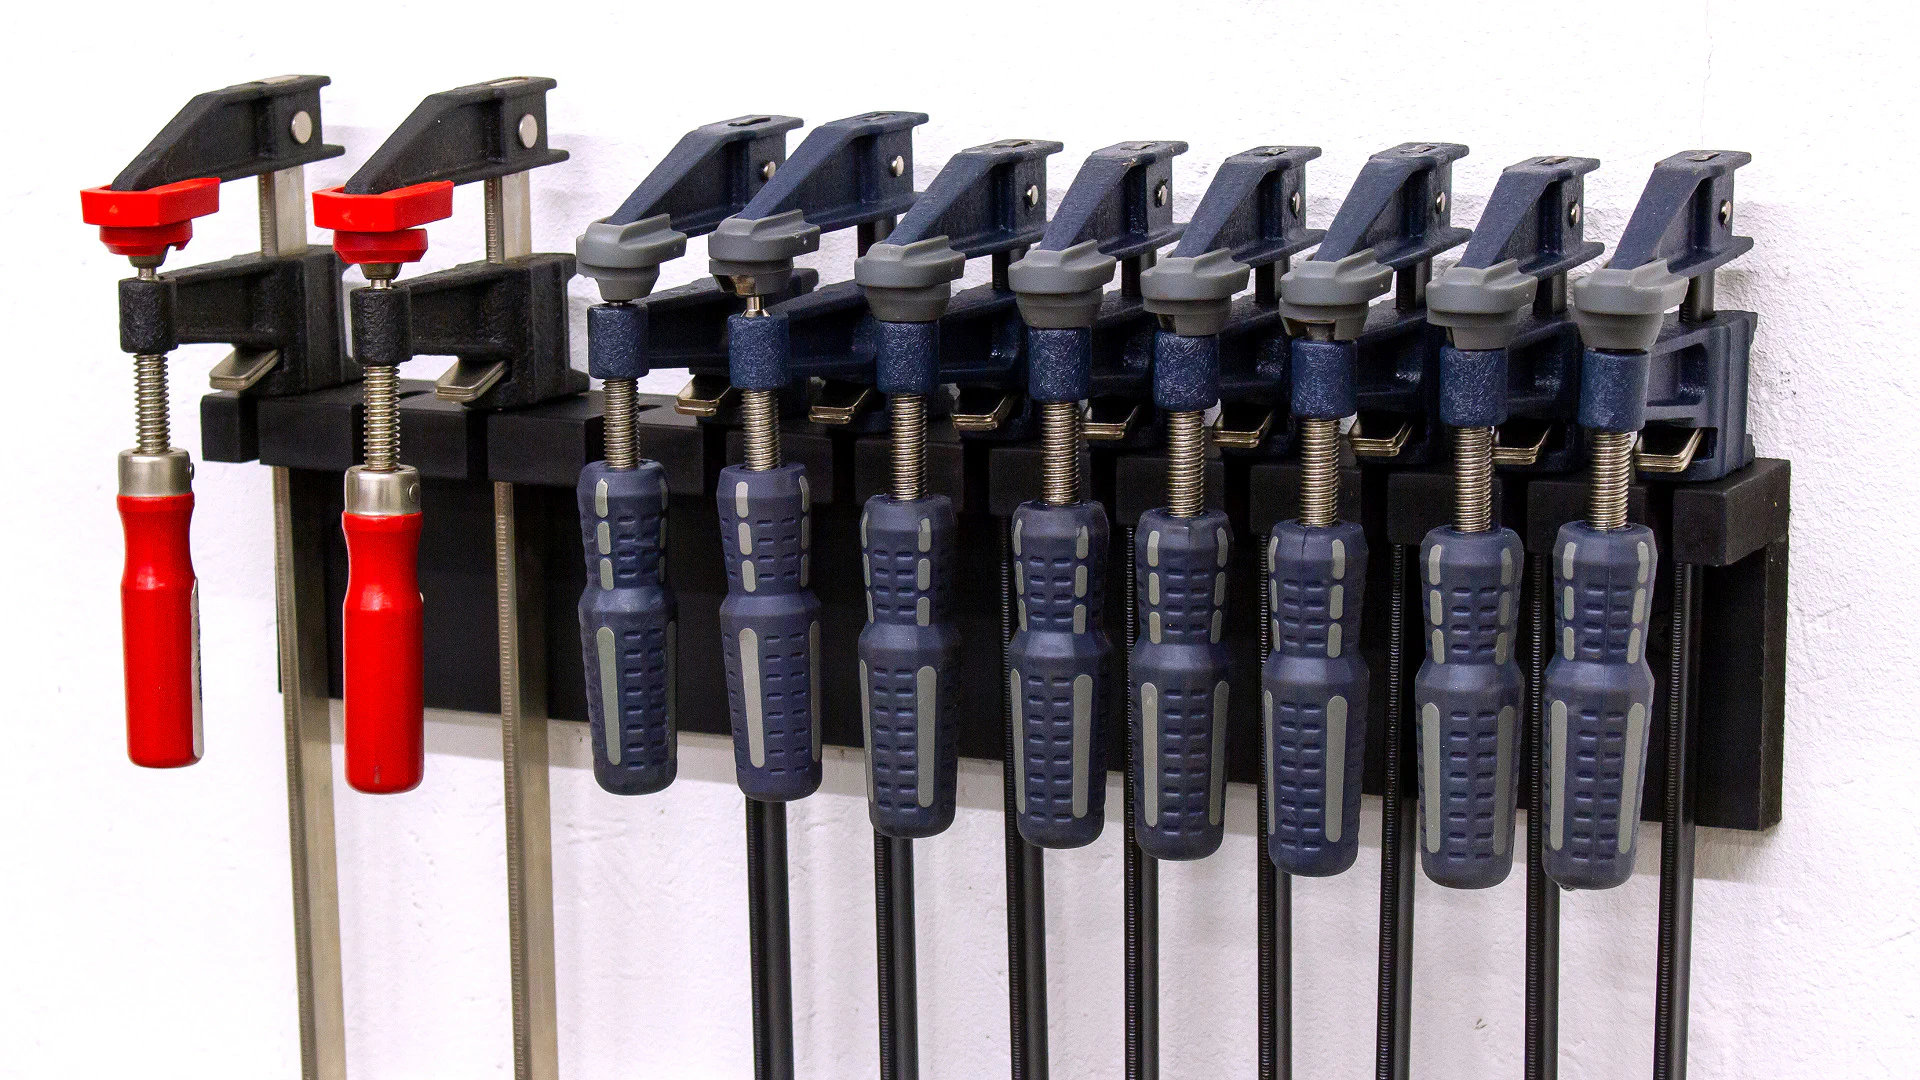
The first pair of clamp racks will hold 12 smaller F-Clamps each. I started these by cutting a few pieces of scrap 3/4" MDF to length and width at the table saw.
![A piece of MDF is cut on a table saw.](/build-three-clamp-racks-from-scraps/images/cutting-small-rack-parts_hude4fd1d1f89f939c39d7e93a70b42ecc_607495_704x704_fit_q80_h2_mitchellnetravali.webp)
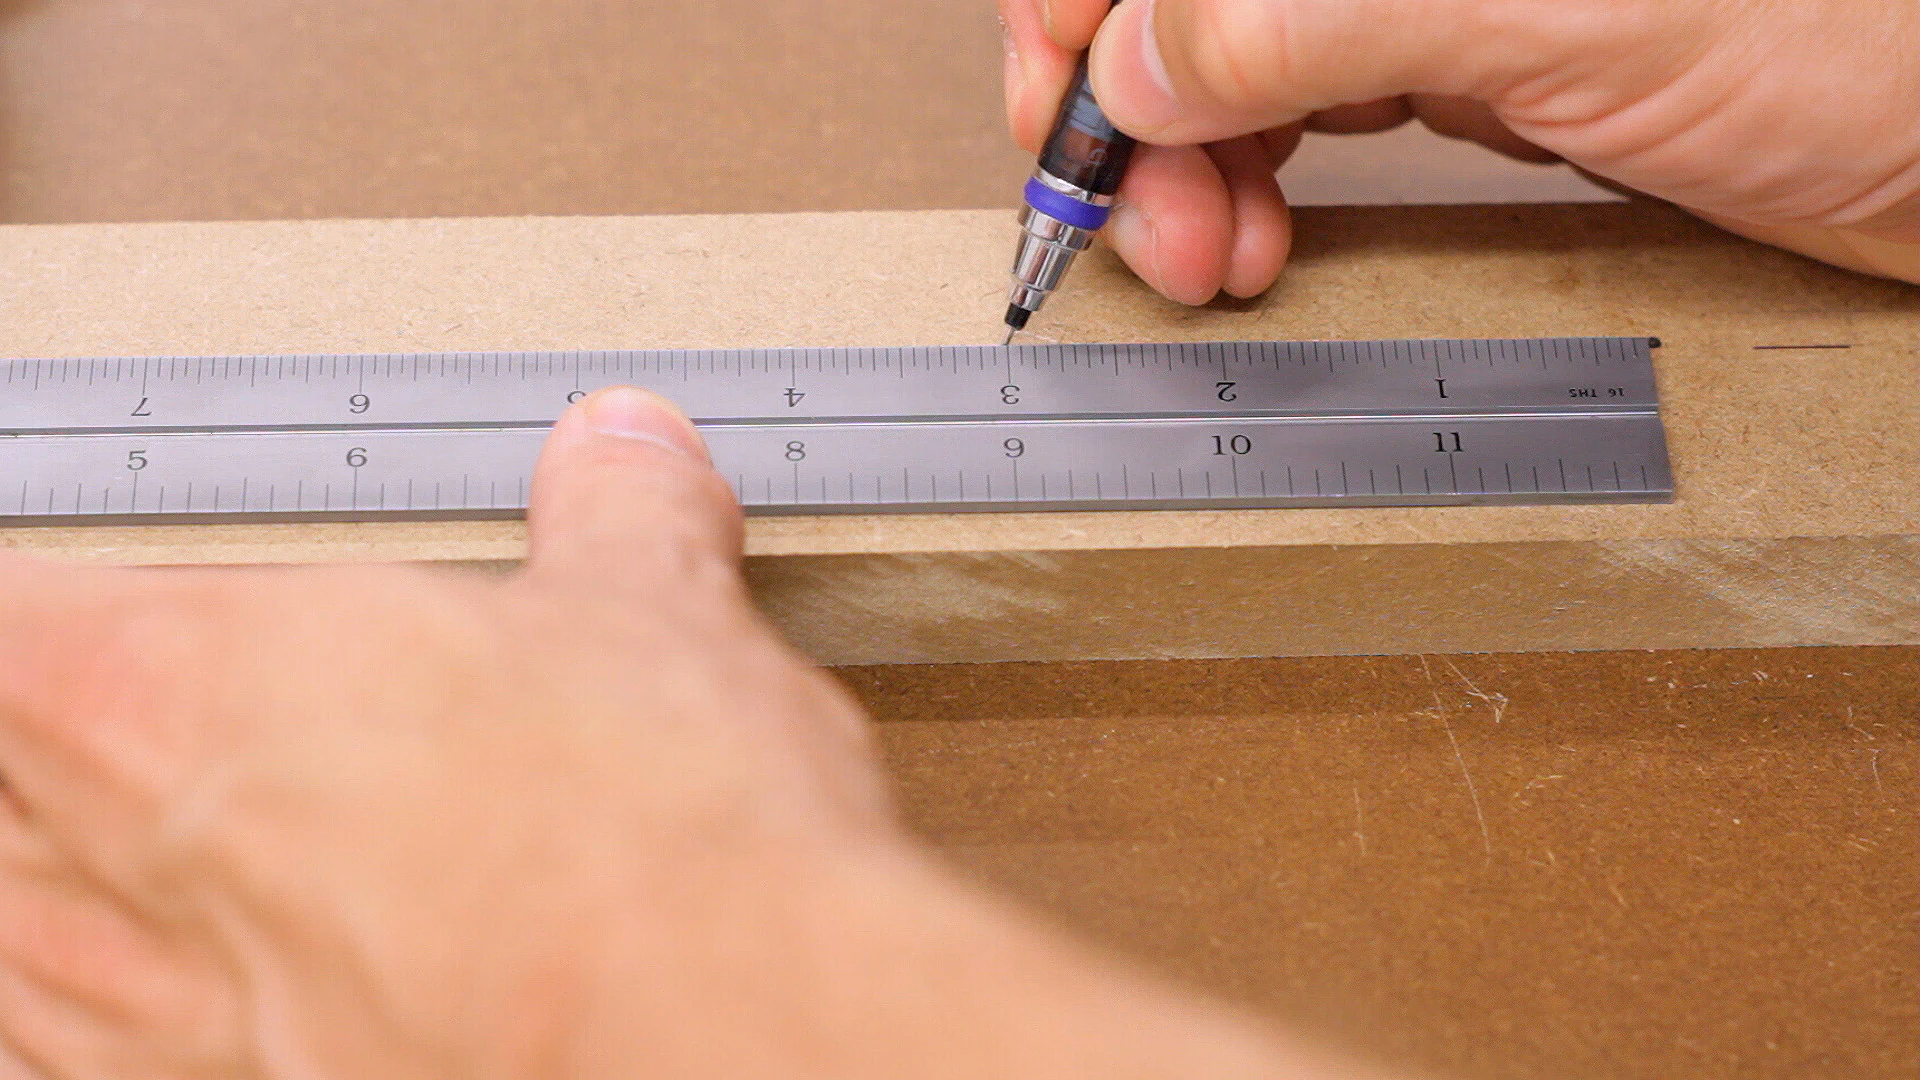
I then marked where the mounting screws will go on the back piece based on the 16" stud spacing in my shop. I also marked the location of the rear of each slot on the top piece.
![A pencil and square are used to mark on a piece of MDF.](/build-three-clamp-racks-from-scraps/images/marking-mounting-holes_hucc592437218371d3813159016b957a04_736024_348x348_fit_q80_h2_mitchellnetravali.webp)
![A pencil and ruler are used to mark on a piece of MDF.](/build-three-clamp-racks-from-scraps/images/marking-slot-holes_hu0c4221acad29bc58d3d8ad717c0caa62_733436_348x348_fit_q80_h2_mitchellnetravali.webp)
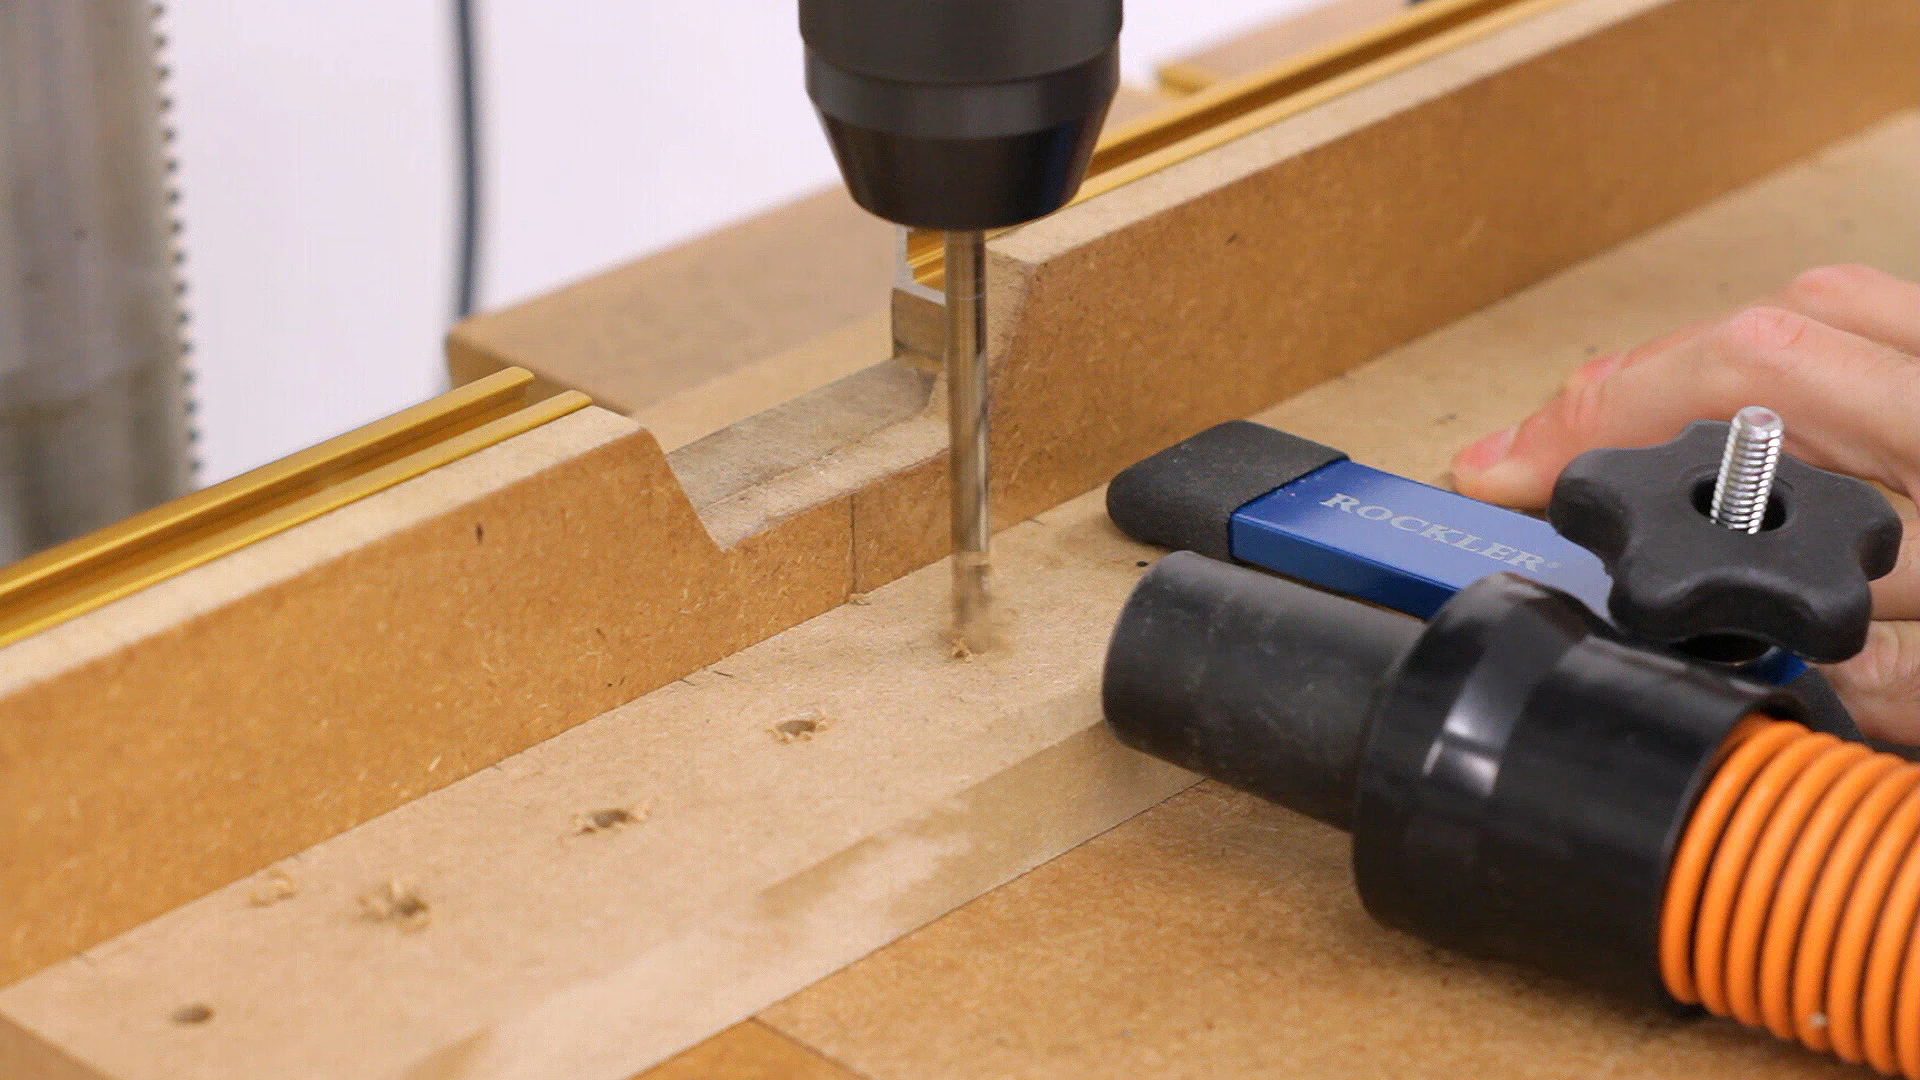
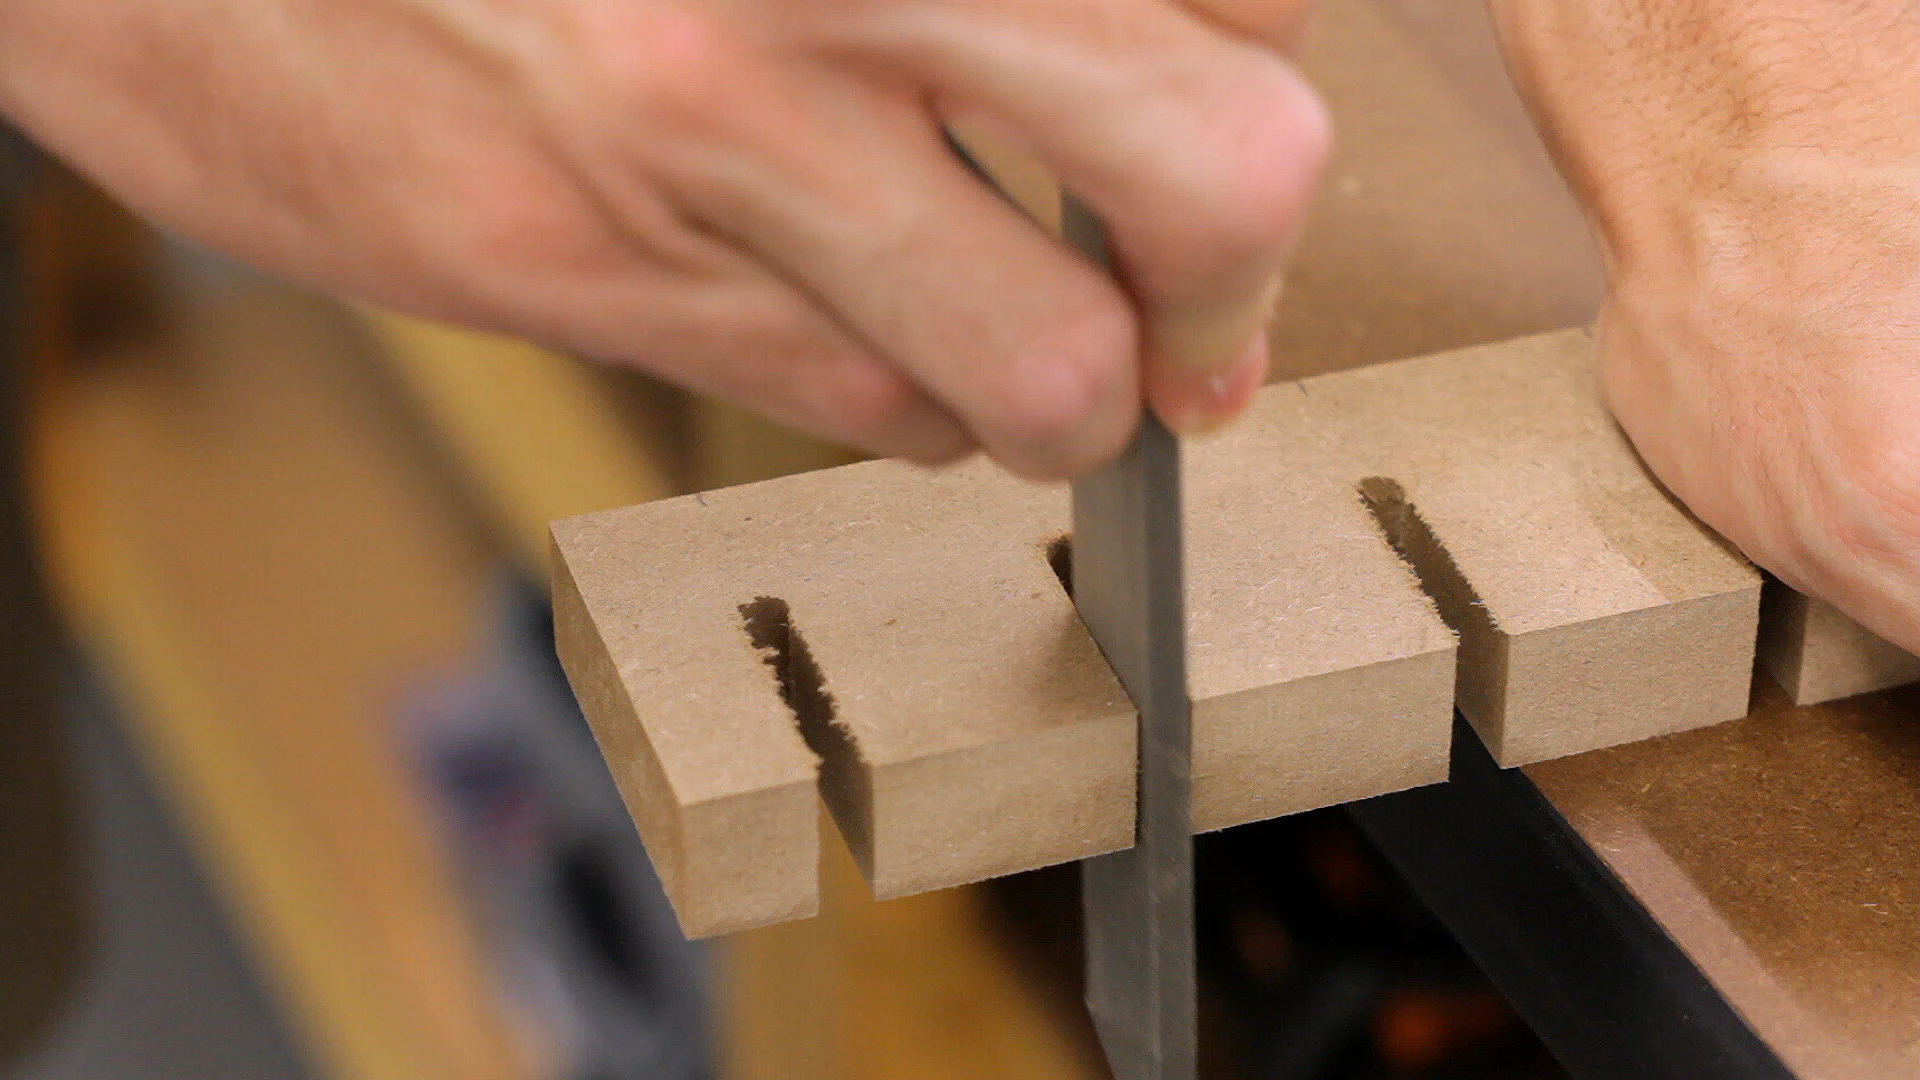
Next, I drilled the slot holes in the top using a bit that was just a little larger than the width of the bar on the largest clamp.
![A drill press is used to drill holes in a piece of MDF.](/build-three-clamp-racks-from-scraps/images/drilling-slot-holes_hueb839104d7f996bce4679a6b2d858e12_709455_704x704_fit_q80_h2_mitchellnetravali.webp)
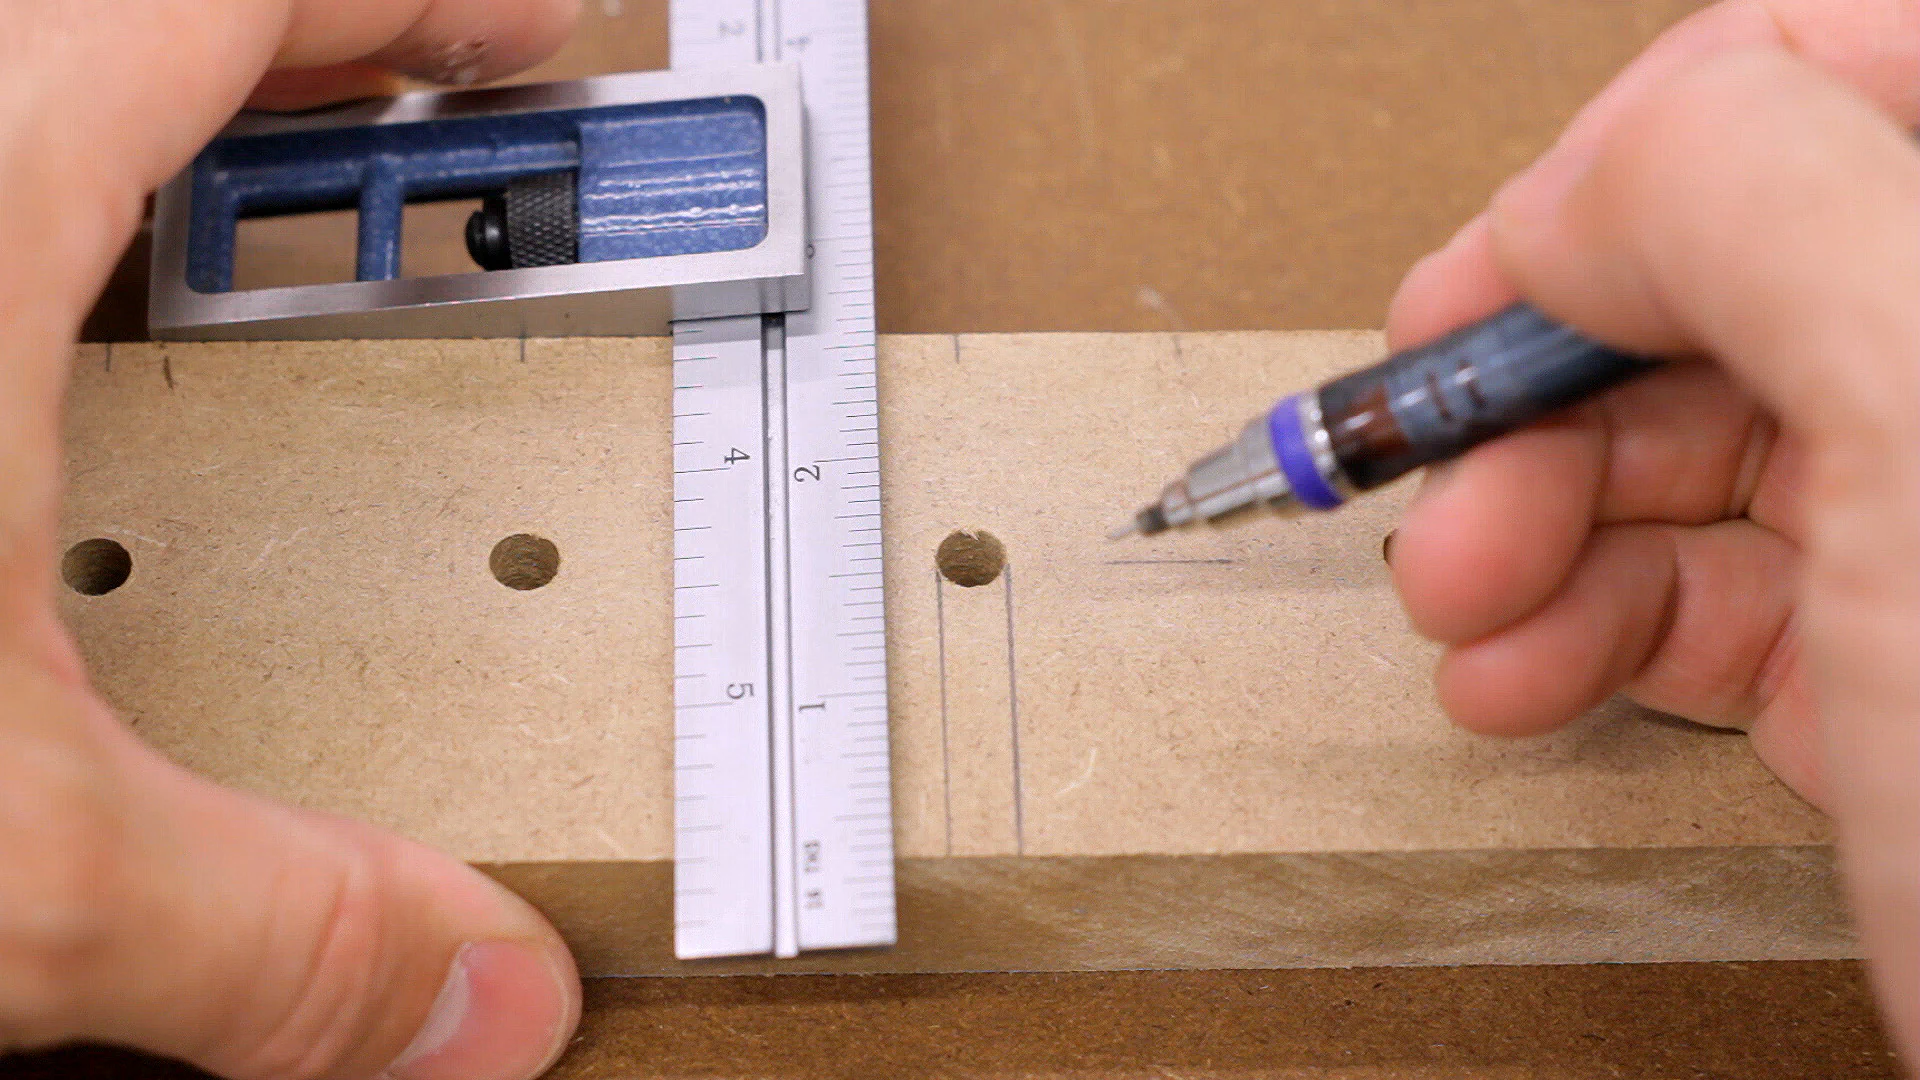
After marking the slot locations with a square, I headed over to the band saw and cut the slots out.
![A square is used to mark slot locations.](/build-three-clamp-racks-from-scraps/images/tracing-slot-locations_hu70788d7b6d9092b8c13fa216d4df8a95_721795_348x348_fit_q80_h2_mitchellnetravali.webp)
![A bandsaw is used to cut slots in a piece of MDF.](/build-three-clamp-racks-from-scraps/images/cutting-slots_hu0e1d9130698d7733bc97253475b0f042_663951_348x348_fit_q80_h2_mitchellnetravali.webp)
Once that was finished I cleaned up the bottoms of the slots with a file and some sandpaper.
![A file is used to clean the edge of a slot in MDF.](/build-three-clamp-racks-from-scraps/images/sanding-slots_hud878d77df58cce59a534f5a57a8c7906_584562_704x704_fit_q80_h2_mitchellnetravali.webp)
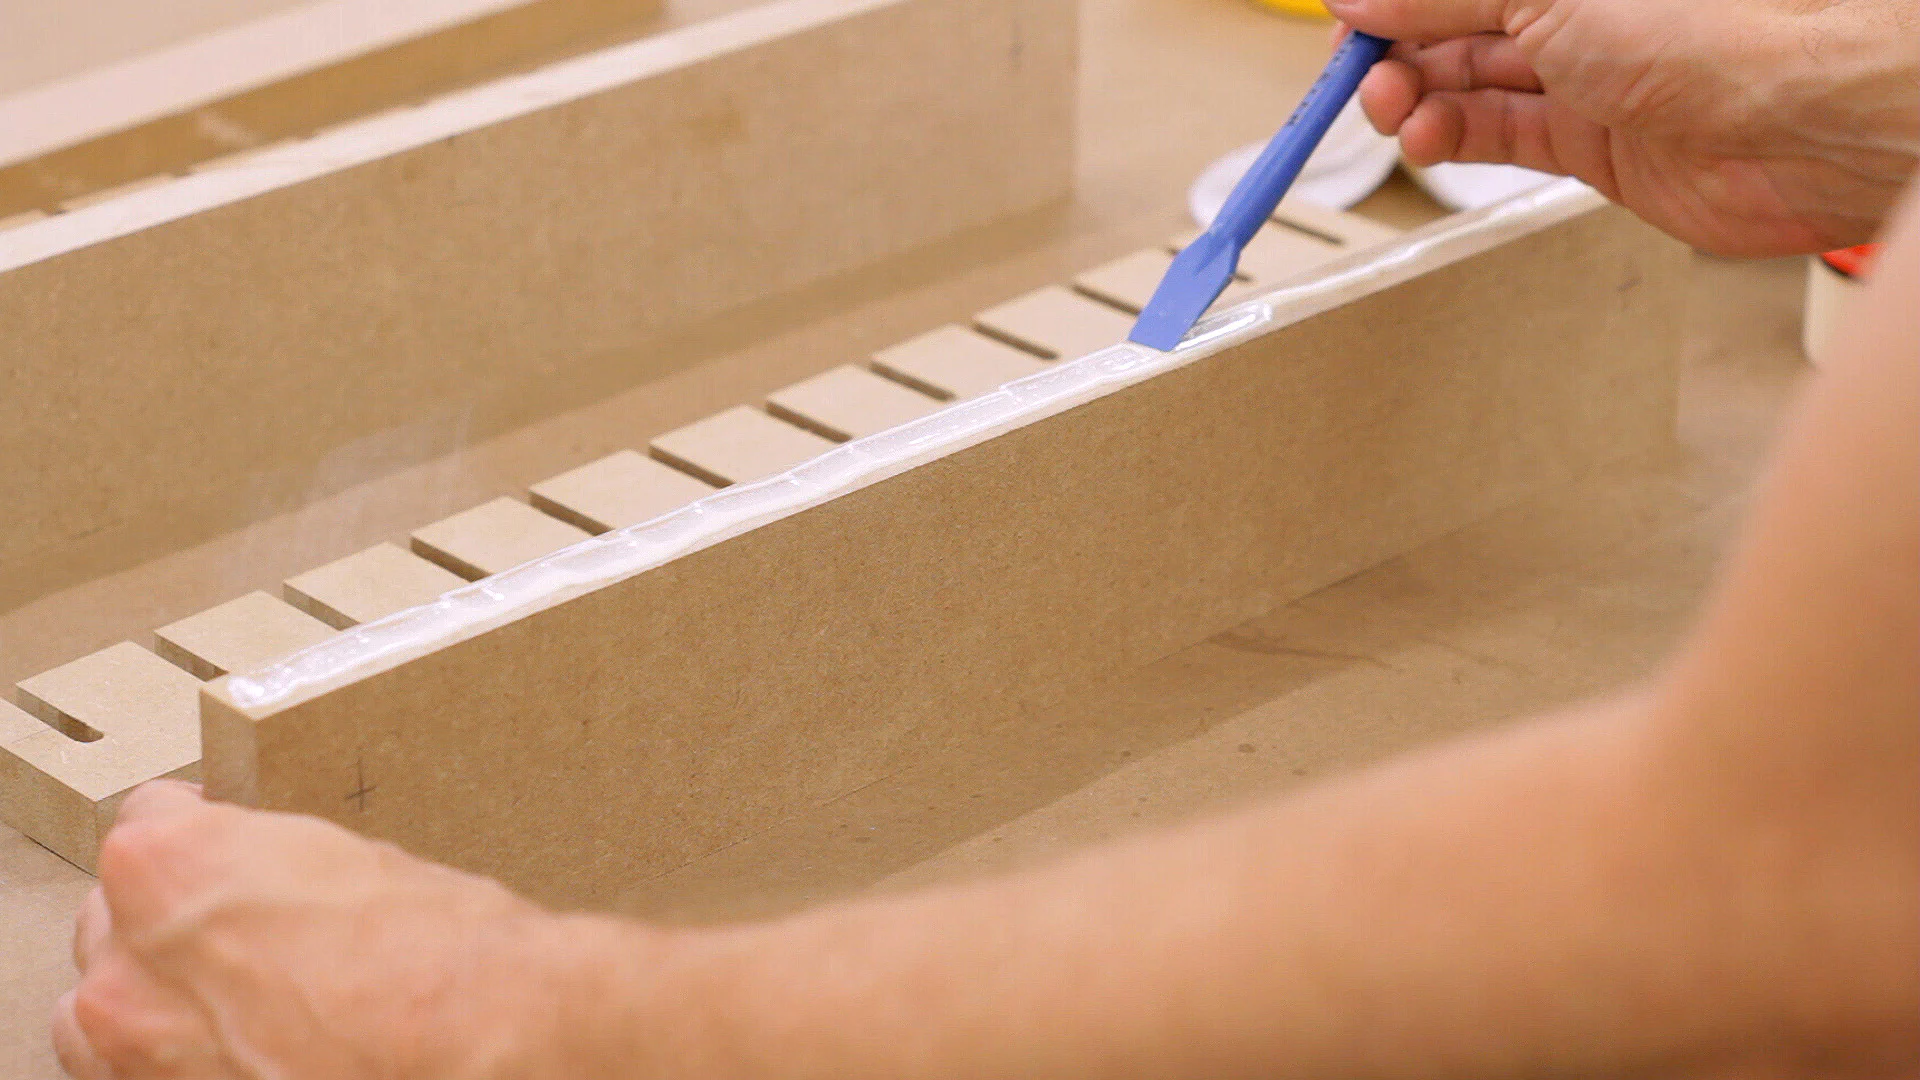
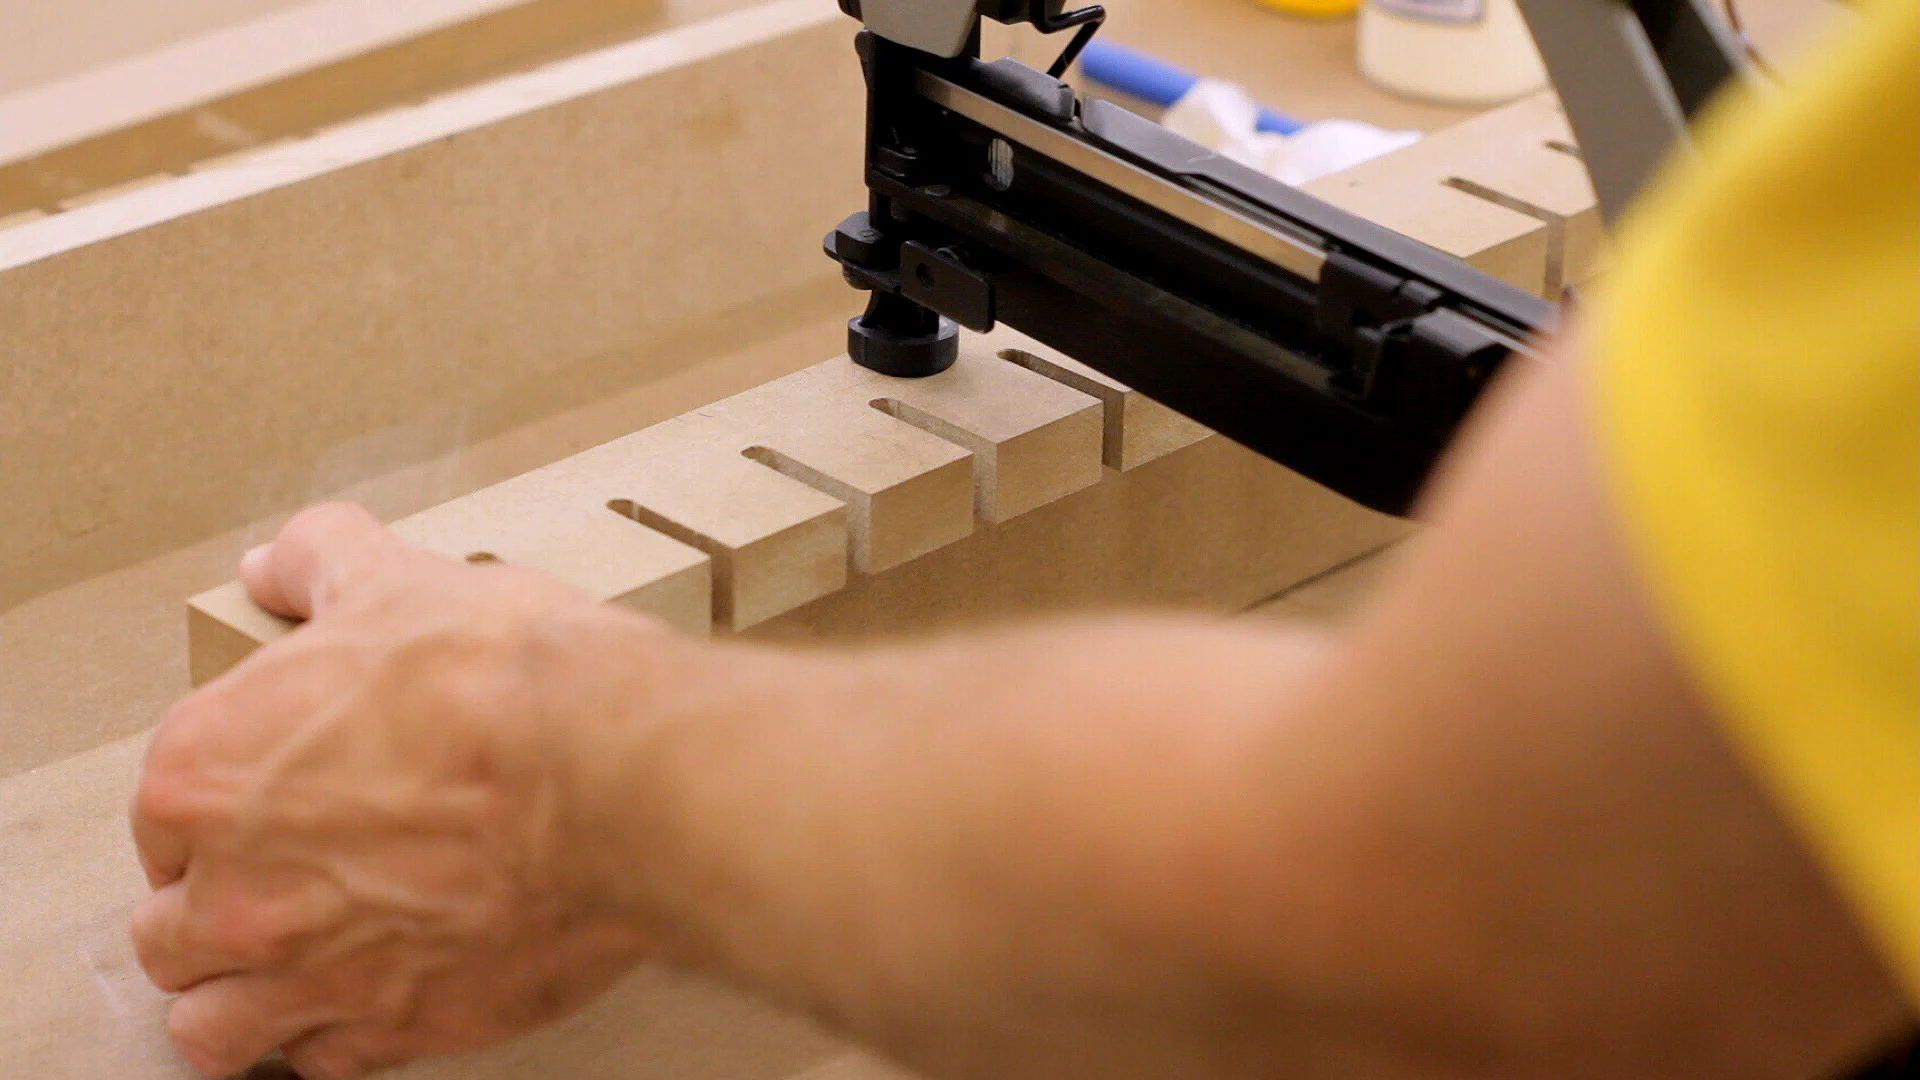
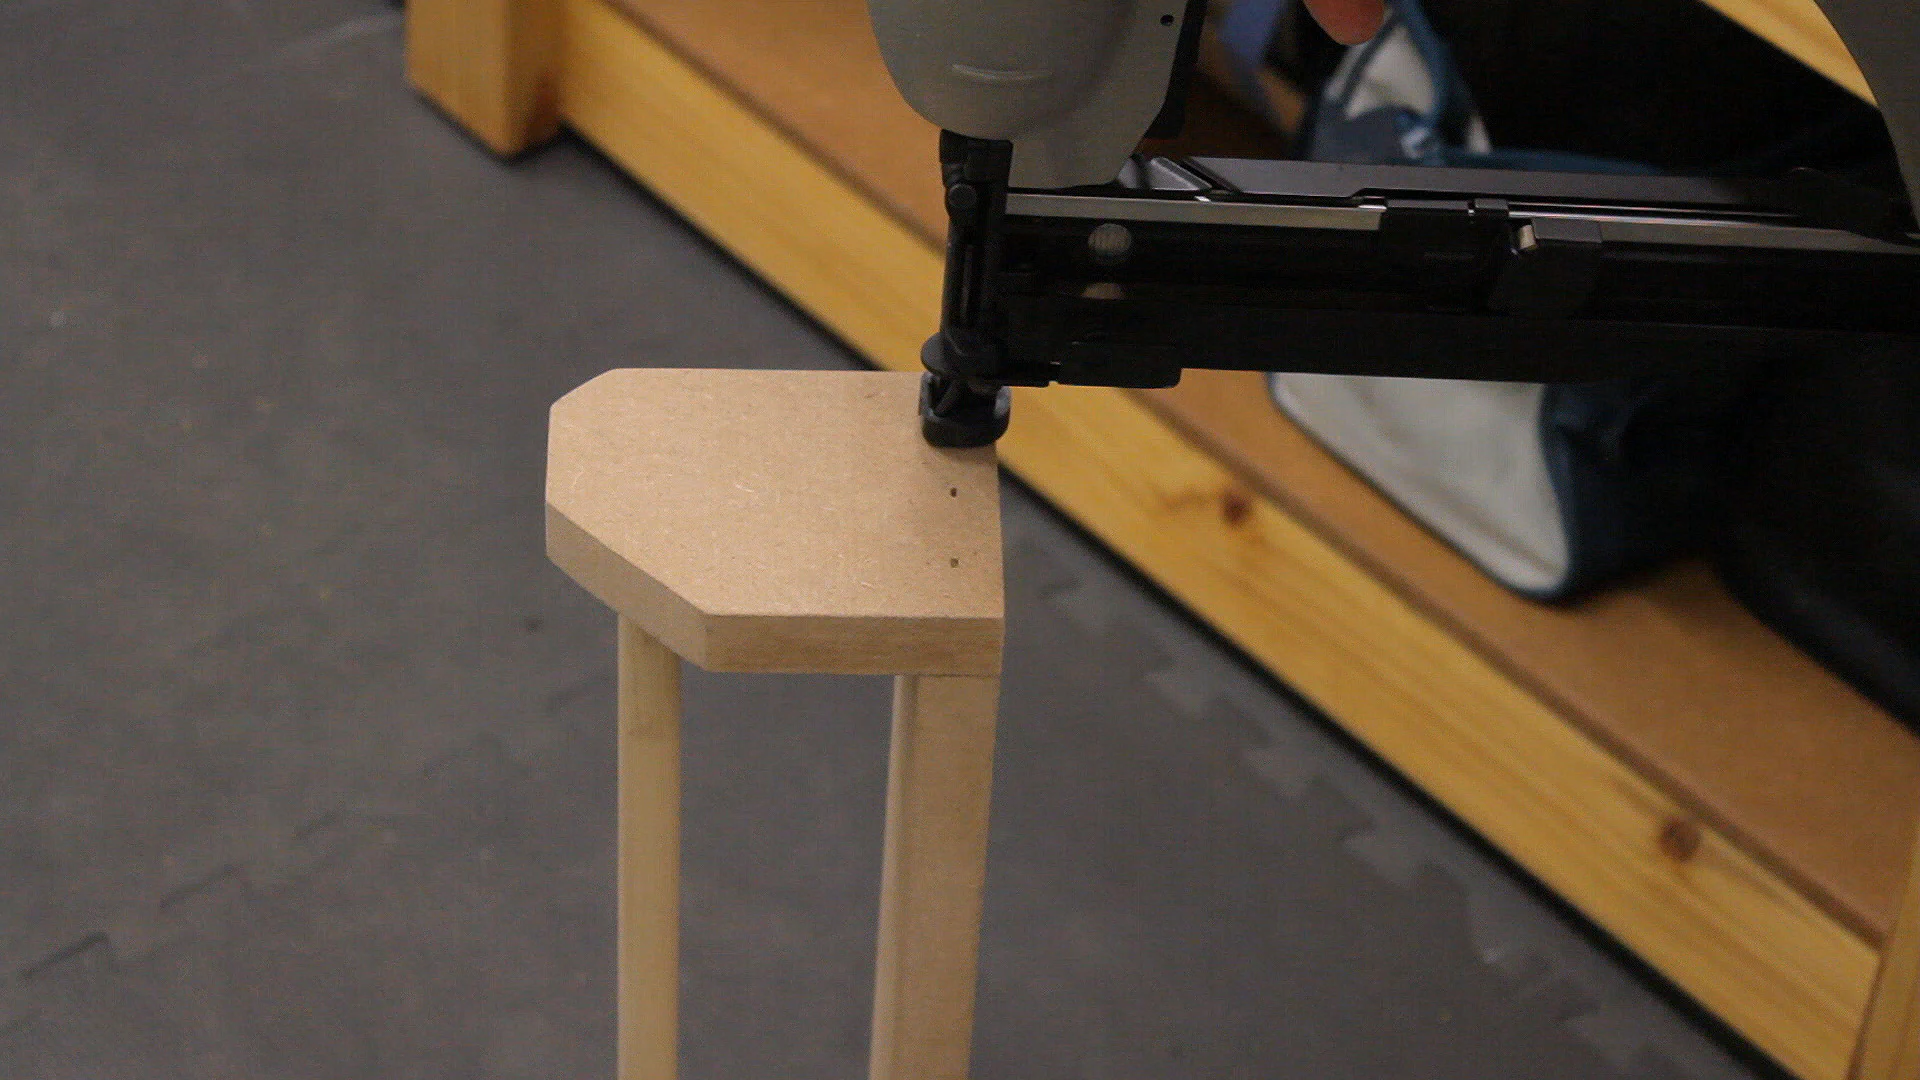
Assembly was pretty simple. I ran a bead of glue along the top of the back piece and used several 2" nails in my nail gun to attach the top to the back.
![Glue is applied to the edge of a piece of MDF.](/build-three-clamp-racks-from-scraps/images/applying-glue_hu770435a7232bb49a9085fc1a2ee9ab03_599099_348x348_fit_q80_h2_mitchellnetravali.webp)
![A nailgun is used to attach the top to the back.](/build-three-clamp-racks-from-scraps/images/nailing-top_hu4f647ccdc939637d043da038228caa51_529682_348x348_fit_q80_h2_mitchellnetravali.webp)
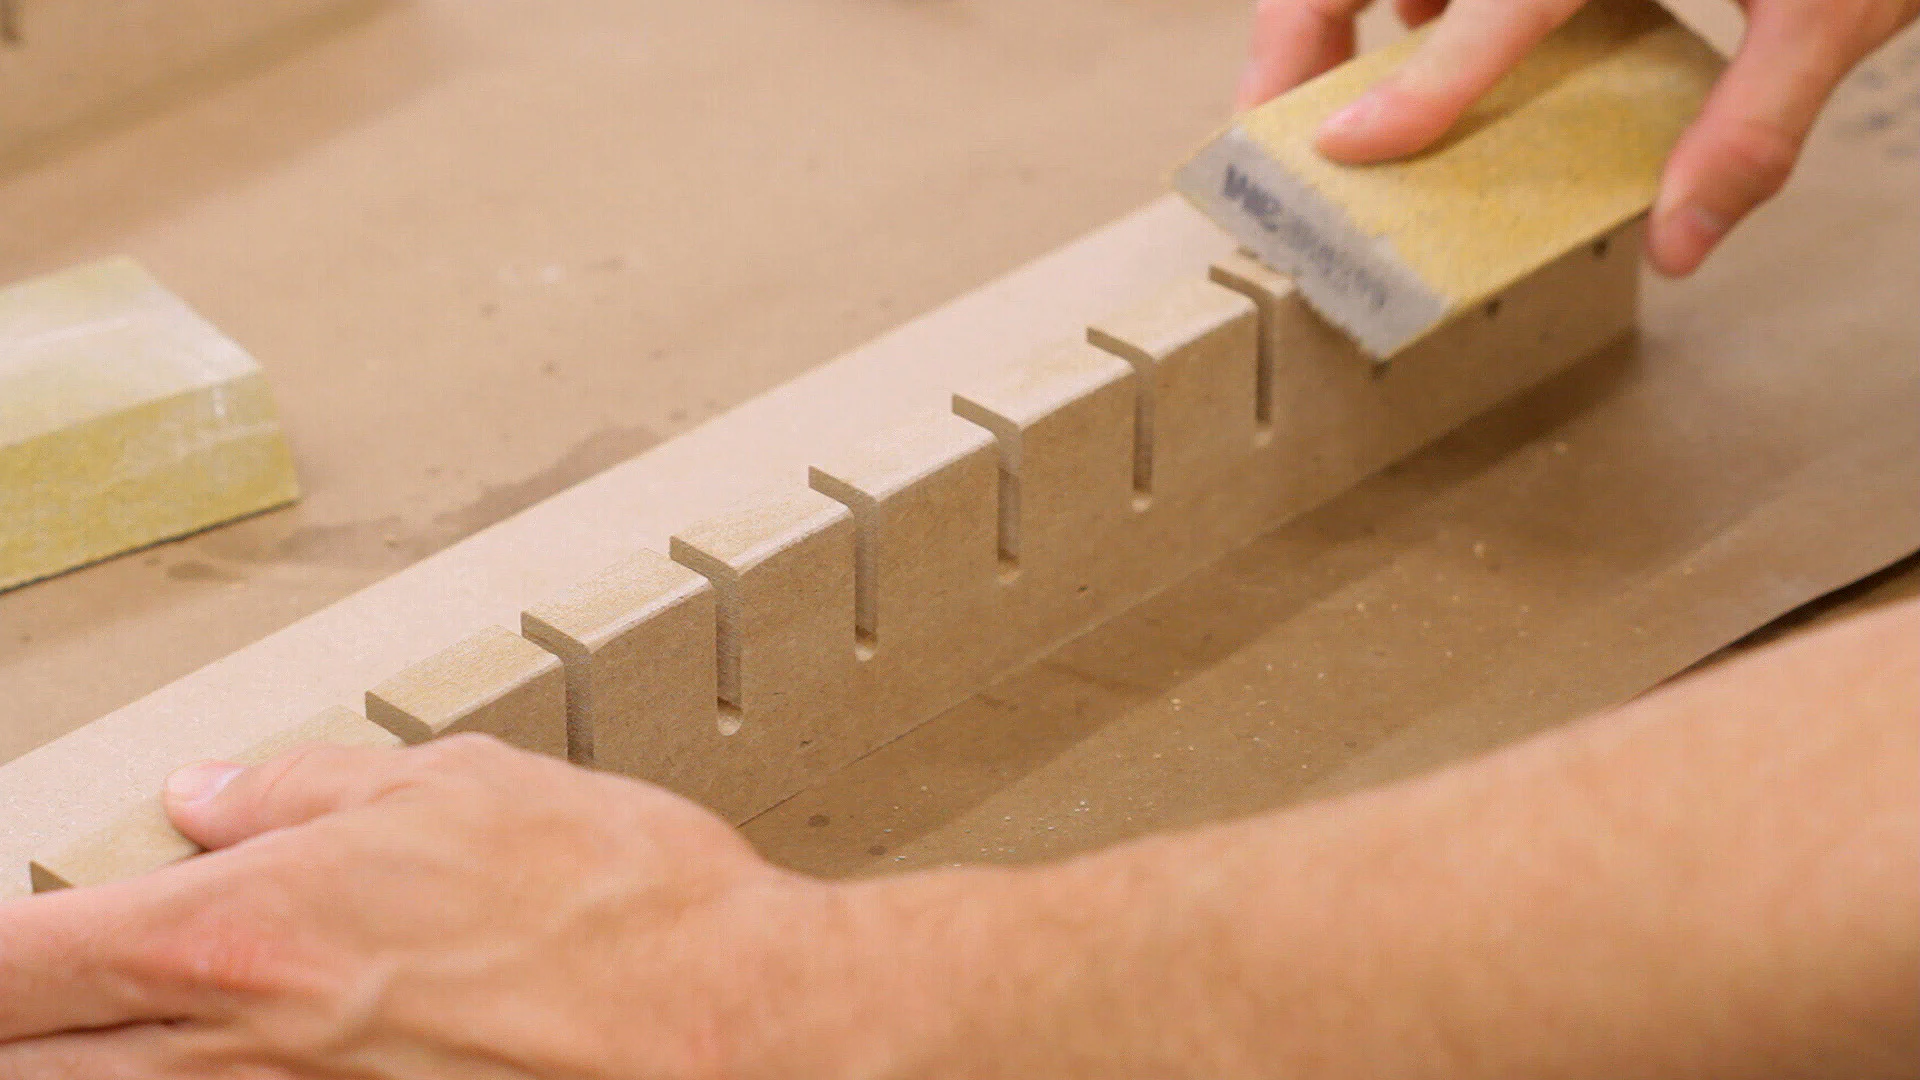
I then counter-sunk and predrilled holes for the mounting screws and rounded over the front edges a bit with a sanding block.
![A drill press is used to make counter-sunk holes in the back of the rack.](/build-three-clamp-racks-from-scraps/images/counter-sinking-mounting-holes_hubbb5a766998716348ea019fc7dcf49e9_695364_348x348_fit_q80_h2_mitchellnetravali.webp)
![A sanding pad is used on the front edge of the rack.](/build-three-clamp-racks-from-scraps/images/sanding-edges_hu079515d8a73fa1f96bc55eae7df75607_525687_348x348_fit_q80_h2_mitchellnetravali.webp)
To finish the racks I used a couple of coats of spray paint and then mounted them to the wall with a pair of cabinet screws.
![A drill is used to insert a screw into the rack.](/build-three-clamp-racks-from-scraps/images/mounting-small-rack_hubecbd81e15e10ea72a82ad8c52a5e60e_439237_704x704_fit_q80_h2_mitchellnetravali.webp)
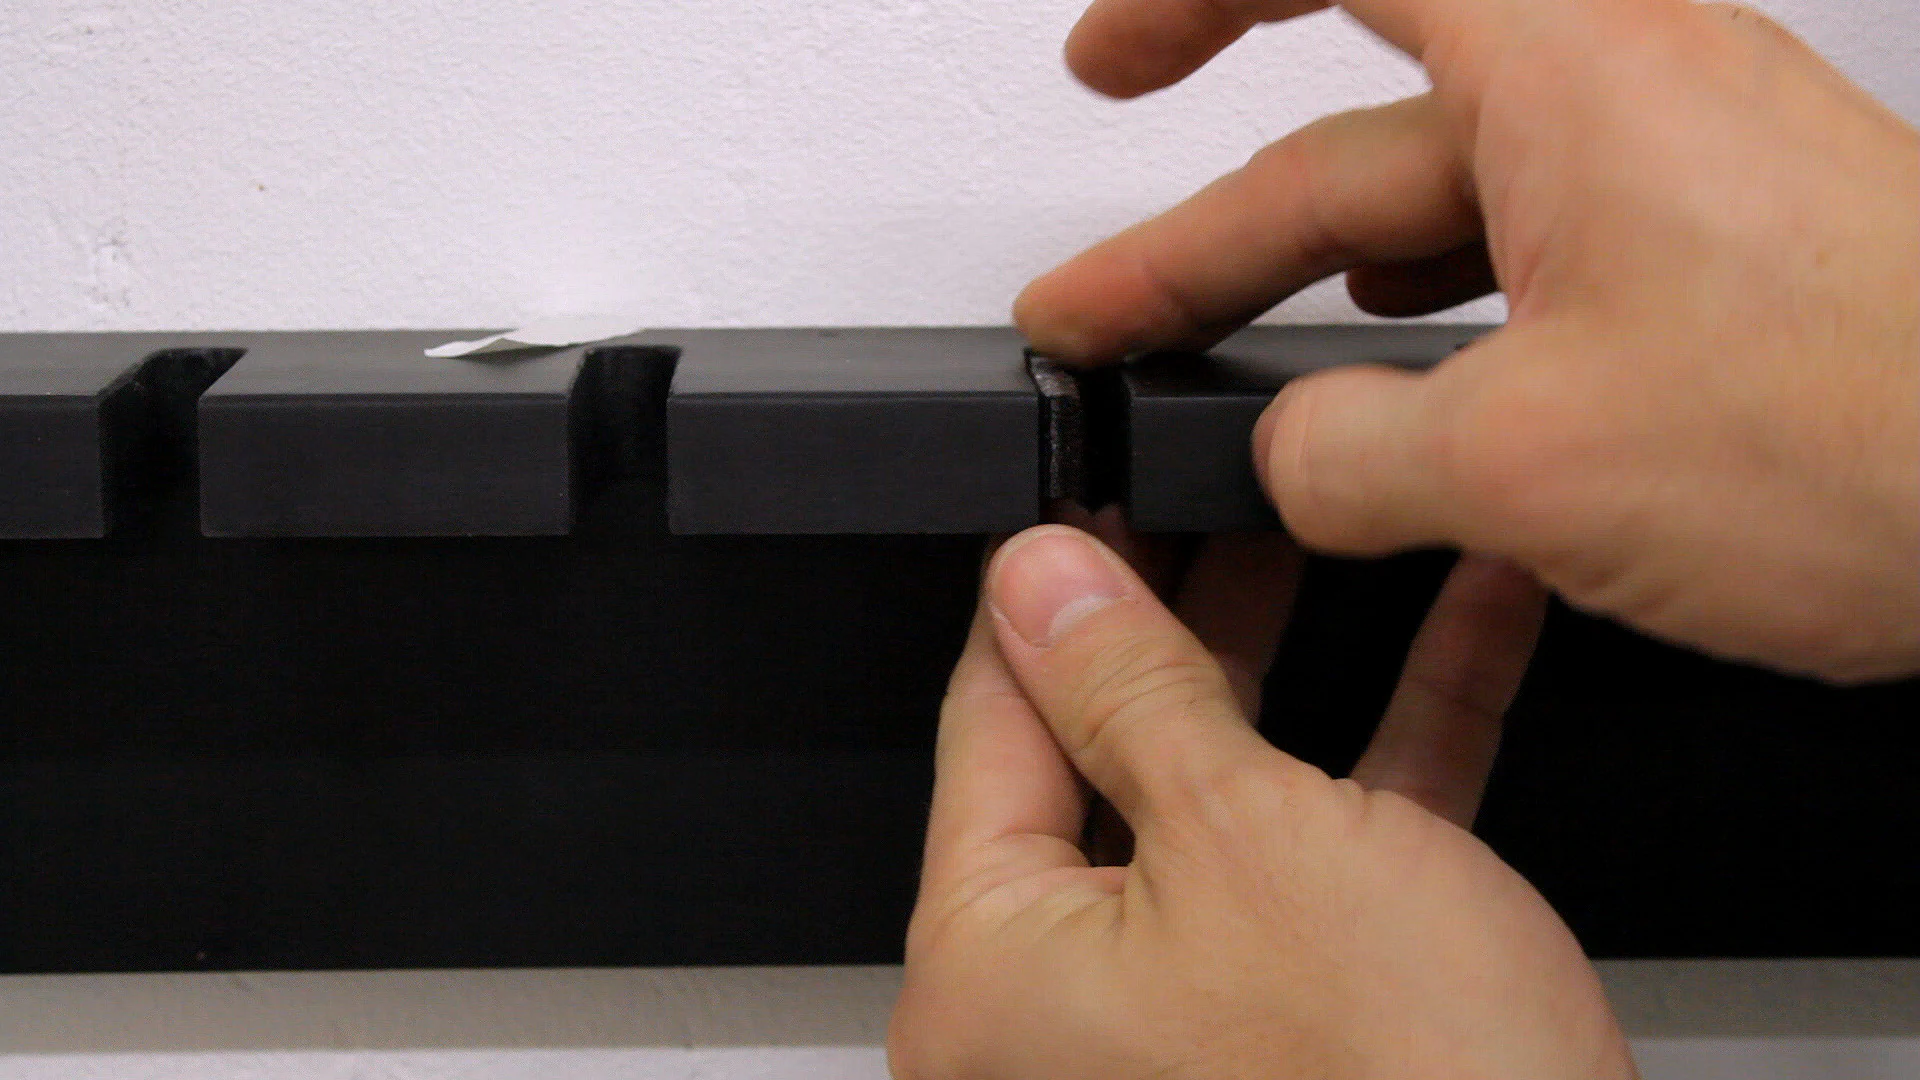
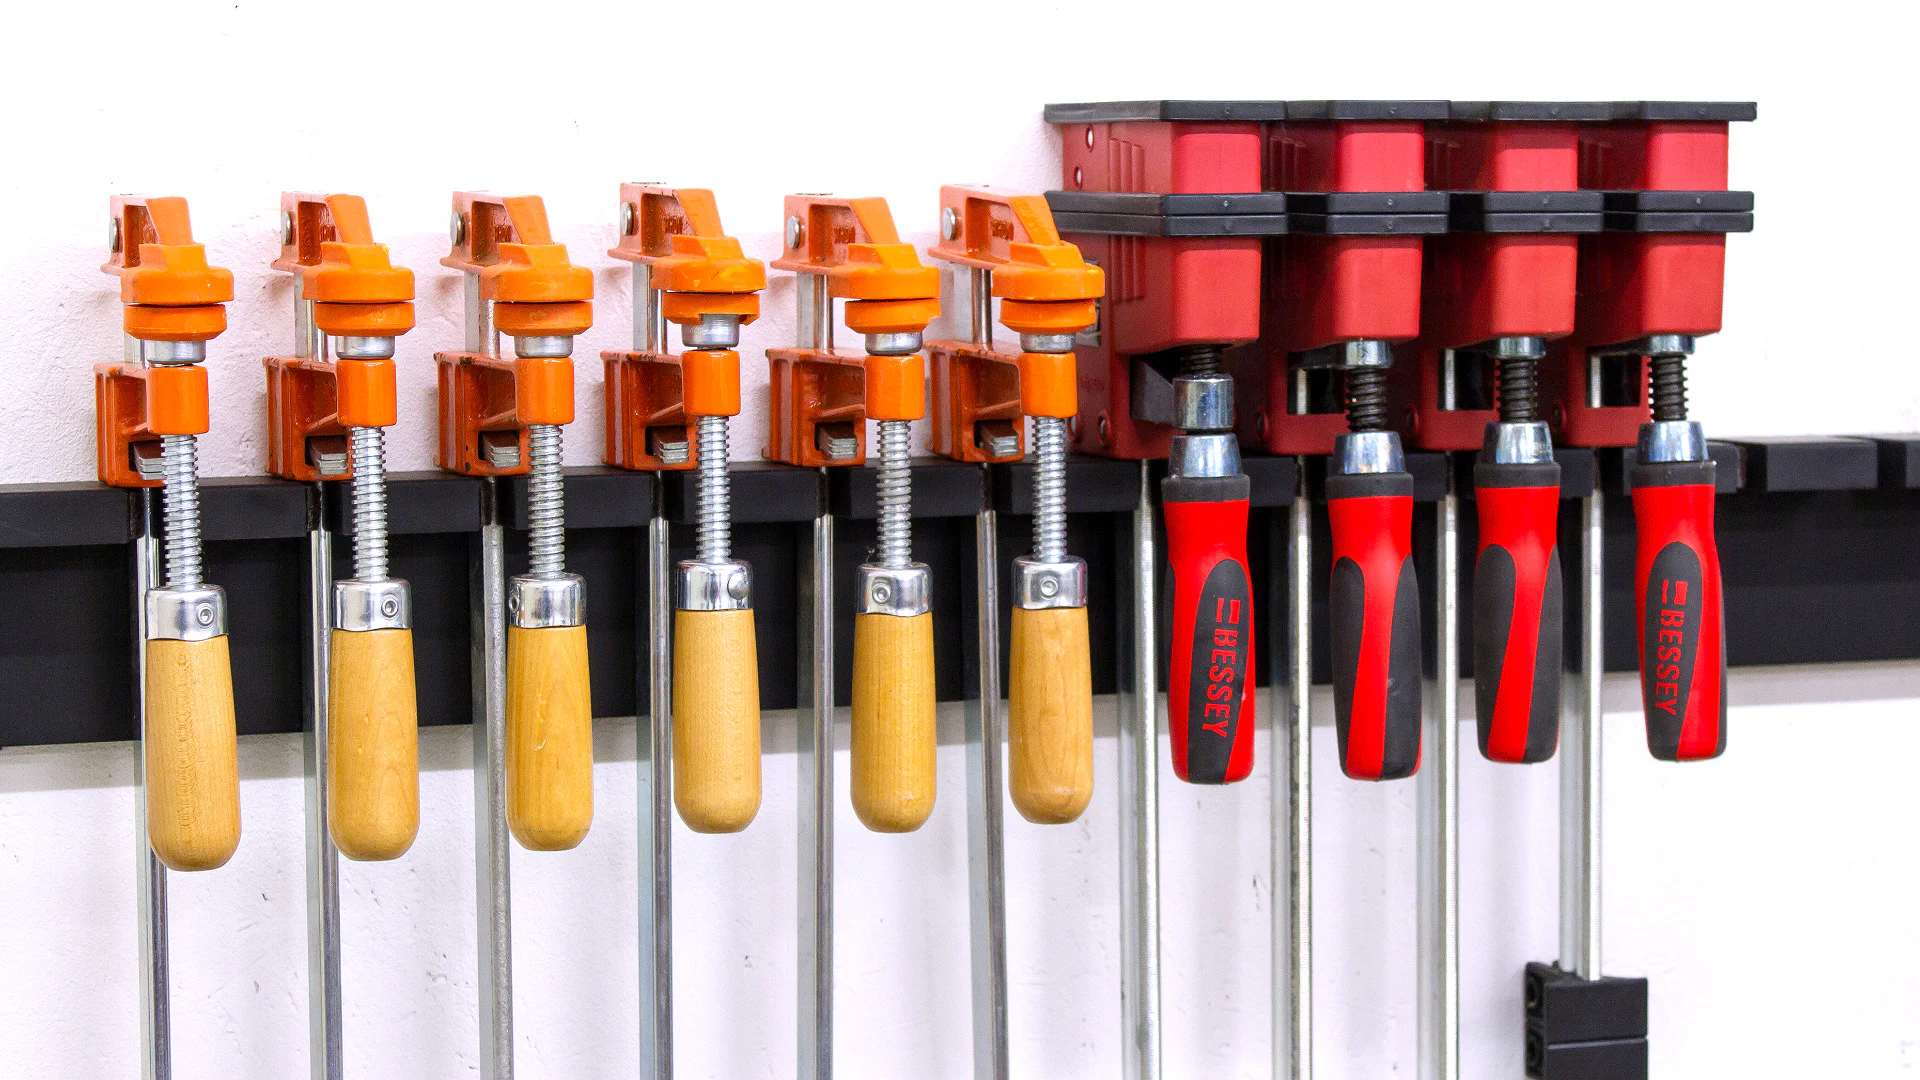
The second rack is just a longer version of the first, but it will hold 14 large F-Clamps including Bessey K-Body parallel clamps.
![A long piece of MDF is cut at the table saw.](/build-three-clamp-racks-from-scraps/images/cutting-large-rack-parts_hua29e65e9716050fc694cb79d75ba604c_620862_704x704_fit_q80_h2_mitchellnetravali.webp)
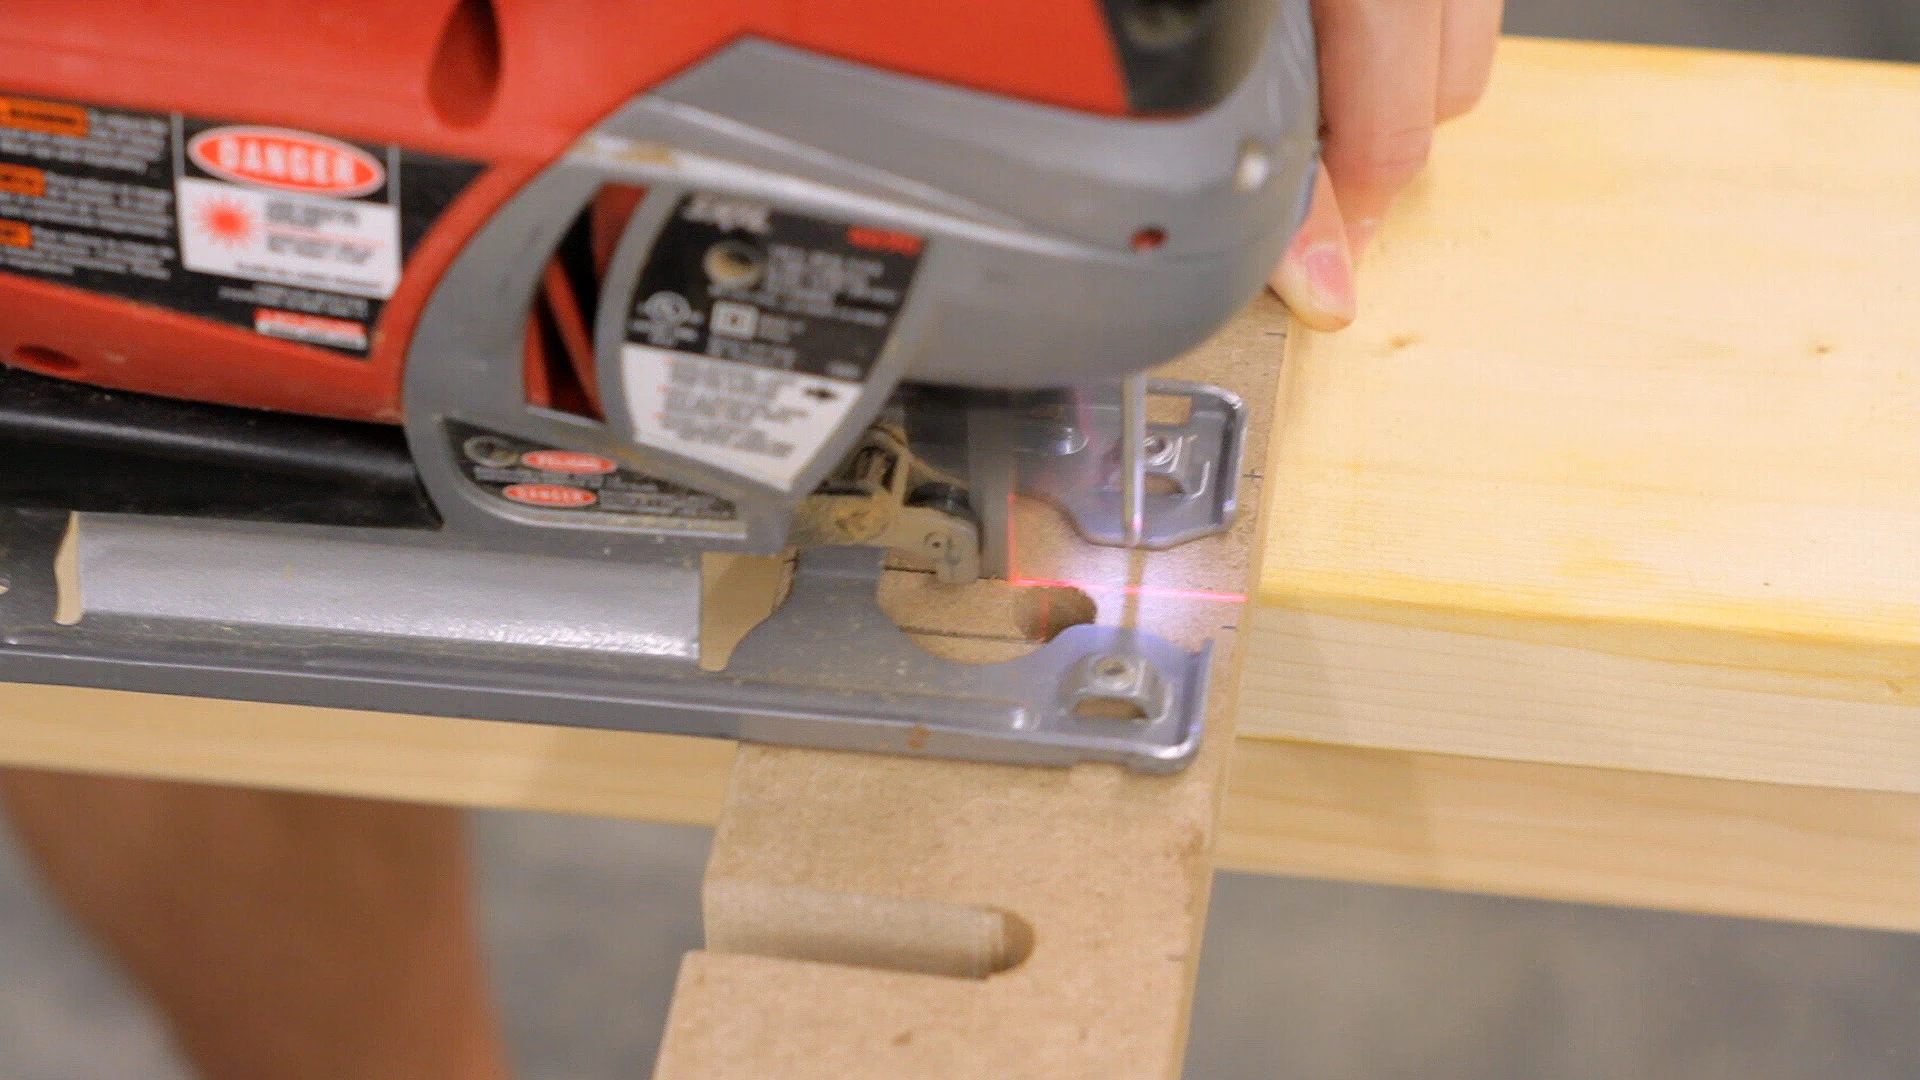
The main differences were the larger drill bit size used for the slots, some heavier duty mounting screws, and having to use a jigsaw to cut the center-most slots as the back was too long to fit through the bandsaw.
![A drill press is used to drill large holes in the top of the rack.](/build-three-clamp-racks-from-scraps/images/drilling-large-slot-holes_hue343bf27fc931fd73cc8ff5732b7bb6f_611156_348x348_fit_q80_h2_mitchellnetravali.webp)
![A jigsaw is used to cut slots in the top of the rack.](/build-three-clamp-racks-from-scraps/images/cutting-slots-jigsaw_hu39af0555ddbbaaedeaf7ac39a6eaaa47_616990_348x348_fit_q80_h2_mitchellnetravali.webp)
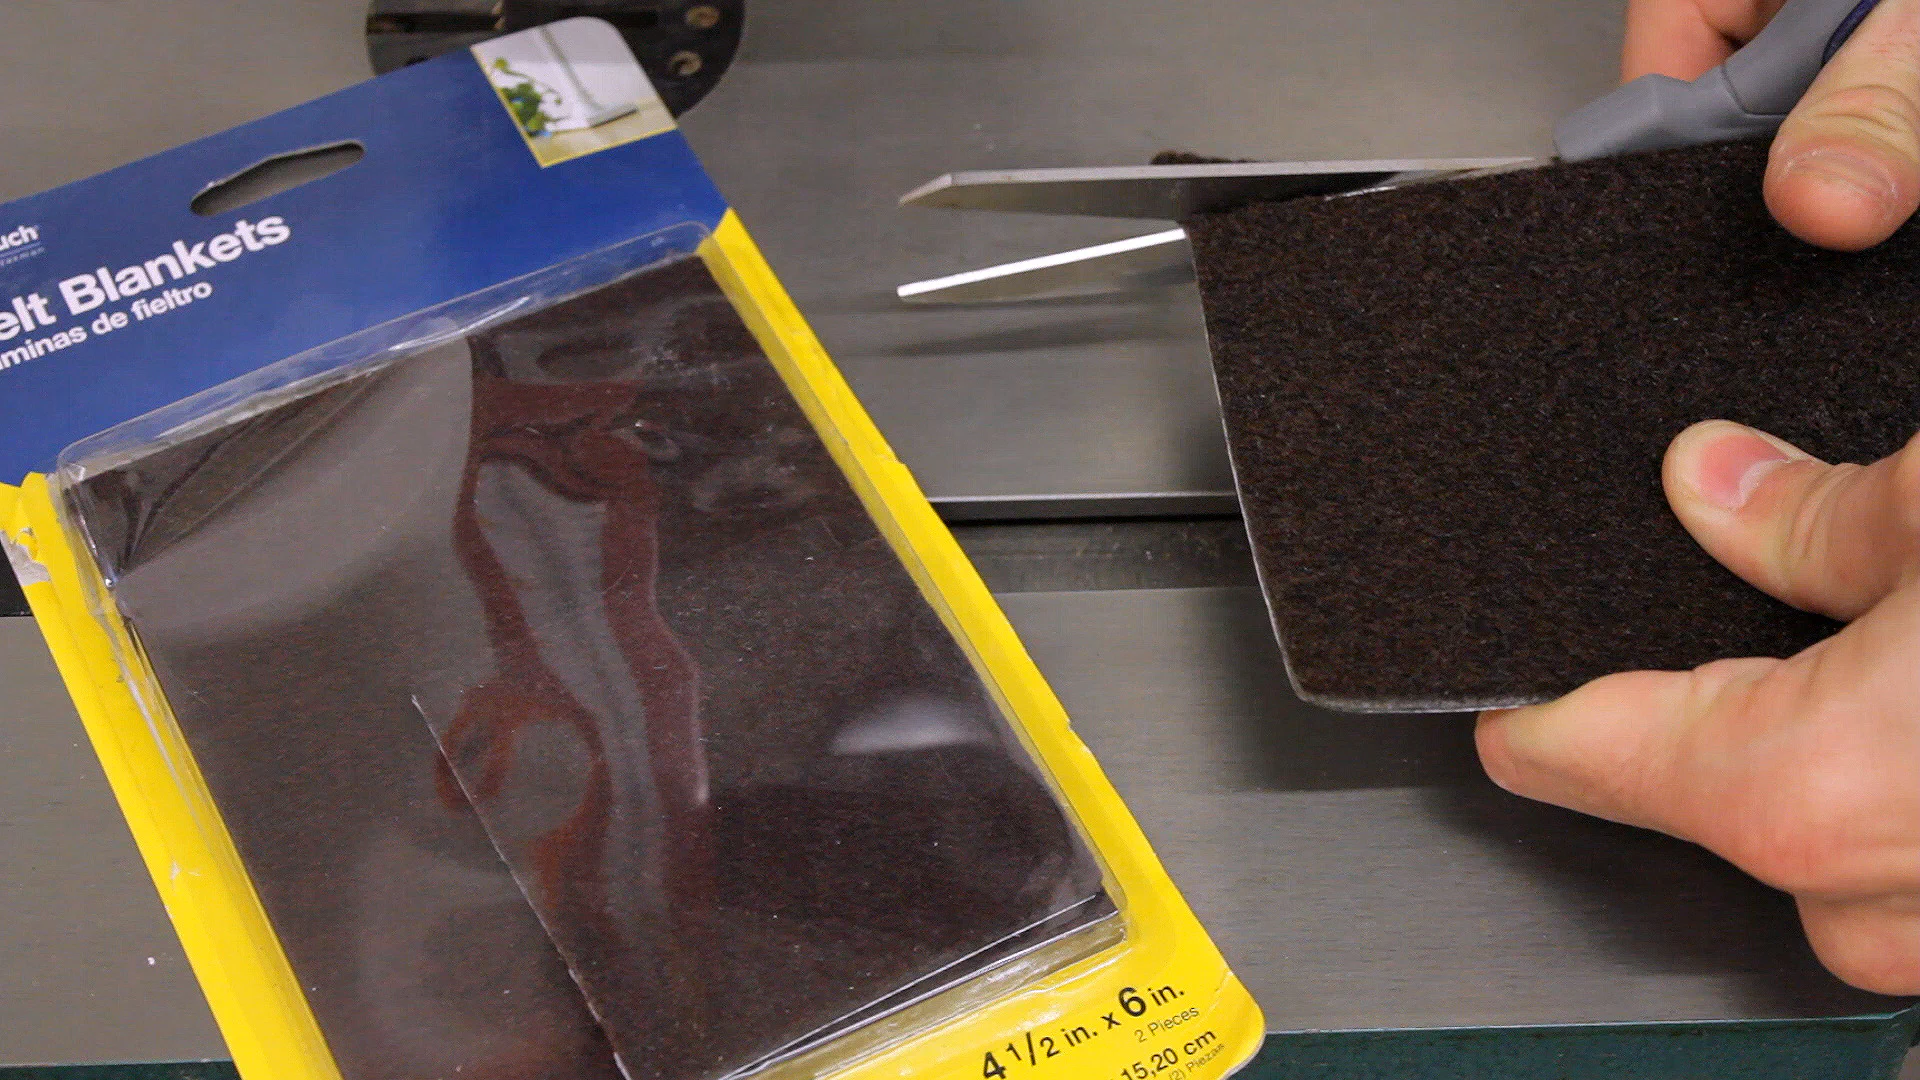
Since the bar widths on these clamps were a bit different, I oversized the slots a little and added small pieces of felt pads used to protect hardwood floors from furniture.
![Scissors are used to cut a piece of felt pad.](/build-three-clamp-racks-from-scraps/images/cutting-felt-pad_hude45089871afdea12fe770a2c13bff41_834956_348x348_fit_q80_h2_mitchellnetravali.webp)
![A felt pad is applied to the inside of the slot.](/build-three-clamp-racks-from-scraps/images/applying-felt-pads_hub97e5224c711c903e57d75f003514e38_549812_348x348_fit_q80_h2_mitchellnetravali.webp)
This worked quite well, but another option would be to simply glue a thin strip of wood or hardboard to the front edge to make a lip prior to cutting the slots.
![A rendering of a clamp rack.](/build-three-clamp-racks-from-scraps/images/rack-with-lip_hu0c2930708911f98264b42f1b81c10178_98042_704x704_fit_q80_h2_mitchellnetravali.webp)
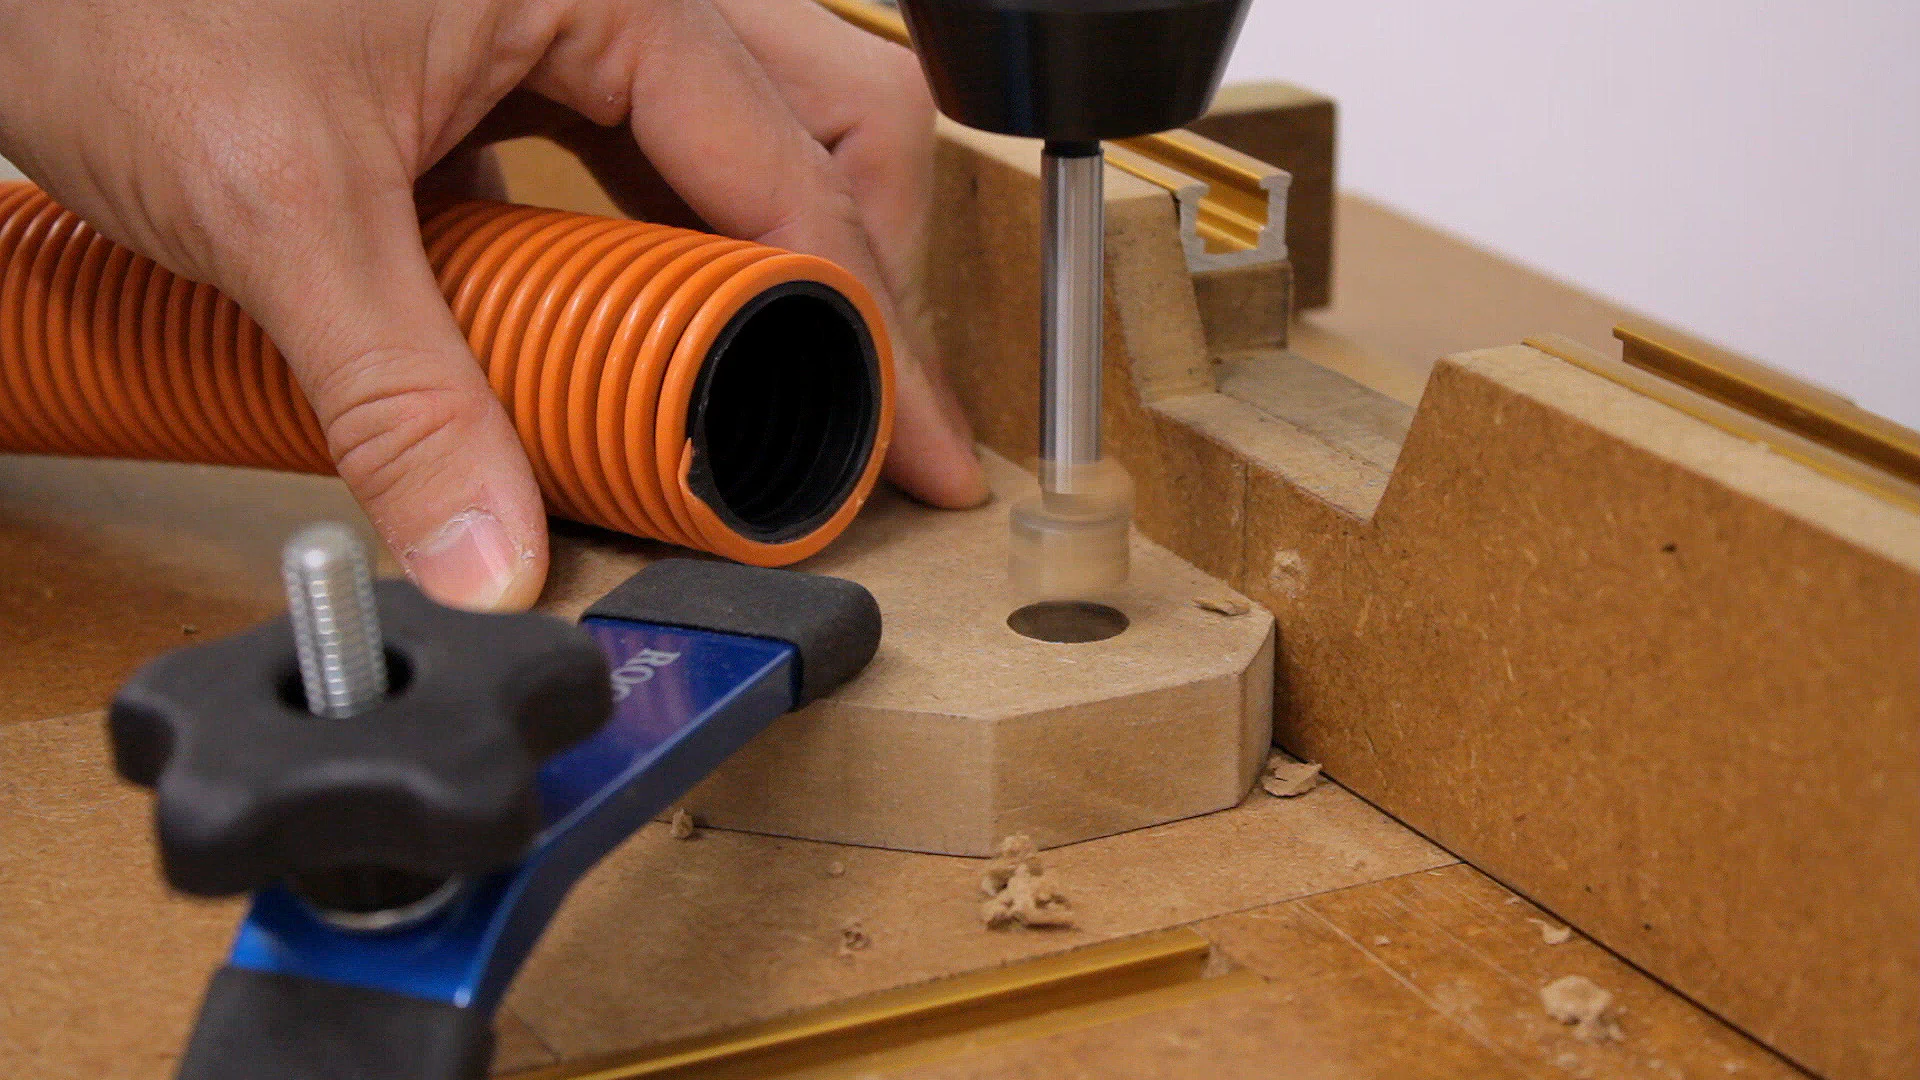
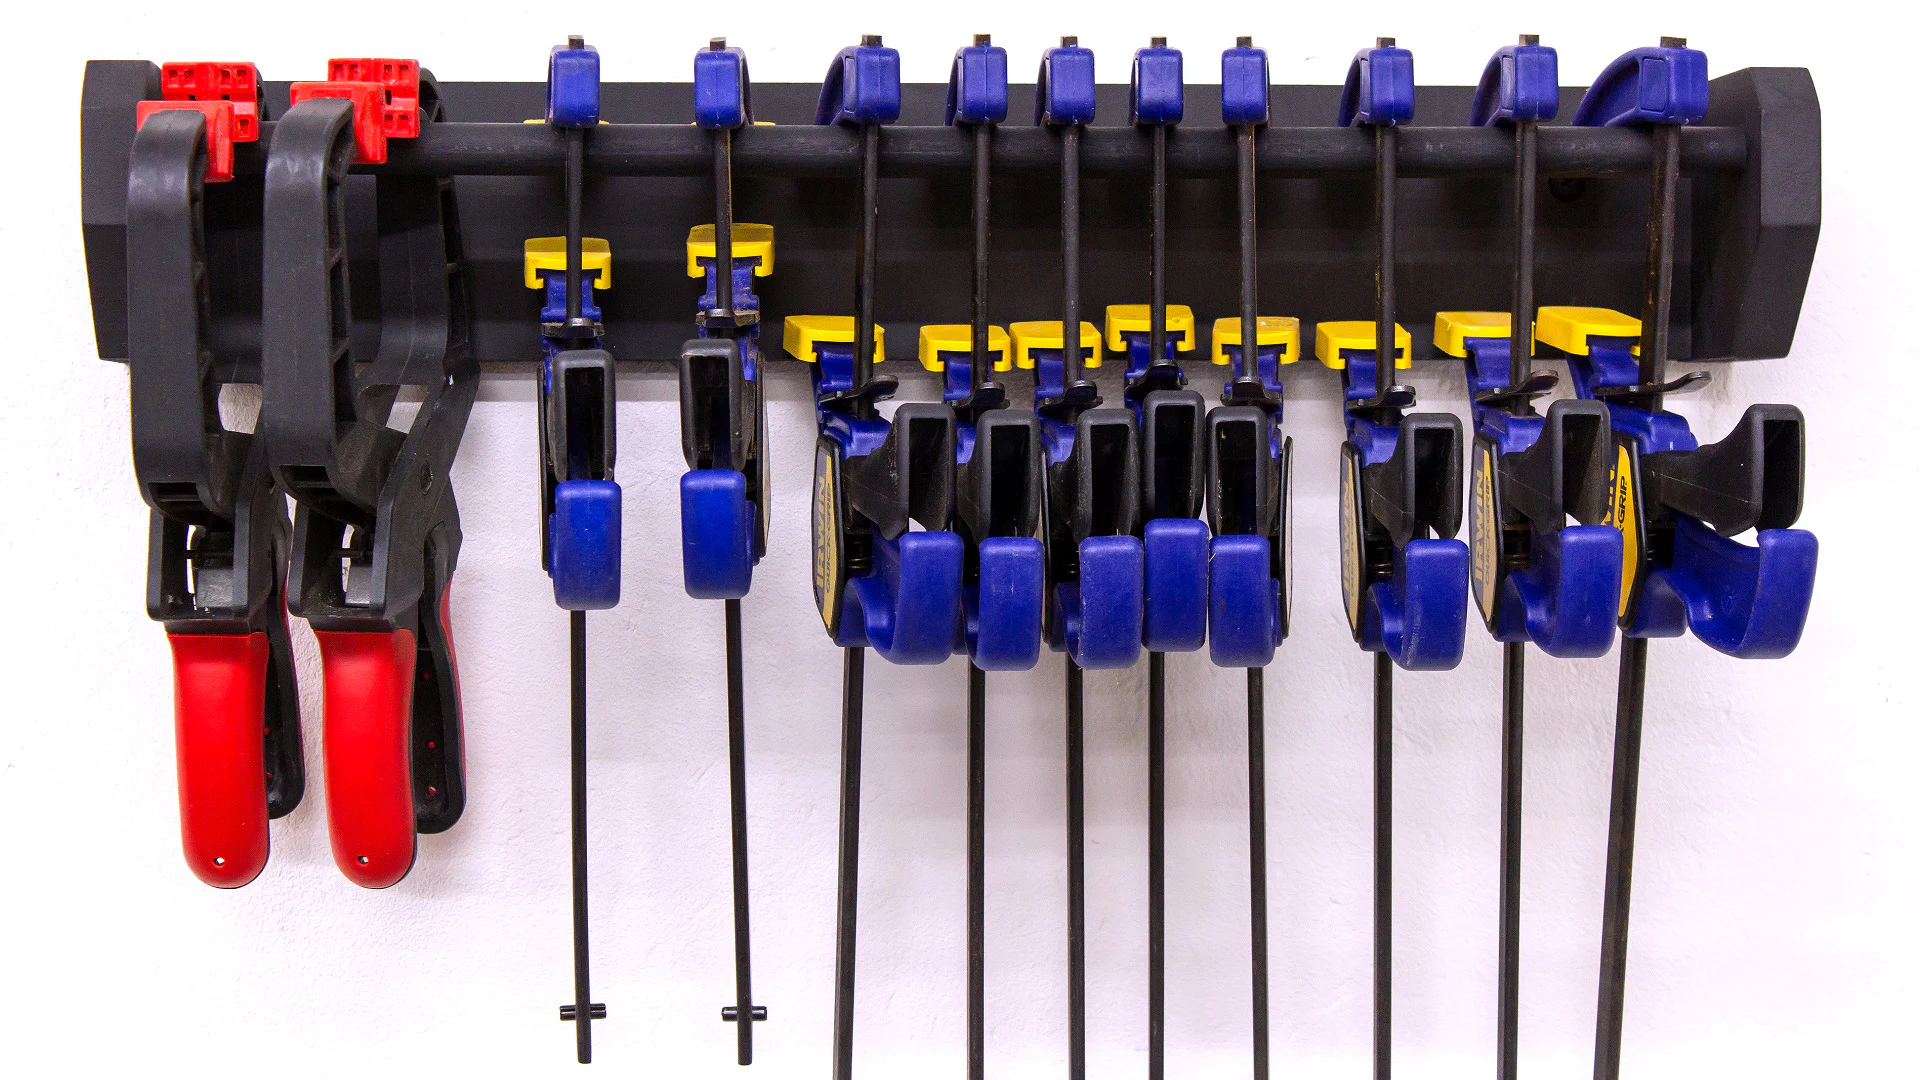
The final rack, which holds 12-14 quick-clamps, is a little different as these clamps don’t fit into the F-Clamp style racks. I cut the back and sides at the table saw and then beveled the front edge of the sides a bit at the bandsaw.
![A table saw is used to cut the rack pieces.](/build-three-clamp-racks-from-scraps/images/cutting-rack-sides_hu5b156facbc566e1897ea4f78a4056f71_804065_348x348_fit_q80_h2_mitchellnetravali.webp)
![A band saw is used to cut a bevel on the rack side.](/build-three-clamp-racks-from-scraps/images/cutting-rack-sides-2_hu41ed38e9fcde5e5f89f187713fc6a4b4_635259_348x348_fit_q80_h2_mitchellnetravali.webp)
Next, I used a 5/8" Forstner bit at the drill press to make a 1/2" deep hole in the sides to hold a piece of dowel.
![A drill press is used to make a hole in the rack side.](/build-three-clamp-racks-from-scraps/images/drilling-holes-in-sides_hu3357ea0ca44697c09764758e376cd2e8_791212_704x704_fit_q80_h2_mitchellnetravali.webp)
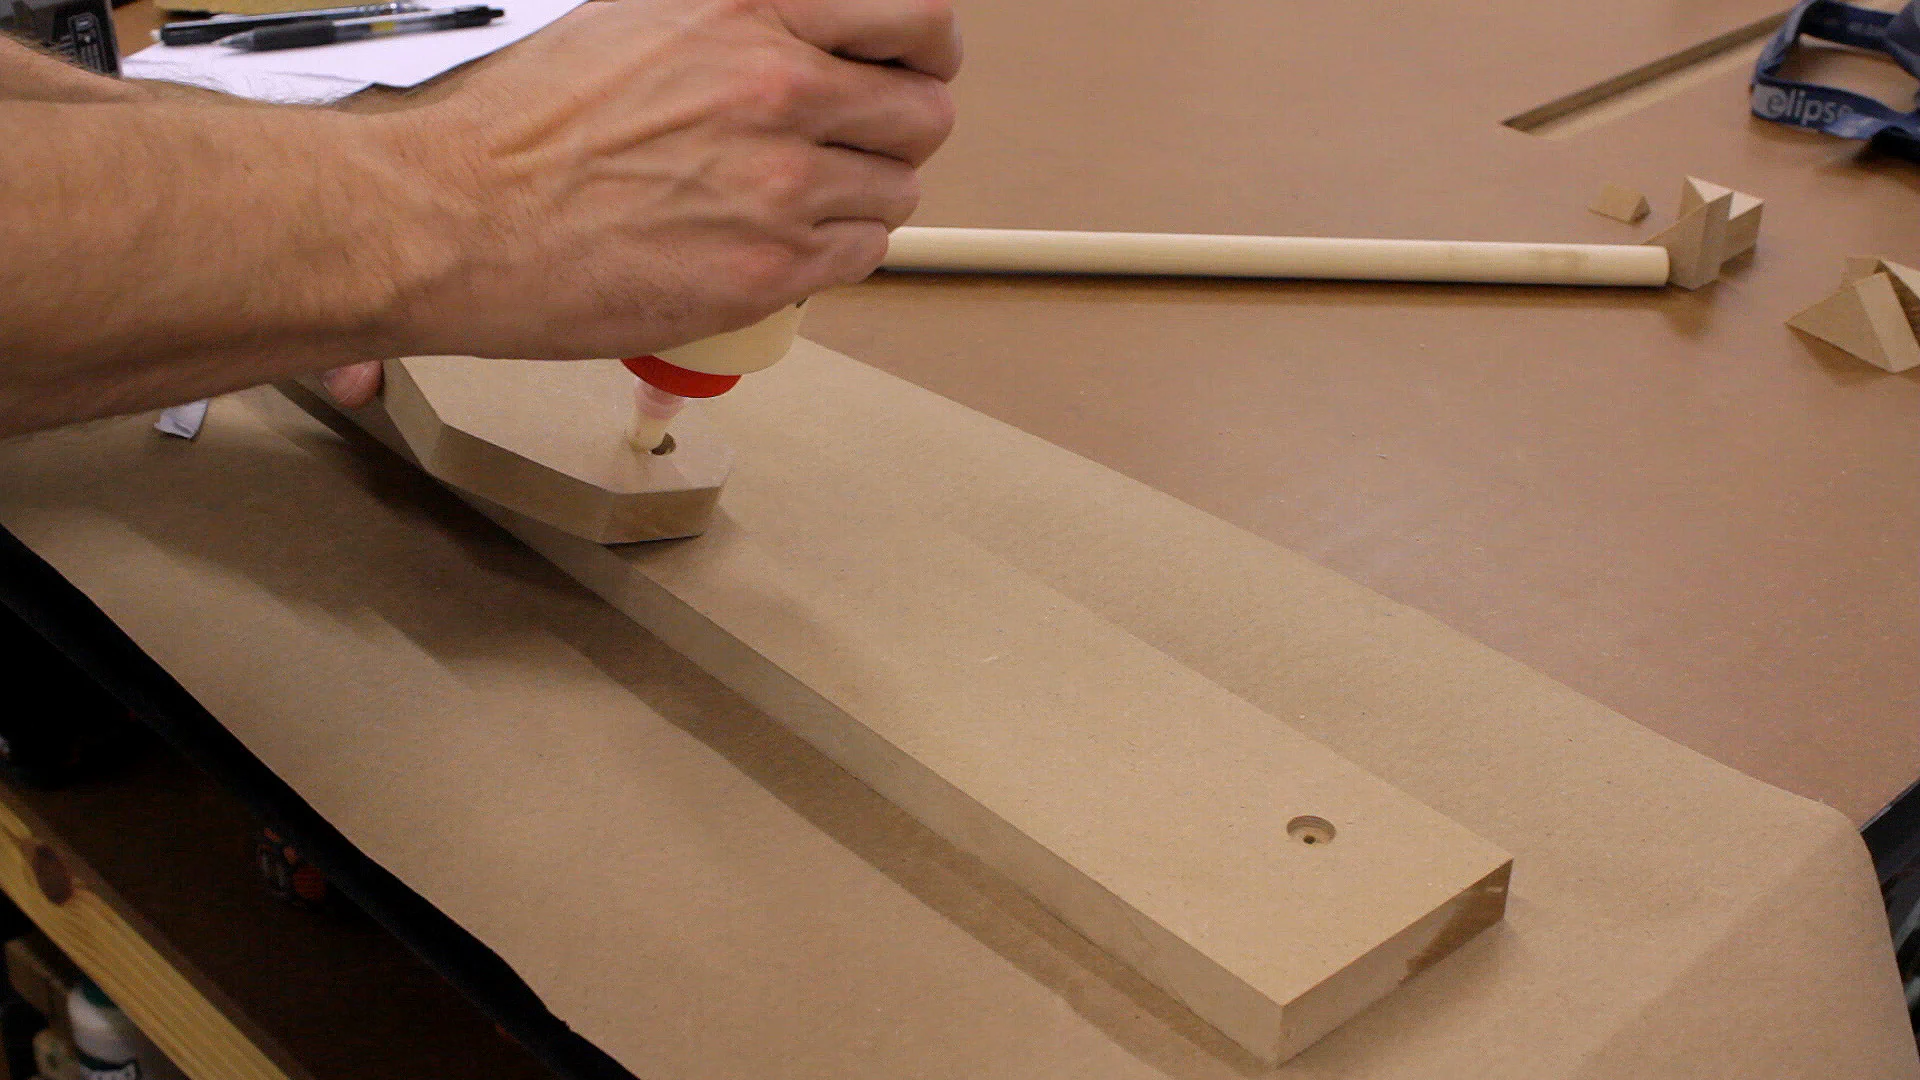
To finish the assembly, I used a bit of glue and clamped the pieces together for a few minutes.
![Glue is applied to the side edges of the back.](/build-three-clamp-racks-from-scraps/images/assembling-quick-clamp-rack-1_hu76f44e05a230f54ecf756f592c30b49d_651419_348x348_fit_q80_h2_mitchellnetravali.webp)
![A clamp is used to secure the rack sides to the back.](/build-three-clamp-racks-from-scraps/images/assembling-quick-clamp-rack-2_hu2cc7a2873a2c392b78cce175d3021be1_726208_348x348_fit_q80_h2_mitchellnetravali.webp)
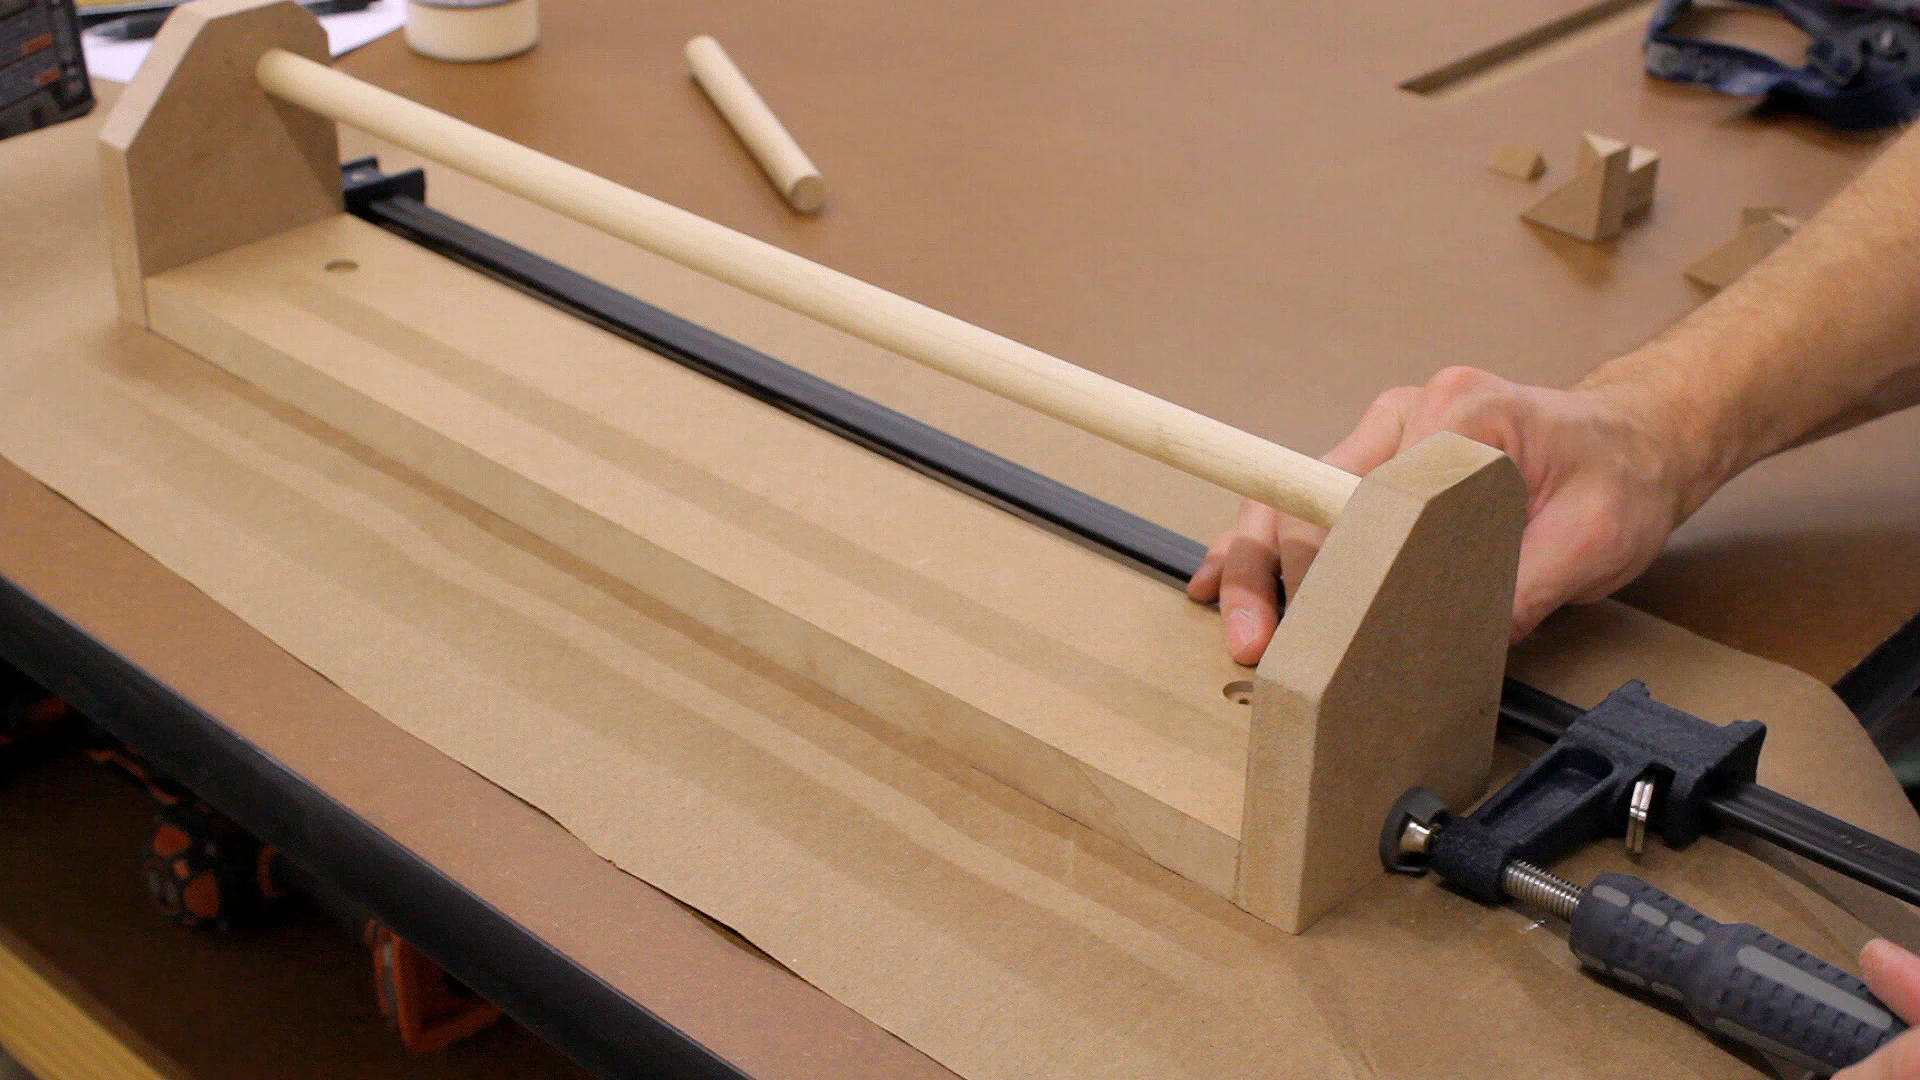
I then finished it up by attaching the sides to the back with a few nails.
![A nailgun is used to attach the side to the back of the rack.](/build-three-clamp-racks-from-scraps/images/assembling-quick-clamp-rack-3_hu18be276b44cebb5051e7b708bdcf9b1a_633445_704x704_fit_q80_h2_mitchellnetravali.webp)
After a little more paint, it was finally time to move all the clamps off the floor and into their new homes.
![The final clamp rack.](/build-three-clamp-racks-from-scraps/images/clamp-rack-01_huc8dab25924e1c46adaee736b0aa4ab73_749229_348x348_fit_q80_h2_mitchellnetravali.webp)
![The final clamp rack.](/build-three-clamp-racks-from-scraps/images/clamp-rack-03_hub7084a6fe5557df33e7cce94b3ecbbb7_705335_348x348_fit_q80_h2_mitchellnetravali.webp)
![The final clamp rack.](/build-three-clamp-racks-from-scraps/images/clamp-rack-02_hua720a2914418b2975c29c73be9e2bcde_689079_704x704_fit_q80_h2_mitchellnetravali.webp)
Materials and Hardware
- 3/4" MDF (See plans for individual rack dimensions.)
- 2" Nails or (Predrilled) Screws
- Cabinet Screws
- Titebond-I Wood Glue
Tools Used
Be sure to check out Our Workshop page for more details.
- Magswitch Magnetic Feather Board
- Power Hands Push Stick
- Grizzly G0691 Table Saw
- Grizzly 17" Bandsaw (G0513P)
- Craftsman 17" Drill Press (22901)
- Skil 6 Amp Scrolling Jigsaw (4690-01)
- Bosch Random Orbit Sander, Jigsaw, Router
Plans
Plans for all three clamp racks are available as PDFs or SketchUp files.
![A Sketchup rendering of a clamp rack.](/build-three-clamp-racks-from-scraps/images/clamp-rack-plans-01_hue199b6a1ed647a8b314f53ae06533b1e_119047_704x704_fit_q80_h2_mitchellnetravali.webp)