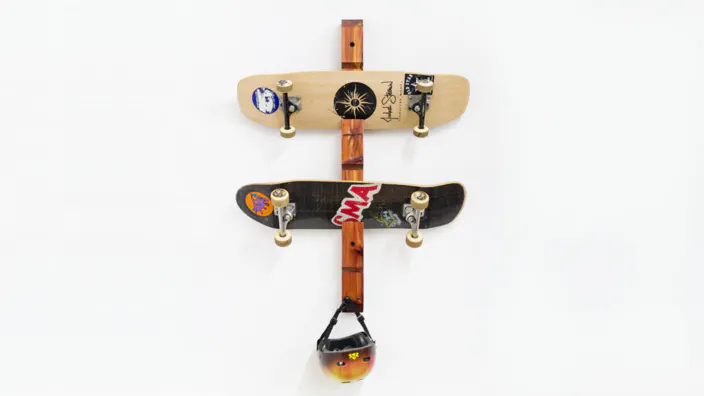
I’ve owed a friend of mine a skateboard rack for quite some time, so I thought this would be a good opportunity to check out our local reclaimed lumber store. Unfortunately, most of the cedar boards they had in stock had just been sold, but we were able to find a pretty nice 8’ x 2" x 4" piece that looked like it could be cleaned up.
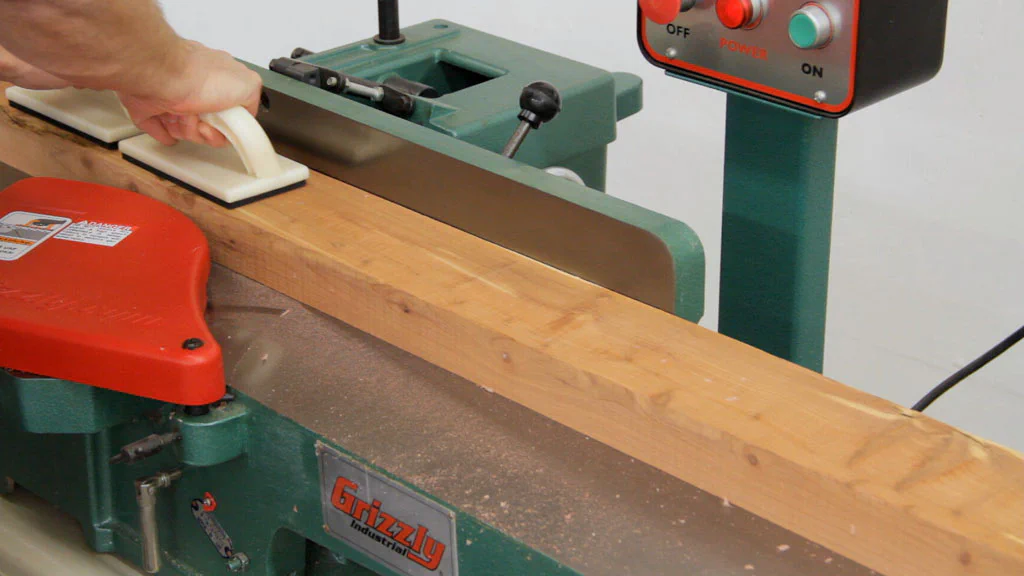
I started surfacing it by running it through the jointer and planer.
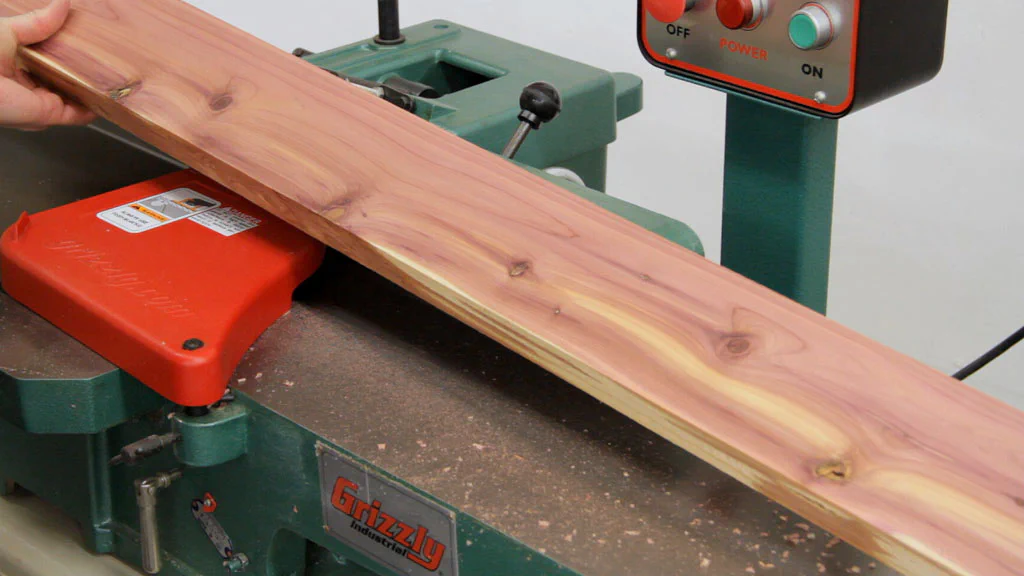
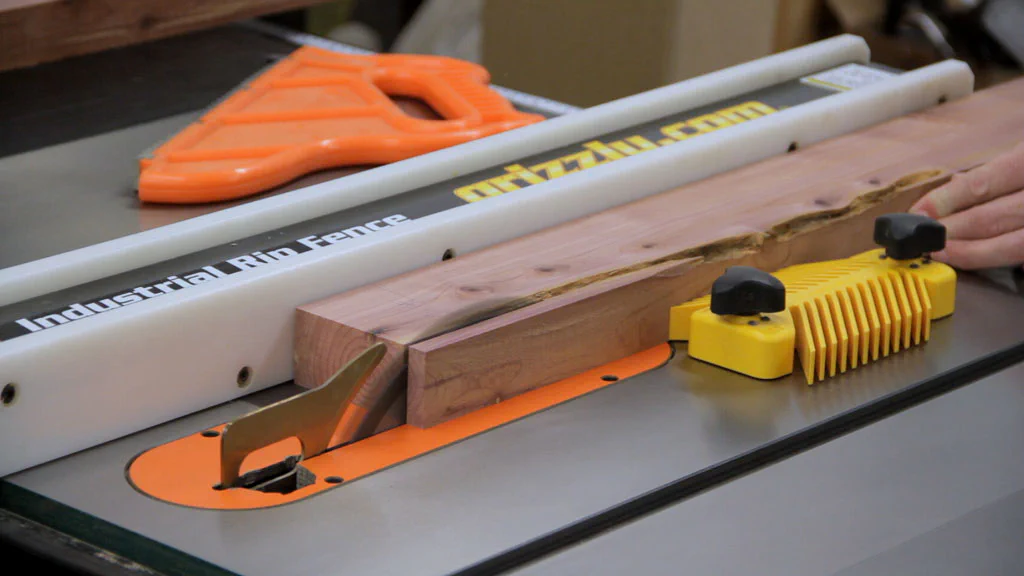
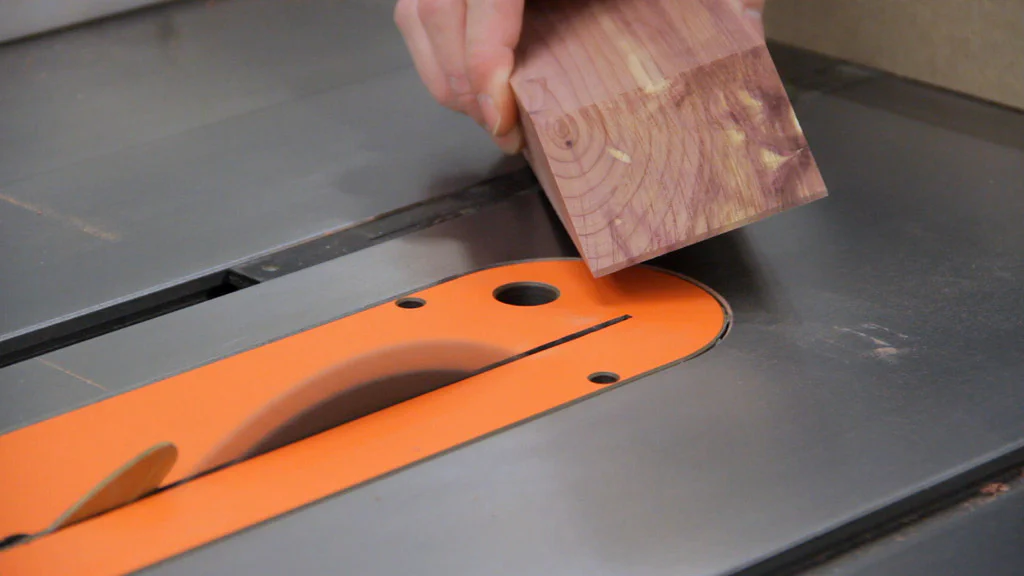
After that, I ripped off the worst of the damage over at the table saw, and it ended up being right around 3.5" wide. Note that if you’re able to find some nice surfaced lumber to start with, you can avoid these cleanup steps and make the remaining cuts with just a miter saw or even a handsaw.
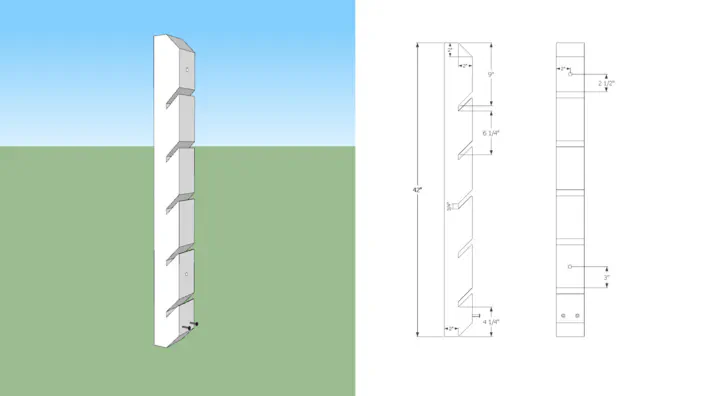
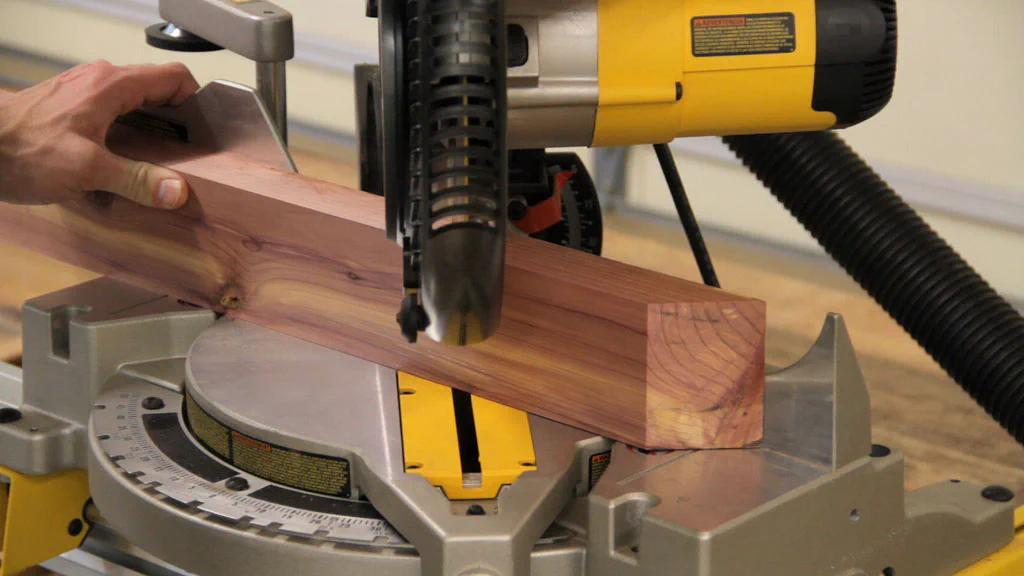
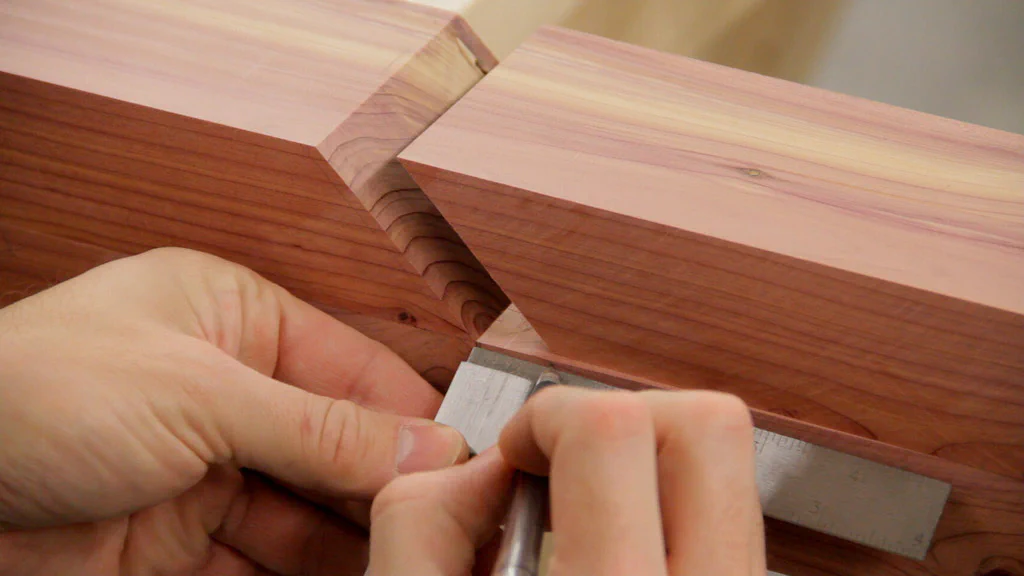
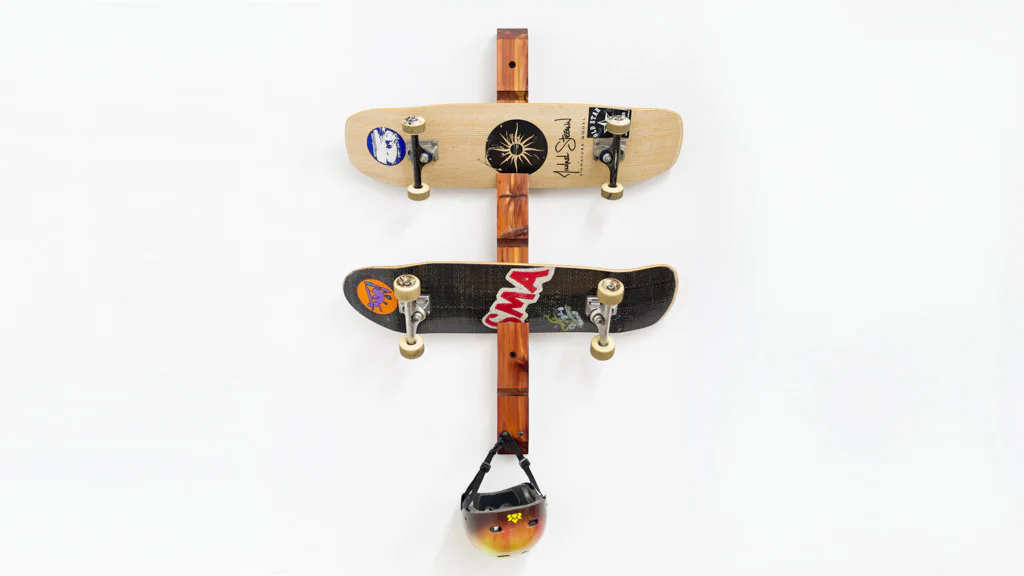
Next, I used my miter saw to cut the back board to length, and then I started making all the 45° cuts for the smaller front pieces. Here you could definitely customize the rack for however many skateboards you want to display.
Once all the pieces were finished, I trimmed a little off the top lip of each just to help prevent them from chipping when skateboards were placed on the rack.
Then I marked a few guidelines for positioning the pieces. I left a 3/4" gap between each piece which seemed to be a good fit for the boards.
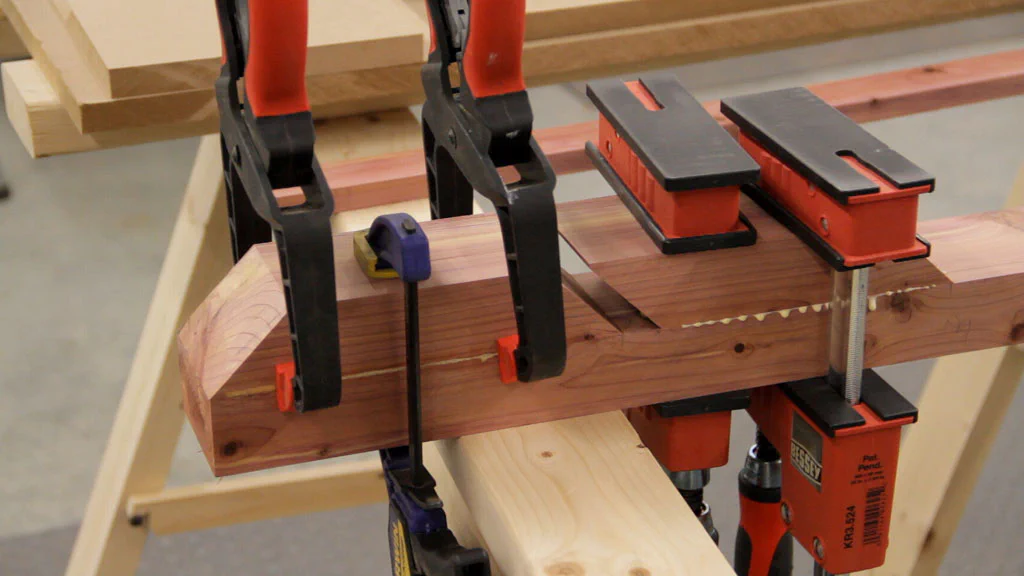
Gluing the pieces onto the back took a little bit of effort as the pieces wanted to squirm around. It may have been easier to predrill and use two screws from the back into each front piece to avoid the clamps, but it turned out fine in the end.
Once the glue dried, I used a card scraper and some sandpaper to clean up the glue joints.

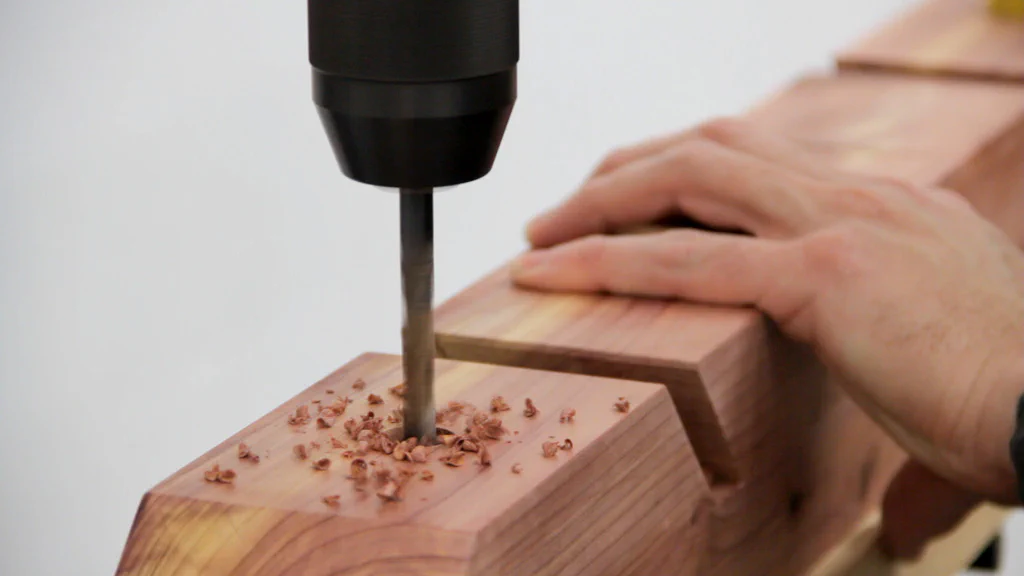
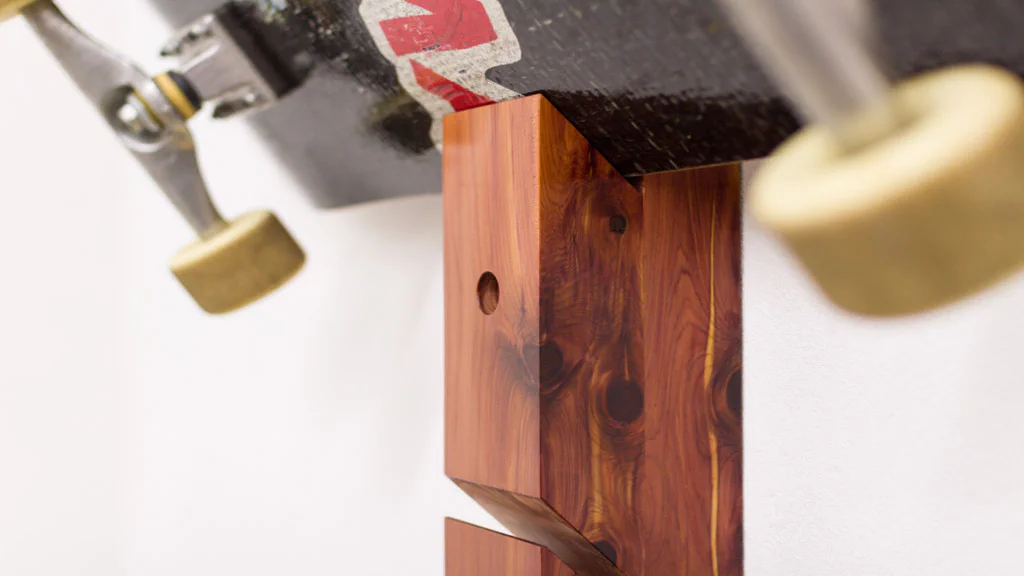
Next, I drilled a counter-bore hole in the top and bottom of the rack for the 4.5" Heavy-Duty HeadLok mounting screws.
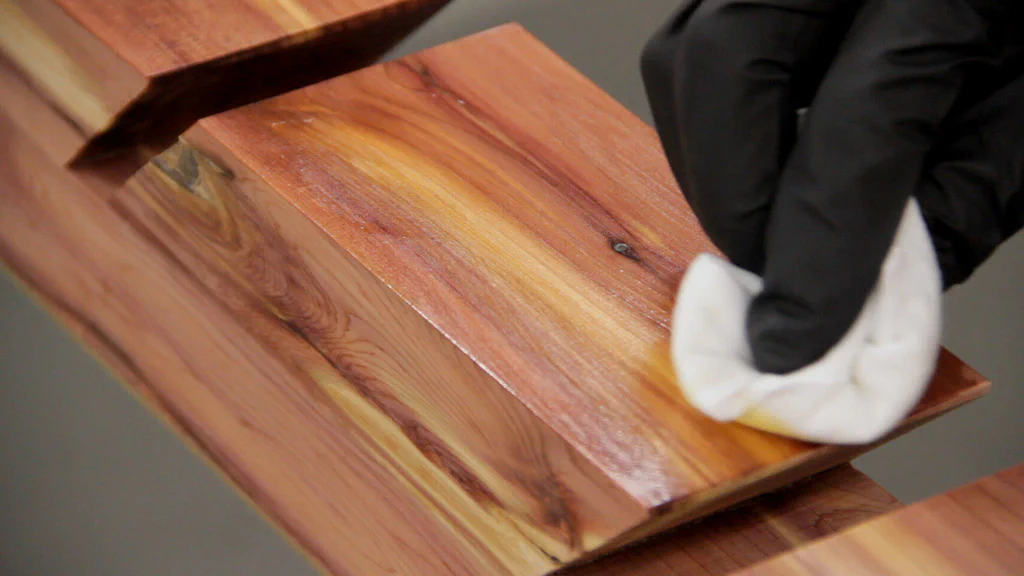
For the finish, I used a coat of boiled linseed oil followed by several thin coats of homemade wipe-on-polyurethane (a 1:1 ratio of Clear Gloss Minwax Polyurethane and Mineral Spirits). I sanded lightly between roughly every other coat.
Finally, I predrilled and added two cabinet screws (the HeadLok screws would also work) to the bottom of the rack for hanging helmets.
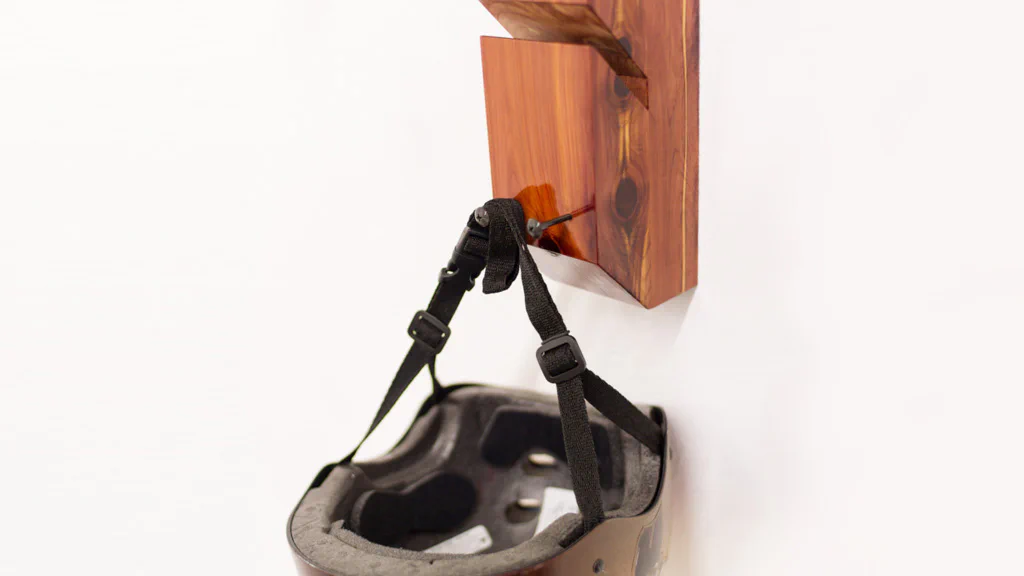
To mount the rack I located a stud and predrilled a hole for the top screw. I then hung the rack with only the top screw with it just barely loose (so that it could still be rotated). After leveling the rack on the wall, I marked where the lower screw should go and rotated the rack out of the way in order to predrill the hole. Finally, I added the lower screw and tightened the top screw.
That was pretty much it for this project. Other than spending a little time on the finish, the rest of the project was relatively easy to do.
Parts List
- 8’ x 2" x 4" Cedar
- 2 - 4.5" Heavy Duty HeadLok Screws
- 2 - Cabinet Screws (or 2 - 4.5" HeadLok Screws)
Tools Used
Be sure to check out Our Workshop page for more details.
- Magswitch Magnetic Feather Board
- Power Hands Push Stick
- Card Scraper
- 10" Dewalt Compound MiterSaw
- Grizzly G0691 Table Saw
- Grizzly G0586 Jointer
- Ridgid R4330 13" Planer
- Craftsman 17" Drill Press
Plans